
Pane morbido e soffice di riso integrale (senza glutine e latticini)
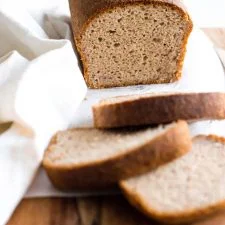
Questo pane morbido e soffice di riso integrale è facile da preparare ed è ottimo per i panini o da tostare e spalmare con burro e marmellata. Preparato con farina di riso integrale per avere più fibre, questo semplice pane lievitato è completamente senza glutine e senza latticini.
Ingredienti
- 2 cups brown rice flour
- 1 3/4 cups warm water (approximately 105F – 115F)
- 1/4 cup sunflower oil
- 1/4 cup psyllium husk powder
- 1 tablespoon instant yeast
- 2 tablespoons sugar
- 3/4 teaspoons xanthan gum
- 2 eggs, room temperature
- 1 teaspoon baking powder
- 1/2 teaspoon salt
Preparazione
- 1
Grease an 8″x4″ metal loaf pan.
- 2
Whisk Dry Ingredients: In a large mixing bowl, whisk the brown rice flour, psyllium husk powder, instant yeast, sugar, baking powder, xanthan gum, and salt together.
- 3
Add Liquid Ingredients: Add the warm water, sunflower oil, and eggs to the dry ingredients and mix well to get a wet and shaggy dough (the dough is supposed to be shaggy, so don’t worry).
- 4
Transfer to Pan: Transfer the dough to the greased loaf pan and smooth out the top with a spatula.
- 5
Let Dough Rise: Cover the dough pan with a kitchen towel and let the dough rise approximately 30 to 40 minutes in a warm, draft-free place until it has almost doubled in size. (Tip: I like to place the loaf pan in my microwave with the power off – it creates the perfect draft-free and warm environment for rising dough).
- 6
Preheat Oven: During the last 10 minutes of the dough rising, preheat oven to 350F and adjust the oven rack to the middle position.
- 7
Bake the dough for 40 to 50 minutes until bread has turned dark brown on top and the loaf sounds hollow when tapped. Remove loaf from the oven.
- 8
Cool Completely: Let the loaf cool for 10 minutes in the loaf pan, before removing and letting it cool completely on the wire rack. Use a serrated bread knife to slice once the loaf has completely cooled.
Cucinala con la ricetta originale
Questa ricetta è di dishbydish.net. Sul loro sito trovi le foto, le note e i consigli dell’autore: il posto migliore per cucinarla.
Apri la ricetta su dishbydish.net