
Torta White Forest senza uova
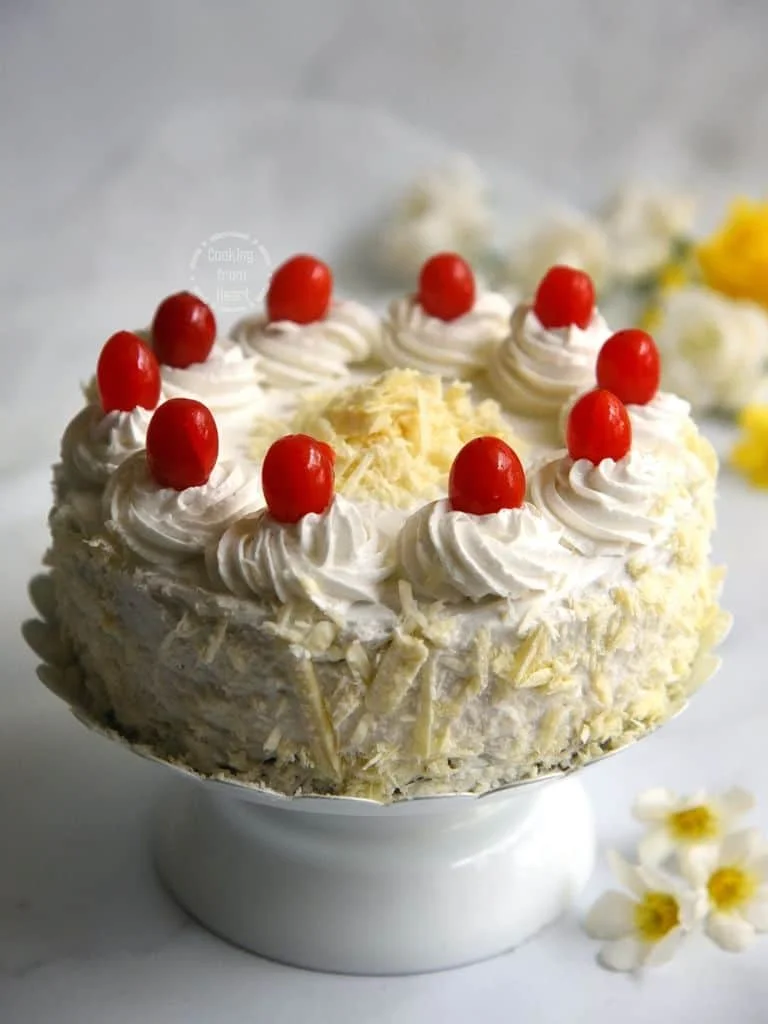
Deliziosa, si scioglie in bocca ed è bellissima: ricetta della torta White Forest senza uova con foto passo passo. Una ricetta infallibile per una torta White Forest morbida e soffice, senza uova né burro!
Ingredienti
- 1 1/2 cup All Purpose Flour/Maida
- 3/4 cup Sugar
- 1/2 cup Plain Yogurt/Curd
- 3/4 cup Milk
- 1/2 cup Oil
- 1/2 tsp Baking Powder
- 1 tsp Baking Soda
- 1 tsp Vanilla Extract
- A pinch of Salt
- 1/4 cup Sugar
- 1/4 cup Water
- 200 grams Non-Diary Whipping Cream Powder
- 100 grams Ice Cold Water
- 15-20 Glazed Cherries
- 1/3 cup White Chocolate Shavings
Preparazione
- 1
Preheat oven at 180°C for 10-12 mins and grease, line two 6” round baking pans with parchment paper. Whip 200gms of non-diary whipping cream powder in 100 gms ice cold water at high speed until there are soft peaks and keep it refrigerated until needed.
- 2
In a mixing bowl, add all dry ingredients – 1 1/2 cups all purpose flour, 1/2 tsp baking powder, 1 tsp baking soda and a pinch of salt. Mix it really well. It could be sieved as well.
- 3
In another mixing bowl, add the rest of the ingredients – 3/4 cup milk, 1/2 cup thick fresh curd, 1/2 cup oil, 1 tsp vanilla extract and 3/4 cup sugar.
- 4
Mix the ingredients with a whisk until the sugar has dissolved.
- 5
Now make a well at the center of the dry ingredients and add the wet mixture.
- 6
Fold it in gently such that there are no lumps.
- 7
Pour the batter equally into the greased, lined baking pans.
- 8
Bake at 180°C for 30-35 mins until a skewer inserted comes out clean. Remove from oven. Rest them for 5 mins and then invert the cakes & remove the parchment paper. Let them cool down completely.
- 9
Meanwhile mix 1/4 cup sugar and 1/4 cup water.
- 10
Heat on low flame until the sugar dissolves and the syrup is sticky. Remove from heat and let it cool down completely too.
- 11
Trim the tops off the cake to make it even (optional). Poke 1/2 an inch holes using a skewer all over the cake and brush liberally with prepared Simple Sugar Syrup all over the cakes.
- 12
Spread a thick layer of the whipped cream evenly on the cake. Now place sliced and finely chopped glazed cherries all over the cake.
- 13
Place the other cake and apply a layer of cream on the top as well as the sides. This is called as crumb coating.
- 14
Place the cake in fridge for 20-30mins before decorating it further.
- 15
Add some more whipped cream on top and sides and evenly spread it using an offset spatula.
- 16
This requires some patience to evenly spread the cream. If the cream is not holding its shape, place it back in fridge to cool it down.
- 17
Using a star nozzle, pipe out rosettes along the edge of the cake.
- 18
Decorate the cake as per preference, there are no rules as such on the design :)
- 19
Place a glazed cherry on each rosette and cover the sides & center with white chocolate shavings.
- 20
Keep refrigerated until it is ready to be served. Best served chilled as dessert.
Cucinala con la ricetta originale
Questa ricetta è di cookingfromheart.com. Sul loro sito trovi le foto, le note e i consigli dell’autore: il posto migliore per cucinarla.
Apri la ricetta su cookingfromheart.com