
Dairy-Free Coconut Ice Milk
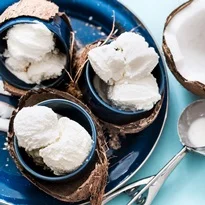
This dairy-free coconut ice milk is a softly set frozen dessert made with coconut milk beverage, sugar and a simple cornstarch thickener. Make the base ahead, then churn and finish with toasted coconut if you like.
Ingredients
- 887 ml (3 3/4 cups)original or vanilla coconut milk beverage
- 177 ml (3/4 cup)sugar
- 1 pinchsalt
- 2 1/2 tablespoons (about 20 g)non-GMO cornflour
- To garnish, optionalunsweetened toasted shredded or flaked coconut
Instructions
- 1
Heat the base
Whisk 887 ml of the coconut milk beverage with the sugar and salt in a heavy-based saucepan. Set over medium heat and bring to a simmer.
- 2
Thicken the mixture
In a small bowl, whisk the remaining 59 ml coconut milk beverage with the cornflour until smooth. Whisk this slurry into the saucepan and cook, stirring constantly, until the mixture thickens enough to coat the back of a wooden spoon.
- 3
Chill the base
Take the pan off the heat and leave the mixture to cool to room temperature. When completely cool, cover and refrigerate for at least 3 to 4 hours, or for up to 24 hours.
- 4
Churn and freeze
Churn the chilled mixture in an ice cream maker according to the manufacturer's instructions. Transfer it to a freezer-safe container and freeze for 3 to 4 hours for a firmer, hard-packed texture.
- 5
Soften and serve
Take the container from the freezer and leave the ice milk to soften for 15 minutes, or until it is easy to scoop. Serve with a sprinkle of toasted coconut, if desired.
What is coconut ice milk?
Ice milk is a frozen dessert made with a milk-based mixture, but this version uses a coconut milk beverage instead of dairy milk. It has a lighter texture than a rich, cream-heavy ice cream.
The recipe follows a straightforward stovetop-and-churn method rather than a region-specific tradition. Sugar sweetens the base, while cornflour helps it thicken before chilling and churning.
Nutrition and macros by portion
The nutrition label shows one serving as written: 205 calories, 1g protein, 48g carbs, 3g fat.
| Portion | Adjustment | kcal | Protein | Carbs | Fat |
|---|---|---|---|---|---|
| Lighter | Smaller scoop, skip garnish | 144 kcal | 1g | 34g | 2g |
| This serving | As written | 205 kcal | 1g | 48g | 3g |
| Hungry | Larger scoop | 308 kcal | 2g | 72g | 5g |
Most of the carbohydrates come from the sugar, with additional carbohydrates from the cornflour and coconut beverage. The coconut beverage contributes most of the fat, while the recipe provides little protein; serve a scoop with fresh fruit and, if it suits your meal, a protein-rich food on the side.
Choosing the coconut milk beverage
Coconut beverage: Use a carton-style original or vanilla drink, as specified, rather than assuming a tin of thick coconut milk is interchangeable. Different brands vary in sweetness and richness, so the finished flavour and texture may vary too.
Vanilla: A vanilla version brings extra flavour without changing the method. If you want the coconut flavour to stand on its own, choose original.
Why the cornflour matters
Smooth slurry: Mix the cornflour with the reserved 59 ml of coconut beverage before adding it to the hot pan. This helps disperse it evenly and reduces the chance of lumps.
Steady stirring: Keep stirring as the base cooks, scraping around the bottom and sides of the pan. Stop when it coats the back of a wooden spoon; it will thicken further as it cools.
Chilling and churning
Cool completely: Let the mixture reach room temperature before covering and refrigerating it. The recipe calls for at least 3 to 4 hours of chilling, or up to 24 hours.
Follow your machine: Churn the cold base according to the ice cream maker's instructions, since machines differ. The extra 3 to 4 hours in the freezer firms the churned ice milk for a hard-packed scoop.
Serving and texture
Scoopable finish: After storage in the freezer, allow the ice milk to soften for about 15 minutes, or longer if needed, before serving. The cue is that it yields easily to a scoop.
Toasted topping: Sprinkle on toasted coconut just before serving for a little crunch and a more pronounced coconut flavour. Keep it optional if you prefer a smooth dessert.
What to serve with it
Fruit: Fresh berries or sliced mango offer a bright contrast to the sweet, coconut-flavoured base. Add them alongside rather than mixing them into the churned mixture.
Crunch: Toasted coconut is the recipe's suggested garnish, while chopped toasted nuts can be served separately for another textural option.
Recipe notes & tips
- Measure out the 59 ml of coconut beverage for the slurry before heating the rest.
- Use a heavy-based saucepan to help the mixture heat evenly.
- Stir constantly after adding the cornflour slurry so the base thickens smoothly.
- Cover the base once it has cooled completely before refrigerating.
- Check your ice cream maker's instructions before starting the churn.
- Toast the coconut garnish ahead of time and let it cool before serving.
Variations
- Vanilla base: Choose vanilla coconut milk beverage for a gentle vanilla flavour.
- Coconut crunch: Add toasted shredded or flaked coconut on top just before serving.
- Berry topping: Serve with fresh berries for a fruity contrast.
- Mango topping: Add sliced mango alongside each scoop.
- Nutty finish: Offer chopped toasted nuts as an optional topping.
Common mistakes to avoid
- Lumpy slurry: Whisk the cornflour into the reserved cold coconut beverage until smooth before adding it to the pan.
- Scorched base: Stir constantly while cooking and use a heavy-based saucepan.
- Under-thickened mixture: Keep cooking until the base coats the back of a wooden spoon.
- Warm base in the churn: Refrigerate until completely cold before using the ice cream maker.
- Hard-to-scoop ice milk: Leave it out for 15 minutes, or until it softens enough to scoop.
How to store
Keep the ice milk in a covered, freezer-safe container. The recipe specifies freezing the churned mixture for 3 to 4 hours for a firm texture; for serving after longer storage, soften it at room temperature for about 15 minutes or as needed. The base can be refrigerated, covered, for up to 24 hours before churning.
Frequently asked questions
Can I use tinned coconut milk instead?
The recipe calls for original or vanilla coconut milk beverage, which is usually thinner than tinned coconut milk. Using a different product may change the richness and texture.
How long does the base need to chill?
Chill it for at least 3 to 4 hours after it has cooled completely. It can stay covered in the refrigerator for up to 24 hours before churning.
Do I need an ice cream maker?
The method is written for an ice cream maker and calls for following its manufacturer's instructions. Without one, this recipe does not provide an alternative freezing method.
How do I know when the mixture is thick enough?
Cook it until it coats the back of a wooden spoon, stirring constantly. The mixture will thicken further as it cools.
How can I make it easy to scoop?
Take the container out of the freezer and leave it for about 15 minutes, or until the ice milk softens enough to scoop.
Cook it from the original
This recipe comes from godairyfree.org. Their page has the author’s own photos, notes and tips — the best place to cook it from.
Open the recipe on godairyfree.org