
Dairy-Free Sweet & Sour Chicken
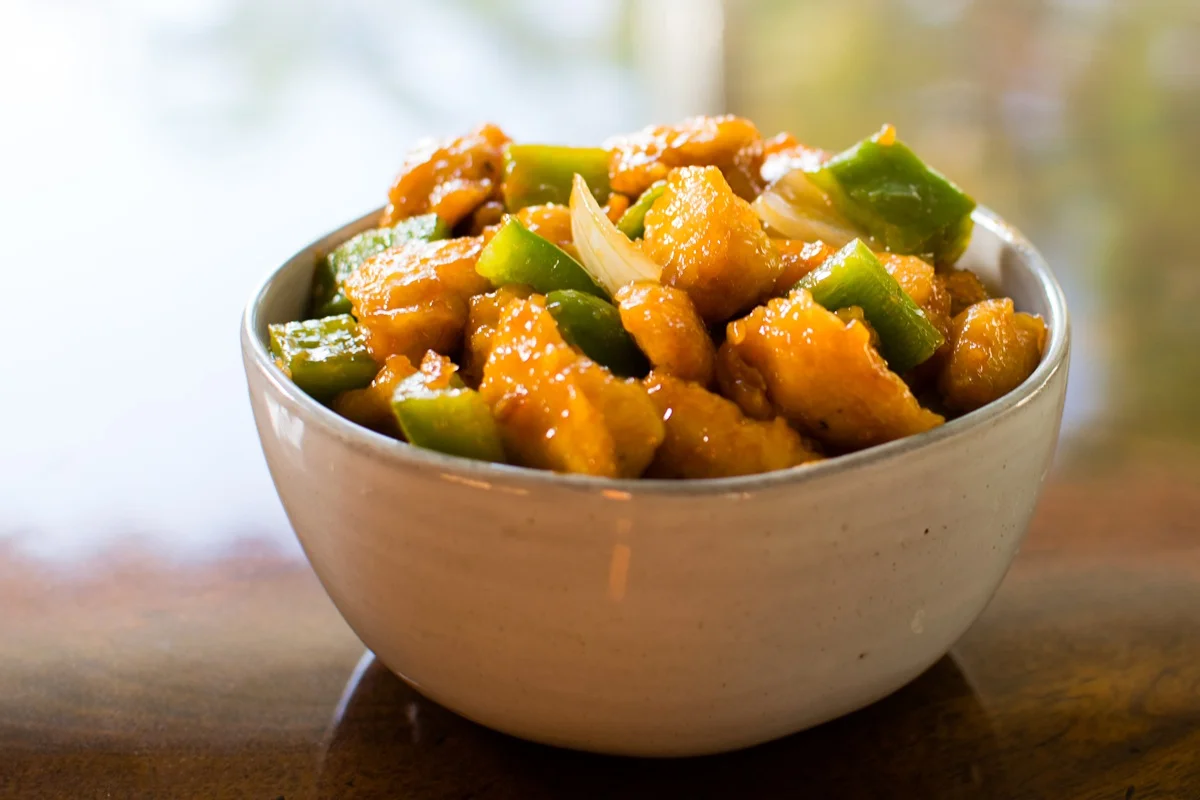
Chicken pieces are lightly coated, pan-fried until golden and baked in a sticky sweet-and-sour sauce with peppers and onion. It makes a comforting dinner, especially served over rice.
Ingredients
- 567 g (1¼ lb)boneless, skinless chicken breast
- ¼ teaspoonsalt
- ⅛ teaspoonblack pepper
- 64 g (½ cup)cornflour
- 45 ml (3 tablespoons), or as neededoil
- 2eggs
- 100 g (½ cup)sugar
- 120 ml (½ cup)apple cider vinegar
- 60 ml (¼ cup)ketchup
- 15 ml (1 tablespoon)soy sauce, regular or gluten-free
- ¼ teaspoonground ginger
- ¼ teaspoonsalt
- 1yellow or sweet white onion, chopped
- 2bell peppers, any colour, chopped
Instructions
- 1
Heat the oven
Preheat the oven to 175°C (350°F).
- 2
Cut the chicken
Pat the chicken dry with kitchen paper, then cut it into 2.5 cm (1-inch) pieces.
- 3
Coat with cornflour
Put the chicken in a large bowl or a large zip-top bag. Add ¼ teaspoon salt and the pepper, and toss to coat. Add the cornflour and toss again, separating the pieces so there are no uncovered patches.
- 4
Whisk the eggs
Whisk the eggs in a pie dish for 1 minute.
- 5
Heat the oil
Warm the oil in a non-stick frying pan over a medium heat.
- 6
Brown the chicken
Work in batches: turn some coated chicken pieces in the egg, then lift them out with a slotted spoon, letting excess egg drain away. Fry for about 30–45 seconds per side, until they are just starting to turn golden, then transfer them to a 23 × 33 cm (9 × 13-inch) baking dish. Repeat with the remaining chicken, adding a little more oil if the pan gets too dry.
- 7
Mix the sauce
In a medium bowl, whisk together the sugar, vinegar, ketchup, soy sauce, ginger and ¼ teaspoon salt until the sugar dissolves.
- 8
Coat the chicken
Pour the sauce over the chicken. Turn the pieces to coat, then spread them out in a single layer.
- 9
Bake until sticky
Bake for 20 minutes, then turn the chicken to coat it in more sauce. Bake for a further 15–20 minutes, until the sauce has thickened and the chicken pieces are lightly browned.
- 10
Cook the vegetables
While the chicken bakes, cook the vegetables. If the pan is dry, add a small drizzle of oil and warm it over a medium-low heat. Add the onion and peppers and cook, stirring occasionally, for about 7–10 minutes, until soft.
- 11
Combine and serve
When the chicken is cooked, add the vegetables to the baking dish and toss everything in any sauce left in the dish.
What is sweet-and-sour chicken?
Sweet-and-sour chicken is a Chinese-style dish built around the contrast of a sweet sauce and a sharp, tangy one. This version uses vinegar, sugar, ketchup and soy sauce, with chicken, peppers and onion.
The chicken is briefly pan-fried before baking in the sauce, giving it a lightly golden coating while the sauce thickens around it. The result is a sticky, homely version that is easy to serve with rice.
Nutrition and macros by portion
The nutrition label shows one serving as written: 394 calories, 18g protein, 39g carbs, 20g fat.
| Portion | Adjustment | kcal | Protein | Carbs | Fat |
|---|---|---|---|---|---|
| Lighter | Less oil, extra peppers | 276 kcal | 12g | 27g | 14g |
| This serving | As written | 394 kcal | 18g | 39g | 20g |
| Hungry | Larger portion with rice | 591 kcal | 26g | 58g | 30g |
The chicken provides most of the protein, while the cornflour and sugar contribute carbohydrates. Oil and egg account for much of the fat; serve it with a moderate portion of rice and add extra vegetables to balance the plate.
The chicken coating
Dry chicken: patting the pieces dry helps the cornflour cling evenly instead of turning patchy or damp.
Cornflour and egg: the cornflour coats the chicken first, and the egg helps form a coating that catches the sauce. Work in batches so the pieces are easy to turn and lift.
Getting the sauce right
Dissolve the sugar: whisk the sauce ingredients until you can no longer feel sugar granules at the bottom of the bowl. This gives the sauce an even balance of sweetness and acidity.
Bake uncovered: the sauce needs time to reduce around the chicken. Turn the pieces partway through so more of their surface gets coated.
How to judge doneness
Chicken: the recipe gives a total baking time of 35–40 minutes after the brief pan-frying, but check the thickest pieces are cooked through before serving.
Sauce: look for a thicker, glossy coating and lightly browned chicken. If the sauce still looks thin, give it a little more time in the oven, checking frequently.
Timing the vegetables
Vegetables: start cooking the onion and peppers while the chicken bakes. They take about 7–10 minutes over a medium-low heat to soften.
Finish together: add the cooked vegetables to the chicken at the end, rather than baking them for the full time. This keeps them from becoming overly soft.
What to serve with it
Rice: serve the chicken and vegetables over cooked rice to catch the sweet-and-sour sauce. Plain steamed rice lets the sauce stay the focus.
Extra vegetables: add a simple steamed green vegetable on the side if you would like more variety on the plate.
Recipe notes & tips
- Cut the chicken into evenly sized pieces so they cook at a similar rate.
- Separate the coated chicken pieces before dipping them in egg to prevent them sticking together.
- Fry the chicken in batches rather than crowding the pan.
- Stir the sauce until the sugar has dissolved before pouring it over the chicken.
- Stir the vegetables occasionally as they soften so they cook evenly.
- Check that the chicken is cooked through before serving.
Variations
- Add pineapple: stir in pineapple chunks near the end of baking so they warm in the sauce.
- Use chicken thighs: cut boneless, skinless thighs into similar-sized pieces and check they are cooked through.
- Make it gluten-free: use gluten-free soy sauce, as noted in the ingredient list.
- Adjust the tang: use a little less vinegar for a milder sauce.
- Change the peppers: use a mixture of colours for a varied look and flavour.
Common mistakes to avoid
- Damp chicken: pat it thoroughly dry so the cornflour adheres evenly.
- Uneven coating: separate the chicken pieces and check that each is covered before adding the egg.
- Crowded frying pan: cook in batches so the chicken can brown rather than steam.
- Overcooked vegetables: cook them separately and add them to the chicken only at the end.
- Thin sauce: bake until it thickens, checking the chicken as it cooks.
- Skipping the midway turn: turn the chicken after 20 minutes so it gets coated in sauce again.
How to store
Refrigerate leftovers in a covered container within 2 hours and use within 3 days. Reheat until piping hot, either in a covered dish in the oven or in the microwave, stirring or turning the pieces so they heat evenly.
Frequently asked questions
Can I prepare the chicken ahead?
You can cut the chicken and mix the sauce ahead, keeping them covered separately in the fridge. For the best coating, cornflour and egg the chicken just before frying.
Can I use a different type of vinegar?
Apple cider vinegar is the one specified here. A similar clear vinegar can be used, but the flavour may be sharper or less fruity.
Can I skip pan-frying the chicken?
The brief frying gives the coating a chance to turn golden before baking. Skipping it changes the texture, so follow the pan-frying step for the result described.
How do I know when the chicken is done?
Check the thickest pieces are cooked through, and look for lightly browned edges and a thickened sauce. Use a food thermometer if you have one.
What should I serve with sweet-and-sour chicken?
Rice is a straightforward accompaniment and soaks up the sauce. You can also serve an extra steamed vegetable alongside it.
Can I make this gluten-free?
Yes, use the gluten-free soy sauce option listed. Check the labels on the other packaged ingredients as well.
Cook it from the original
This recipe comes from godairyfree.org. Their page has the author’s own photos, notes and tips — the best place to cook it from.
Open the recipe on godairyfree.org