
Chocolate Mochi Recipe
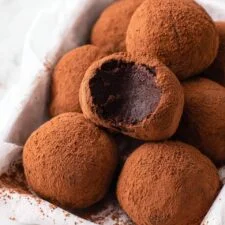
These chocolate mochi have a soft, chewy cocoa dough wrapped around a rich semi-sweet chocolate ganache centre. They make a special bite-sized dessert, with cocoa powder adding a silky, bittersweet finish.
Ingredients
- 225 g (7.9 oz)semi-sweet chocolate, roughly chopped
- 120 ml (1/2 cup)double cream
- 30 g (2 tbsp)unsalted butter
- 60 g (1/2 cup)cocoa powder
- 150 g (1 cup)glutinous rice flour
- 48 g (1/4 cup)granulated sugar
- 15 g (2 tbsp)cornflour
- 15 g (2 tbsp)cocoa powder
- 240 ml (1 cup)whole milk
- 1 tbspvegetable oil
Instructions
- 1
Make the ganache
Put the chopped chocolate, double cream and butter in a heatproof bowl. Warm gently in the microwave or over a bain-marie until melted and smooth.
- 2
Chill the ganache
Stir until fully combined, cover with cling film and refrigerate for 1–2 hours, until firm enough to shape.
- 3
Line a tray
Line a baking tray with baking parchment for the ganache portions.
- 4
Shape the centres
Divide the chilled ganache into 8 equal portions and roll each into a smooth ball.
- 5
Chill the centres
Set the balls on the lined tray and refrigerate for 30 minutes, or until firm.
- 6
Mix dry ingredients
In a medium microwave-safe bowl, whisk the glutinous rice flour, sugar, 15 g cocoa powder and cornflour until evenly mixed.
- 7
Whisk in milk
Pour in the whole milk and whisk thoroughly until you have a smooth batter.
- 8
Microwave the dough
Cover the bowl with cling film and microwave on high for 2 minutes.
- 9
Stir the mixture
Carefully remove the cling film and stir the mixture so the heat and texture are redistributed.
- 10
Microwave again
Cover the bowl again and microwave for a further 2 minutes; the dough should start to look semi-translucent.
- 11
Check the dough
If it still looks liquid or milky, microwave in 1-minute intervals until cooked through and slightly translucent.
- 12
Cool the dough
Leave the cooked mochi dough until it is cool enough to handle comfortably.
- 13
Knead until smooth
Add the vegetable oil and knead with oiled or gloved hands until the dough is smooth and elastic.
- 14
Line another tray
Line a second baking tray with baking parchment for the assembled mochi.
- 15
Divide the dough
Split the mochi dough into 8 equal pieces and put them on the prepared tray.
- 16
Set out the cocoa
Tip the remaining 60 g cocoa powder into a shallow bowl for coating.
- 17
Wrap the centres
Flatten one portion of dough in your palm and place a firm ganache ball in the middle. Carefully wrap the dough around it, pinching the edges together to seal.
- 18
Coat the mochi
Gently roll the filled mochi in the cocoa powder until coated all over.
- 19
Repeat the assembly
Fill and coat the remaining portions in the same way, using all the dough and ganache.
What is chocolate mochi?
Mochi is a Japanese sweet known for its springy, chewy texture, traditionally made with glutinous rice. This version pairs a cocoa-rich mochi wrapper with a chocolate ganache centre for a dessert that brings together chewiness and a soft, rich filling.
Glutinous rice flour gives the dough its characteristic stretch; it does not mean the flour contains gluten. The ganache is chilled before wrapping so it stays compact while you shape each piece.
Nutrition and macros by portion
The nutrition label shows one serving as written: 490 calories, 7g protein, 55g carbs, 29g fat.
| Portion | Adjustment | kcal | Protein | Carbs | Fat |
|---|---|---|---|---|---|
| Lighter | Smaller mochi portions | 343 kcal | 5g | 39g | 20g |
| This serving | As written | 490 kcal | 7g | 55g | 29g |
| Hungry | Larger portion | 735 kcal | 11g | 83g | 44g |
The chocolate, cream and butter contribute much of the fat, while the rice flour, sugar and chocolate provide most of the carbohydrates. The chocolate, milk and cream also contribute some protein. Balance a serving with fresh fruit, or enjoy one piece after a meal rather than serving several alongside other rich desserts.
The chocolate filling
Ganache base: Semi-sweet chocolate, cream and butter melt together into a smooth, rich centre. Heat gently and stir well so no unmelted chocolate remains.
Firm centres: The long chill, followed by a shorter chill after shaping the balls, helps the filling hold its form during assembly.
Getting the mochi dough right
Smooth batter: Whisk the milk into the dry ingredients thoroughly before cooking, breaking up any pockets of flour or cocoa.
Microwave stages: The two 2-minute intervals, with a stir between them, help the mixture cook more evenly. If it still looks milky or runny, continue in 1-minute intervals as directed.
Handling and sealing
Cool first: Let the dough cool until it is comfortable to handle, then knead in the oil with oiled or gloved hands. The dough should feel smooth and elastic.
Seal the seam: Keep the ganache in the centre as you bring the dough edges together. Pinch the join closed before rolling the ball in cocoa.
Portioning and timing
Even pieces: Dividing both the ganache and dough into 8 equal portions makes it easier to wrap each centre without running short.
Plan for chilling: The recipe includes 1–2 hours for chilling the ganache and another 30 minutes for the shaped centres, in addition to preparation and cooking. These resting periods help make the filling easier to handle.
Serving ideas
Serve the mochi as small dessert bites with tea or coffee. Their cocoa coating and ganache centre make them rich, so one or two can be a satisfying finish to a meal.
For contrast, serve with fresh berries or sliced fruit. Keep the mochi separate until serving so the cocoa coating stays neat.
Recipe notes & tips
- Chop the chocolate into small, similar-sized pieces so it melts evenly.
- Cover the ganache while it chills to prevent it from drying out.
- Use oiled hands or gloves when kneading the warm, sticky mochi dough.
- Keep the ganache centres cold until you are ready to wrap them.
- Pinch each seam closed thoroughly before coating the mochi.
Variations
- Darker chocolate: Use a darker semi-sweet chocolate for a more bittersweet ganache.
- Matcha coating: Replace some of the outer cocoa powder with matcha for a green tea finish.
- Vanilla ganache: Stir a little vanilla into the melted ganache for a fragrant note.
- Coconut finish: Roll the assembled mochi in finely grated coconut instead of cocoa.
- Fruit pairing: Serve with fresh raspberries or strawberries for a bright contrast.
Common mistakes to avoid
- Runny ganache: Chill it for the full 1–2 hours and until firm enough to roll.
- Uneven cooking: Stir the dough after its first 2-minute microwave interval before cooking it again.
- Milky dough: Continue microwaving in 1-minute intervals until it looks cooked and slightly translucent.
- Dough too hot to handle: Let it cool until comfortable to touch before kneading.
- Open seams: Pinch the edges together carefully around the ganache before rolling the mochi.
How to store
Store the mochi in an airtight container in the fridge and eat within 2 days for the best texture. Let them sit briefly at room temperature before serving; avoid microwaving, which can soften the ganache and make the dough overly sticky.
Frequently asked questions
Can I make the ganache ahead?
Yes. Chill it until firm, then shape the balls and keep them covered in the fridge until you are ready to assemble the mochi.
Why is the mochi dough still milky?
It may need more cooking. Continue microwaving in 1-minute intervals until the dough is cooked through and slightly translucent.
Can I cook the dough without a microwave?
The method provided is designed for a microwave. If you use another cooking method, the heating time and texture cues may differ, so cook until the dough is fully cooked and slightly translucent.
How do I stop the dough sticking to my hands?
Knead with oiled or gloved hands, as directed, and make sure the dough has cooled enough to handle comfortably.
Can I freeze chocolate mochi?
The recipe does not specify freezing, and freezing may change the chewy texture. For the best result, refrigerate and eat within 2 days.
Cook it from the original
This recipe comes from busyrecipe.com. Their page has the author’s own photos, notes and tips — the best place to cook it from.
Open the recipe on busyrecipe.com