
Danish Lent Buns (Fastelavnsboller) with Pastry Cream and Chocolate Icing Recipe
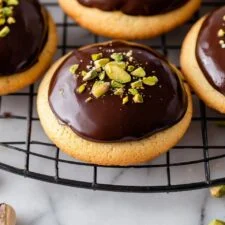
These Danish Fastelavnsboller are soft, cardamom-scented buns filled with vanilla pastry cream and finished with chocolate icing and sprinkles. They make a festive bake to share with coffee or tea.
Ingredients
- 13 g dried active yeast or 25 g fresh yeastdried active yeast or fresh yeast
- 250 mlwhole milk, heated to 36–37°C
- 100 gbutter, melted and cooled slightly
- 40 ggranulated sugar
- 400–500 gstrong white bread flour
- 1 teaspoonbaking powder
- 2 teaspoonsground cardamom
- 1 teaspoonsalt
- 1egg, beaten
- 1 eggegg, for brushing
- 500 mlwhole milk
- 1vanilla pod
- 2eggs
- 1egg yolk
- 100 gcaster sugar
- 30 gcornflour
- 25 gbutter
- 150 gicing sugar
- As neededhot water
- 50 gdark chocolate, melted
- To tastesprinkles
Instructions
- 1
Make the pastry cream
Put the 500 ml milk and vanilla pod in a saucepan and bring to boiling point. In a separate bowl, whisk the caster sugar, 2 eggs, egg yolk and cornflour until smooth. Gradually whisk about one-third of the hot milk into the egg mixture, then return it all to the saucepan. Heat, stirring constantly, until it boils and thickens; let it boil for about 30 seconds. Take the pan off the heat, stir in 25 g butter, transfer the cream to a bowl and leave it to cool and set.
- 2
Activate the yeast
If using fresh yeast, dissolve it in the warm milk. If using dried active yeast, sprinkle it over the milk and leave for 15 minutes, until bubbly. Tip the yeast mixture into a mixer bowl fitted with a dough hook, add the melted butter and mix for 1 minute.
- 3
Mix the dough
Add the granulated sugar and mix for a further minute. Combine the flour, cardamom, salt and baking powder in a separate bowl. Gradually add this mixture and the beaten egg to the wet ingredients, then knead for 5 minutes until the dough is slightly sticky but workable. Add more flour only if it sticks excessively.
- 4
Let dough rise
Cover the bowl with a dish towel or cling film and leave the dough in a warm place for about 30 minutes, or until doubled in size.
- 5
Fill and shape
Lightly flour the work surface and turn out the dough. Knead briefly, then roll it into a 30 × 40 cm rectangle and cut it into 12 equal squares. Put a tablespoon of pastry cream on each square and pinch the corners and sides together to seal in the filling.
- 6
Rise again
Arrange the buns seam-side down on a lined baking tray. Leave them to rise for 20–25 minutes.
- 7
Bake the buns
Preheat the oven to 180–200°C. Brush the buns with the egg for brushing and bake for 10–12 minutes, until golden and cooked through. Transfer them to a rack to cool.
- 8
Mix the icing
Melt the dark chocolate. Stir hot water into the icing sugar a tablespoon at a time until the icing is thick and smooth. Mix in the melted chocolate and let the icing cool slightly so it does not melt on the buns.
- 9
Ice and serve
Spread the chocolate icing over each bun, add sprinkles and serve.
What are Fastelavnsboller?
Fastelavnsboller are Danish buns associated with Fastelavn, the pre-Lenten celebration. They are made in different styles, but this version uses a yeast dough wrapped around pastry cream.
Cardamom seasons the soft dough, while the chocolate icing and sprinkles make each bun a festive treat.
Nutrition and macros by portion
The nutrition label shows one serving as written: 400 calories, 9g protein, 60g carbs, 14g fat.
| Portion | Adjustment | kcal | Protein | Carbs | Fat |
|---|---|---|---|---|---|
| Lighter | Use less icing | 280 kcal | 6g | 42g | 10g |
| This serving | As written | 400 kcal | 9g | 60g | 14g |
| Hungry | Serve two buns | 600 kcal | 14g | 90g | 21g |
The flour, sugar and icing contribute most of the carbohydrates, while butter, whole milk and chocolate provide much of the fat. Eggs, milk and flour contribute protein. For a more balanced plate, serve one bun with fresh fruit and an unsweetened drink.
Build the pastry cream
Vanilla: Infuse the milk with the split vanilla pod as it heats, then remove the pod if you prefer not to have it in the finished cream.
Tempering: Whisking some hot milk into the egg mixture gradually helps combine the ingredients before they go back into the pan. Stir constantly as the cream heats so it thickens evenly without catching.
Get the dough consistency right
Flour: Start with the lower end of the 400–500 g range and add more only if the dough is too sticky to handle. A slightly tacky dough helps keep the buns soft.
Kneading: Give the dough the full 5 minutes of kneading time, then use the first rise to let it expand before shaping.
Seal the filling well
Portions: Use a tablespoon of cooled pastry cream for each square so the filling is easier to enclose. Too much cream can make the edges difficult to seal.
Seams: Pinch the corners and sides firmly together, then set each bun seam-side down on the tray. This helps keep the filling inside as the dough rises and bakes.
Watch the rise and bake
First rise: Look for the dough to double in size; the time can vary with the warmth of the room. The recipe gives about 30 minutes for this stage.
Oven: Bake at 180–200°C for 10–12 minutes, checking for a golden surface and buns that are cooked through. Cool them on a rack before icing.
Finish and serve
Icing: Add hot water to the icing sugar a tablespoon at a time, stopping when the mixture is thick enough to spread. Let the chocolate icing cool slightly before applying it to the buns.
Pairing: Serve the buns with coffee or tea. Their sweet icing and creamy centre also work well alongside a simple bowl of fresh fruit.
Recipe notes & tips
- Cool the pastry cream before filling the dough so it is easier to portion and handle.
- Keep the dough slightly tacky and add extra flour sparingly.
- Pinch every edge of each square firmly around the pastry cream.
- Place the buns seam-side down before their second rise.
- Wait until the buns have cooled before spreading on the icing.
- Add water to the icing sugar gradually to avoid making the icing too thin.
Variations
- Citrus cream: Add finely grated lemon zest to the pastry cream for a bright note.
- Vanilla icing: Leave out the chocolate and use a little vanilla in the icing instead.
- Extra cardamom: Add a little more ground cardamom to the dough for a stronger spice flavour.
- Different sprinkles: Use your preferred sprinkles to change the finish for a celebration.
- Fruit on the side: Serve with fresh berries or sliced fruit alongside the buns.
Common mistakes to avoid
- Adding too much flour: The dough can become firm; add flour gradually and stop once it is workable.
- Skipping the yeast activation: Dried active yeast should sit in the warm milk for 15 minutes until bubbly.
- Filling with warm cream: Warm filling is harder to handle; let the pastry cream cool and set first.
- Leaving the seams loose: The filling may escape; pinch the corners and sides together firmly.
- Icing warm buns: The icing can melt and run; wait until the buns have cooled on a rack.
- Overheating the pastry cream: It can catch on the pan; stir constantly while it thickens.
How to store
Store cooled buns in an airtight container in the fridge for up to 3 days. Bring them to room temperature before serving, or warm briefly in a low oven; the icing may soften.
Frequently asked questions
Can I make the pastry cream ahead?
Yes. Prepare it ahead, transfer it to a bowl and leave it to cool and set before using it to fill the buns.
Can I use fresh yeast instead of dried yeast?
Yes. Use 25 g fresh yeast and dissolve it in the warm milk. The recipe uses 13 g dried active yeast as the alternative.
How do I know when the dough has risen enough?
After the first rise, it should have doubled in size. The recipe gives about 30 minutes, but the dough’s appearance is the best guide.
Can I freeze the buns?
They can be frozen, though the icing and sprinkles may change texture after thawing. For the neatest finish, freeze the buns without icing and decorate after they have thawed.
Why is my icing too runny?
It may have too much water. Stir in more icing sugar a little at a time until it is thick enough to spread.
Cook it from the original
This recipe comes from busyrecipe.com. Their page has the author’s own photos, notes and tips — the best place to cook it from.
Open the recipe on busyrecipe.com