
Dairy-Free Kefir
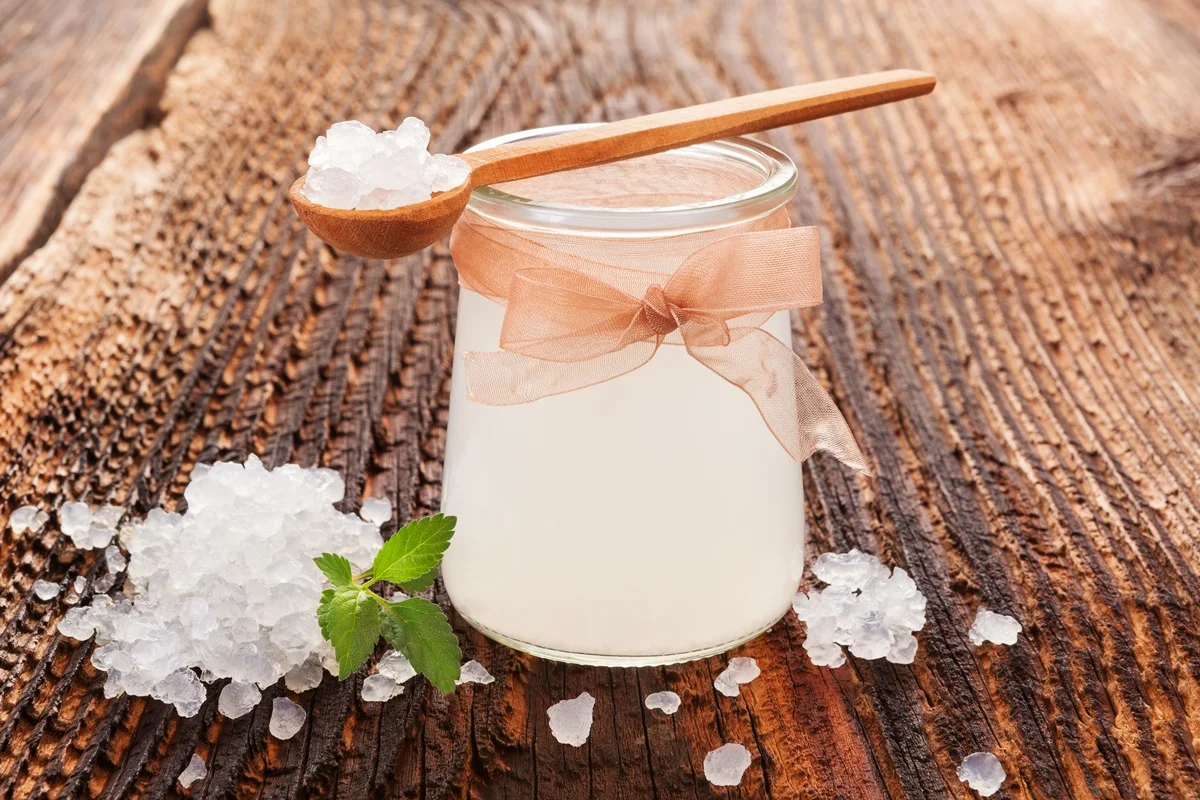
Water kefir is a lightly fermented drink made with water kefir grains, sugar and water rather than dairy milk. This simple batch is useful when you want a dairy-free cultured drink, with the grains saved to start another batch.
Ingredients
- As neededWater kefir grains, rehydrated (see note)
- 50 g (1/4 cup)Sugar
- 946 ml (4 cups)Water, free of chlorine and fluoride
Instructions
- 1
Dissolve the sugar
Put the sugar in a clean 1-quart (946 ml) jar. Add 118 ml (1/2 cup) hot water and swirl until the sugar dissolves.
- 2
Cool the mixture
Add 828 ml (3 1/2 cups) room-temperature or cool water. Check that the water is between 20°C and 29°C (68°F and 85°F).
- 3
Add the grains
Add the water kefir grains. Cover the jar with a coffee filter or several layers of cheesecloth and secure the covering with a rubber band.
- 4
Culture the kefir
Leave the jar in a warm spot at 20°C to 29°C (68°F to 85°F) for 24 to 48 hours, and no longer than 72 hours. The grains should look plump and translucent.
- 5
Strain the drink
Pour the kefir through a clean fine-mesh sieve made of stainless steel or plastic.
- 6
Chill the kefir
Transfer the prepared water kefir to airtight, pressure-safe bottles, such as flip-top bottles, and refrigerate for 1 to 3 weeks.
- 7
Refresh the grains
To preserve the grains, repeat steps 1 to 3 using the used grains. Start a new batch, or refrigerate the jar; the grains should stay healthy for up to 3 weeks. It is best to replace the water and sugar weekly.
What is water kefir?
Water kefir is a fermented drink made with water kefir grains, which contain bacteria and yeast that differ from those in milk kefir. These grains use sucrose rather than lactose, so this recipe uses sugar and water instead of dairy.
The method is straightforward: dissolve the sugar, let the grains culture the mixture, then strain them out. Keeping the grains means you can use them for another batch.
Nutrition and macros by portion
The nutrition label shows one serving as written: 24 calories, 0g protein, 6g carbs, 0g fat.
| Portion | Adjustment | kcal | Protein | Carbs | Fat |
|---|---|---|---|---|---|
| Lighter | Smaller glass | 17 kcal | 0g | 4g | 0g |
| This serving | As written | 24 kcal | 0g | 6g | 0g |
| Hungry | Larger glass | 36 kcal | 0g | 9g | 0g |
The listed carbohydrates come mainly from the sugar used to feed the grains; the recipe provides no meaningful protein or fat per serving. Pair a glass with a protein-rich snack or meal component if you want a more balanced plate.
The sugar and water
Sugar: it feeds the water kefir grains during culturing, so keep the stated amount rather than treating it as optional.
Water: use water free of chlorine and fluoride, as specified, and divide it between the hot portion for dissolving the sugar and the cooler portion added afterwards.
Check the temperature
Before adding the grains, check that the liquid is between 20°C and 29°C. Water that is still hot can be unsuitable for the grains, so let the mixture cool if needed.
Keep the jar in a spot within the same temperature range while it cultures. A thermometer makes both checks easier.
Watch the fermentation
Allow 24 to 48 hours for the first culture, and do not exceed 72 hours. The recipe’s visual cue is grains that look plump and translucent.
Fermentation time can vary within that range, so check the grains rather than relying on the clock alone.
Strain and bottle safely
Use a clean fine-mesh sieve made from stainless steel or plastic to separate the grains from the drink. Keep the grains if you plan to start another batch.
Choose airtight, pressure-safe bottles for storage, as directed, and refrigerate the finished kefir.
How to serve it
Serve the chilled kefir on its own or alongside a meal. Its mild sweetness can also make it a refreshing alternative to a sweetened soft drink.
For a more filling snack, pair a glass with a source of protein, such as nuts or a savoury meal component.
Recipe notes & tips
- Use a clean jar and clean straining equipment for each batch.
- Measure the water carefully so the hot and cool portions add up to the listed total.
- Check the liquid temperature before adding the grains.
- Keep the covering secured with a rubber band while the kefir cultures.
- Replace the grains’ water and sugar weekly if keeping them in the refrigerator.
Variations
- Citrus finish: Add a squeeze of lemon to a glass just before serving.
- Berry serve: Add a few crushed berries to the glass when serving.
- Ginger note: Add a thin slice of fresh ginger to a serving for a warming flavour.
- Juice blend: Mix a little finished kefir with fruit juice in the glass to adjust the flavour.
Common mistakes to avoid
- Hot liquid: Adding the grains before the mixture cools can be unsuitable for them; check the temperature first.
- Chlorinated water: Use water free of chlorine and fluoride, as the recipe specifies.
- Too much culturing: Do not leave the batch longer than 72 hours.
- Wrong sieve material: Use a clean fine-mesh sieve made from stainless steel or plastic.
- Unsuited bottles: Choose airtight bottles that are safe for pressure rather than ordinary containers.
How to store
Keep the prepared kefir in airtight, pressure-safe bottles in the refrigerator for 1 to 3 weeks. The grains can be refrigerated for up to 3 weeks, but it is best to change their water and sugar weekly.
Frequently asked questions
Can I use milk kefir grains instead?
No. This recipe is specifically for water kefir grains, which differ from milk kefir grains and use sucrose rather than lactose.
How warm should the water be when I add the grains?
It should be between 20°C and 29°C (68°F and 85°F). Check the temperature after adding the cool water.
How long should the kefir culture?
Culture it for 24 to 48 hours, and do not let it sit for more than 72 hours. The grains should be plump and translucent.
Can I keep the grains between batches?
Yes. Refrigerate them in the jar, and replace the water and sugar weekly. The recipe says they should stay healthy for up to 3 weeks.
What kind of bottles should I use?
Use airtight, pressure-safe bottles, such as flip-top bottles, and keep them in the refrigerator.
Cook it from the original
This recipe comes from godairyfree.org. Their page has the author’s own photos, notes and tips — the best place to cook it from.
Open the recipe on godairyfree.org