
Dairy-Free Reese's Peanut Butter Eggs Copycat
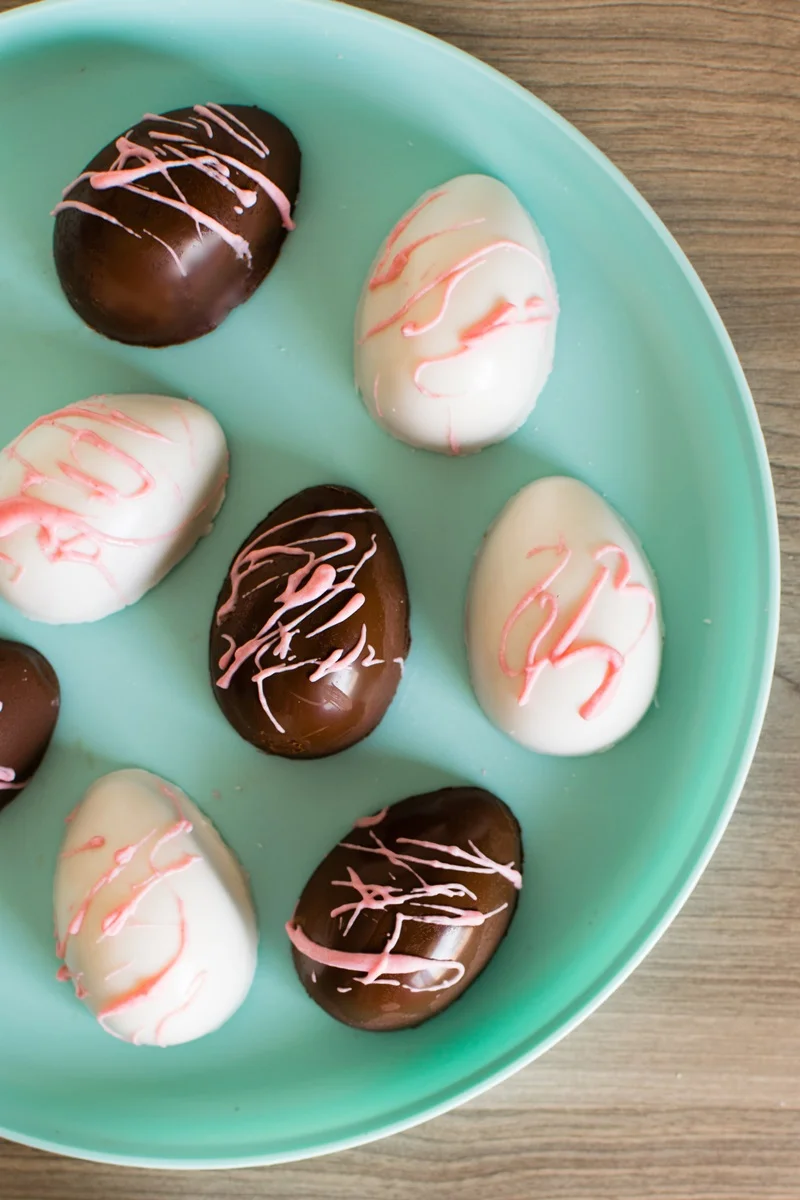
These dairy-free peanut butter eggs pair a smooth, sweet peanut butter centre with a crisp chocolate shell. Choose moulds for a neat finish or roll and cut the mixture for a classic homemade look; allow extra time for chilling.
Ingredients
- 190 g (¾ cup)creamy peanut butter (or sunflower seed butter)
- 28 g (2 tablespoons)dairy-free buttery stick or spread
- 2.5 ml (½ teaspoon)vanilla extract
- A pinchsalt (omit if using salted peanut butter)
- 165–180 g (1⅜–1½ cups)icing sugar
- 7.5–15 ml (½–1 tablespoon)water
- 283 g (10 oz)dairy-free chocolate chips
- 5 ml (1 teaspoon), as neededdairy-free shortening
Instructions
- 1
Mix the filling
Beat the peanut butter, dairy-free buttery spread, vanilla and salt, if using, in a mixing bowl until smooth. Beat or stir in icing sugar to taste.
- 2
Adjust the dough
The mixture may be crumbly and slightly dry. Mix in about ½ tablespoon water; using your hands, bring it together until firm, cohesive, smooth and pliable, like play dough.
- 3
Melt the chocolate
For the roll-and-cut option, melt the chocolate with the shortening using your chosen method. For the mould option, use the same method or microwave the chocolate with the shortening just until melted.
- 4
Fill the moulds
For the mould option, spoon a couple of teaspoons of chocolate into each egg mould and brush it or spread it up the sides with the back of a spoon. Refrigerate for about 15 minutes, or until set. Roll large chunks of the peanut butter mixture and press them into the moulds, filling each to just below the top of the chocolate. Briefly reheat the remaining chocolate if it has started to set, spread it over the filling to cover, and tap the mould on the work surface to level the chocolate. Refrigerate until set, about 30 minutes, then carefully peel back the moulds to release the eggs.
- 5
Roll and cut
For the classic roll-and-cut option, roll the peanut butter dough to about 1.25–1.9 cm (½–¾ inch) thick. Cut out egg shapes with half a vertical-opening plastic egg or an egg-shaped cutter, or shape them by hand. Reroll the scraps and cut again to use up the mixture. Dip the eggs in melted chocolate, let the excess drip off, then place them on a parchment-lined tray. Refrigerate for 30 minutes, or until set.
- 6
Store the eggs
Keep the eggs in an airtight container in the refrigerator for up to 1 week, or freeze them for longer storage.
What are peanut butter eggs?
Peanut butter eggs are an American-style confection, often associated with Easter: a sweet, soft peanut butter centre enclosed in chocolate. This homemade version skips dairy while keeping the familiar contrast between creamy filling and chocolate coating.
Two shaping methods make the recipe flexible. Moulds give the eggs a smooth, polished shell, while rolling and cutting creates a more traditional hand-shaped finish.
Nutrition and macros by portion
The nutrition label shows one serving as written: 246 calories, 5g protein, 28g carbs, 14g fat.
| Portion | Adjustment | kcal | Protein | Carbs | Fat |
|---|---|---|---|---|---|
| Lighter | Make smaller eggs | 172 kcal | 3g | 20g | 10g |
| This serving | As written | 246 kcal | 5g | 28g | 14g |
| Hungry | Serve two eggs | 369 kcal | 7g | 42g | 21g |
The peanut butter and chocolate contribute most of the fat, while the icing sugar and chocolate provide much of the carbohydrate; peanut butter supplies some of the protein. Pair an egg with fruit or serve it after a meal with a source of fibre to balance its sweetness.
Build a pliable filling
Peanut butter: creamy peanut butter makes a smooth centre that is easy to shape; sunflower seed butter is offered as a substitute.
Icing sugar: add within the stated range to suit your taste and help the mixture become firm enough to handle.
Water: add gradually if the mixture looks dry or crumbly. The finished dough should hold together and feel pliable rather than sticky.
Choose your shaping method
Moulds: coat the sides first and let the chocolate set before adding the filling. Leave room at the top for a final layer of chocolate to seal each egg.
Roll and cut: keep the dough evenly thick so the eggs are similar in size. Gather and reroll the scraps to use the remaining filling.
Get the chocolate coating right
Melted chocolate: work with chocolate that is fluid enough to spread or dip, but avoid overheating it. The recipe allows the same melting method for both options, with microwaving also suggested for the mould method.
Shortening: use the stated amount as needed with the chocolate. For dipped eggs, pause over the bowl to let excess coating drain before setting them on the lined tray.
Watch the chilling stages
Moulds: chill the first chocolate layer for about 15 minutes before filling, then chill the finished eggs for about 30 minutes.
Roll and cut: refrigerate the coated eggs for 30 minutes, or until set. The listed 30-minute total is hands-on time; the recipe also calls for chilling, so allow about an hour for chilling when making the moulded version.
Serve and enjoy
Let the eggs sit briefly at room temperature if you prefer a less-firm centre, while keeping them cool enough that the chocolate holds its shape.
Serve them with fresh berries or sliced fruit for a simple contrast to the rich, sweet filling. They also work well as small after-dinner treats.
Recipe notes & tips
- If your peanut butter is salted, leave out the pinch of salt.
- Add water a little at a time so the filling does not become too soft.
- Use the icing sugar range to adjust the filling's sweetness and firmness.
- Keep the chocolate layer in the moulds even, especially around the edges.
- Line the tray with parchment before dipping the eggs.
- Allow the chocolate to set fully before moving the finished eggs.
Variations
- Sunflower butter: swap it for the peanut butter for the listed alternative.
- Hand-shaped eggs: shape the filling by hand if you do not have a cutter or mould.
- Different moulds: use egg-shaped moulds of another size, keeping each filling below the chocolate rim.
- Softer centre: add water gradually until the dough is pliable, without making it sticky.
Common mistakes to avoid
- Dry filling: mix in water gradually until the dough holds together and feels pliable.
- Too much water: add it in small amounts so the mixture remains firm enough to shape.
- Thin mould coating: spread the chocolate up the sides before chilling so the filling can be enclosed.
- Overfilled moulds: leave space below the chocolate edge for the sealing layer.
- Uneven cut-outs: roll the dough to a consistent thickness before cutting.
- Moving eggs too soon: refrigerate until the chocolate is set before handling.
How to store
Store the eggs in an airtight container in the refrigerator for up to 1 week. Freeze them for longer storage and thaw in the refrigerator before serving.
Frequently asked questions
How long does this recipe take?
The 30-minute total is hands-on time. The mould method also needs about 15 minutes for the first chocolate layer and about 30 minutes for the finished eggs to set.
Can I use sunflower seed butter?
Yes. It is listed as a substitute for the peanut butter; the filling may have a slightly different flavour and consistency.
What if the filling is crumbly?
Mix in water gradually, starting with about ½ tablespoon. Stop when the dough is smooth, cohesive and pliable.
Do I need egg-shaped moulds?
No. Roll the dough and cut egg shapes with half a vertically opening plastic egg or an egg-shaped cutter, or shape them by hand.
Can I make these without dairy?
Use dairy-free buttery spread, dairy-free chocolate chips and dairy-free shortening, as specified. Check product labels to confirm they suit your needs.
How long do the eggs keep?
They keep in an airtight container in the refrigerator for up to 1 week. The recipe also suggests freezing them for longer storage.
Cook it from the original
This recipe comes from godairyfree.org. Their page has the author’s own photos, notes and tips — the best place to cook it from.
Open the recipe on godairyfree.org