
Oreo Mousse
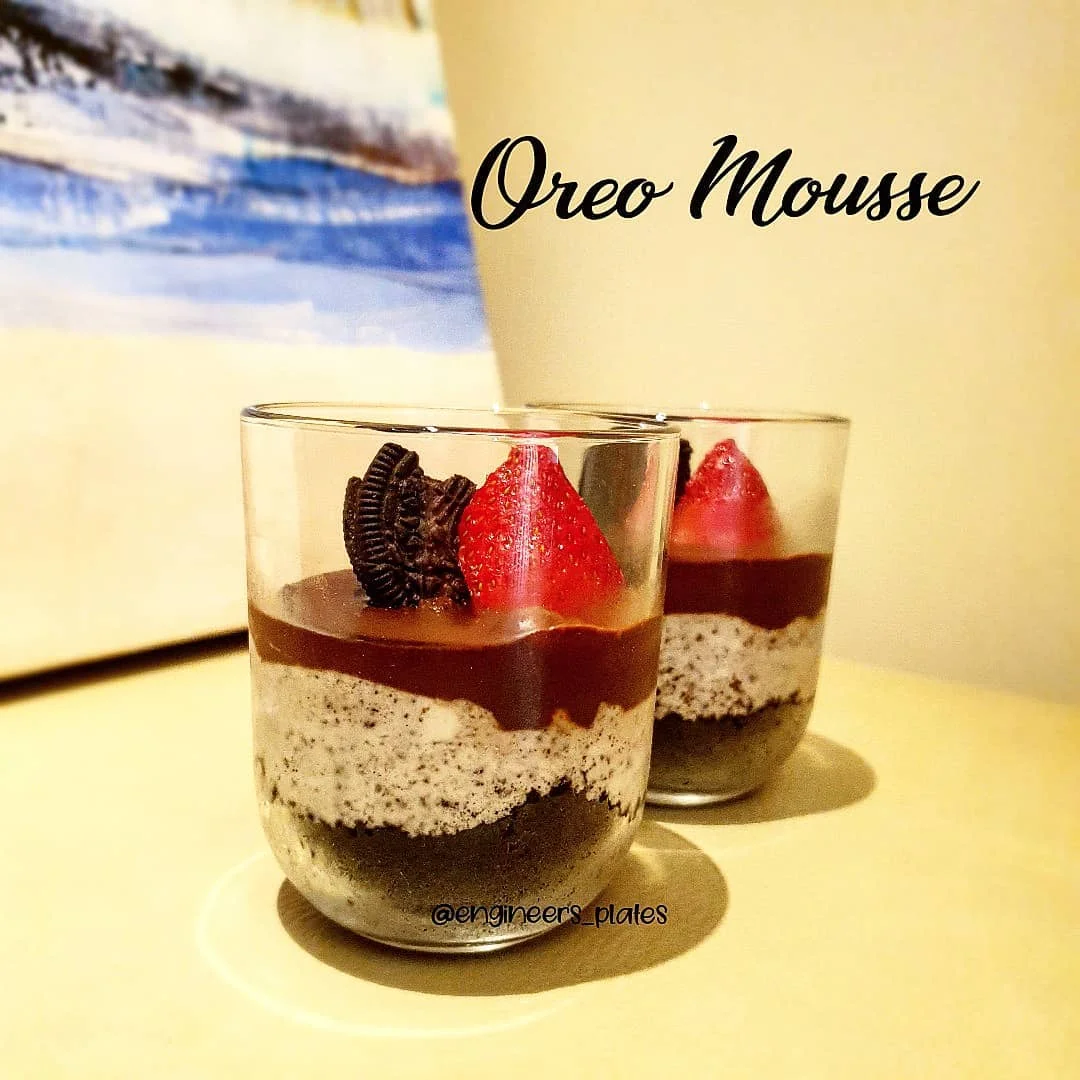
Oreo Mousse layers a buttery biscuit base with Oreo-studded whipped cream and a simple chocolate topping. It is a chilled, no-bake dessert that is easy to assemble ahead of serving.
Ingredients
- 14Oreo biscuits, separated from the white filling
- Not specifiedWhipped cream
- 1 spoonMelted butter
- Not specifiedChocolate bar
- Not specifiedHot milk
- 4–5 spoonfuls of crushed biscuits, reservedOreo biscuits
- Not specifiedStrawberries
Instructions
- 1
Crush the biscuits
Crush the biscuit parts finely. Stir in 1 spoon of melted butter until combined, then press the mixture gently into a container. Set aside 4–5 spoonfuls of crushed biscuits for later.
- 2
Mix the cream
Prepare the whipped cream according to its instructions. Fold in the crushed biscuits and the reserved white Oreo filling.
- 3
Add the filling
Spread the cream mixture over the biscuit base, then chill it in the fridge.
- 4
Make the topping
Put the chocolate in a bowl. Add hot milk a little at a time, stirring until the mixture forms a paste; keep it thick rather than watery.
- 5
Chill and serve
Spread the chocolate mixture over the cream layer and chill in the fridge. Serve with strawberries.
What is Oreo mousse?
Oreo mousse is a chilled layered dessert built around the familiar combination of chocolate biscuits and cream. This version uses the biscuit crumbs for a buttery base and mixes the cookies’ white filling into the whipped cream.
It is a home-style, no-bake take on a mousse rather than a traditional egg-based one. The separate chocolate-and-milk topping adds another layer of chocolate flavour.
Nutrition and macros by portion
The nutrition label shows one serving as written: 565 calories, 7g protein, 55g carbs, 37g fat.
| Portion | Adjustment | kcal | Protein | Carbs | Fat |
|---|---|---|---|---|---|
| Lighter | Use less cream and chocolate | 396 kcal | 5g | 39g | 26g |
| This serving | As written | 565 kcal | 7g | 55g | 37g |
| Hungry | Serve a larger portion | 848 kcal | 11g | 83g | 56g |
The biscuits and any added sugar in the cream contribute most of the carbohydrates, while the whipped cream, butter and chocolate supply much of the fat. The chocolate and cream also contribute some protein, though the amount depends on the products and quantities used. Serve a portion with extra strawberries for a fresh contrast.
Build a firm biscuit base
Fine crumbs: crush the biscuits thoroughly so the base holds together instead of breaking into large pieces.
Butter: mix it through the crumbs, then press gently into the container. The reserved crumbs are folded into the cream, so keep them separate from the base.
Fold the cream gently
Whipped cream: prepare it as directed on its packaging before adding the biscuit crumbs and white filling.
Mixing: fold the additions through without beating the cream. This helps the filling stay airy rather than dense.
Keep the chocolate topping thick
Hot milk: add it gradually to the chocolate while stirring. Stop once the mixture becomes a thick paste; adding too much milk can make it runny.
Layering: spread the topping carefully over the chilled cream so the layers remain distinct.
Allow time to chill
The recipe gives no exact chilling duration, so leave the dessert in the fridge until the layers feel set enough to serve. A shallow container may chill more quickly than a deep one.
Keep it refrigerated between serving and return any leftovers promptly to the fridge.
Serve with strawberries
Strawberries add a fresh, slightly tart contrast to the sweet biscuit, cream and chocolate layers. Add them when serving so they stay fresh.
For neat portions, use a spoon to cut through the layers and lift each serving from the container.
Recipe notes & tips
- Crush the biscuits finely for a base that presses together evenly.
- Reserve the 4–5 spoonfuls of crumbs before mixing the rest into the cream.
- Fold the biscuit crumbs and filling into the whipped cream gently.
- Add hot milk gradually so the chocolate topping does not become watery.
- Chill the dessert until the layers are firm enough to serve.
- Add the strawberries just before serving.
Variations
- Berry topping: Add raspberries or sliced strawberries over each portion just before serving.
- Extra crunch: Scatter additional crushed Oreo biscuits on top before serving.
- Dark chocolate: Use a dark chocolate bar for a less sweet, more pronounced chocolate topping.
- Individual portions: Assemble the layers in small glasses instead of one container.
- Vanilla cream: Add a little vanilla to the whipped cream if it suits the cream you are using.
Common mistakes to avoid
- Large biscuit pieces: Crush the biscuits more finely so the base presses together evenly.
- Loose base: Mix the crumbs thoroughly with the melted butter and press them gently into the container.
- Deflated cream: Fold in the crumbs and filling gently rather than beating the mixture.
- Watery topping: Add the hot milk a little at a time and stop when the chocolate forms a paste.
- Soft layers: Chill the dessert until it is set enough to portion.
- Soggy strawberries: Add the fruit close to serving rather than leaving it on the dessert in the fridge.
How to store
Cover and keep the mousse in the fridge, ideally for up to 2 days; add strawberries just before serving. Serve chilled, as the layered cream dessert is not suited to reheating.
Frequently asked questions
How long should I chill Oreo mousse?
The recipe does not specify a time. Chill it until the layers are firm enough to serve, allowing longer if you are using a deep container.
Can I make it ahead?
Yes. Assemble and chill it ahead, then add the strawberries when you are ready to serve.
What can I use instead of a container?
Small glasses or dessert dishes work well for individual layers. Press the biscuit base gently into each one.
Why is my chocolate topping runny?
It may have taken on too much milk. Add the milk gradually and stop once the chocolate mixture is a thick paste.
Can I use the whole Oreo biscuits?
The method separates the biscuits from their white filling, using the biscuit parts for crumbs and the filling in the cream. Keeping those components separate follows the intended layering.
Cook it from the original
This recipe comes from fooooods.com. Their page has the author’s own photos, notes and tips — the best place to cook it from.
Open the recipe on fooooods.com