
Japanese Milk Bread
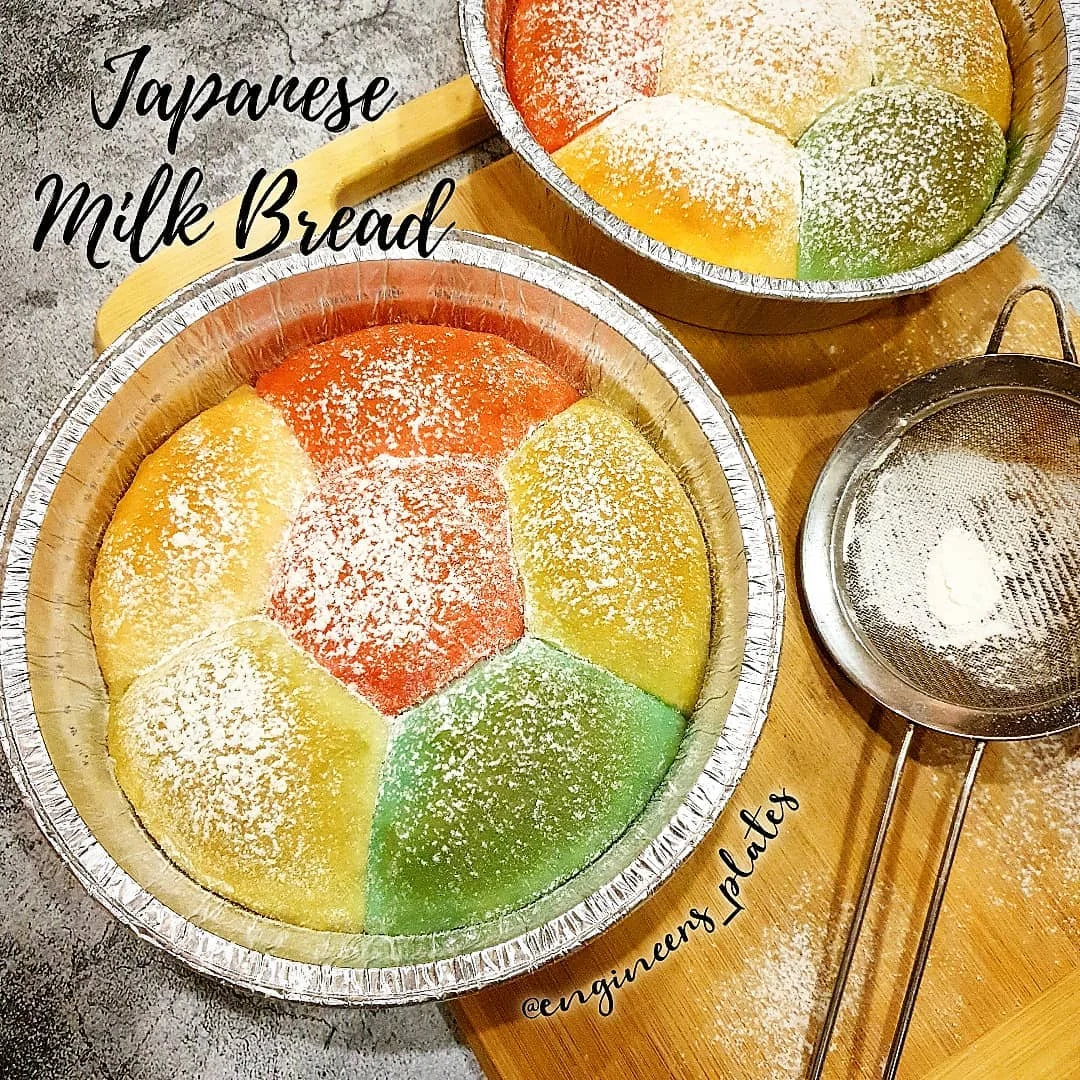
Japanese milk bread is a soft, yeasted bread made here as small, colourful buns with sweet chocolate and cheddar fillings. The dough takes time to knead and proof, but the individual portions make it easy to fill and bake.
Ingredients
- 360 gself-raising flour
- 30 gcaster sugar
- 15 gmilk powder
- 1 (15 g)egg yolk
- 185 mlcold water
- 7 gyeast
- 30 g, at room temperaturebutter
- 3 gsalt
- optionalfood colouring
- as neededoil
- 50 g, at room temperaturebutter
- 50 gcaster sugar
- 1 tbspchocolate milk powder
- 1 tbspcocoa powder
- 50 g, at room temperaturebutter
- 50 gcaster sugar
- 25 gshredded cheddar cheese
- 1 tbspmilk powder
- as neededflour, for topping
Instructions
- 1
Mix the dough
Mix all the dough ingredients except the 30 g butter and salt until they come together as a dough.
- 2
Knead the dough
Add the butter and salt, then knead with a mixer or by hand for about 20 minutes.
- 3
Colour the dough
Divide the dough according to how many colours you want to use. Add a few drops of food colouring to each portion and mix it in.
- 4
Leave to proof
Drizzle a little oil into a bowl, add the dough and cover it. Leave it in a warm place at 24–36°C to proof.
- 5
Shape portions
Divide the dough into 40 g pieces and shape each into a ball. Cover the balls.
- 6
Rest the dough
Leave the covered dough balls to rest for about 10 minutes.
- 7
Add the filling
Put 1 tsp of filling inside each piece of dough, then shape it into a ball again.
- 8
Proof the buns
Arrange the filled buns on a tray and leave them to proof.
- 9
Heat the oven
Preheat the oven to 150°C.
- 10
Dust and bake
Sift flour over the dough, then bake for about 20 minutes.
What is Japanese milk bread?
Japanese milk bread is known for a tender, pillowy crumb and a mild, milky flavour. This version makes small buns rather than one loaf, with optional food colouring and two different fillings.
The dough uses milk powder, sugar and butter for richness, while yeast gives it a risen texture. Self-raising flour is specified in this recipe, so follow the listed ingredients rather than swapping in a different flour without adjusting the method.
Nutrition and macros by portion
The nutrition label shows one serving as written: 780 calories, 14g protein, 111g carbs, 30g fat.
| Portion | Adjustment | kcal | Protein | Carbs | Fat |
|---|---|---|---|---|---|
| Lighter | Use less filling | 546 kcal | 10g | 78g | 21g |
| This serving | As written | 780 kcal | 14g | 111g | 30g |
| Hungry | Serve an extra bun | 1170 kcal | 21g | 167g | 45g |
The flour and sugars provide most of the carbohydrates, while butter carries much of the fat. The milk powder, egg yolk and cheddar contribute some protein, though the recipe is primarily a bread-and-filling treat. Pair a bun with fruit or yoghurt for a more rounded plate.
Building the dough
Mix first: combine the dough ingredients without the butter and salt, then add those once a dough has formed. Kneading for about 20 minutes is the main hands-on part of the recipe.
Butter: use it at room temperature so it is easier to work into the dough. Keep the two 50 g portions separate; they belong to the fillings, not the dough.
Colour and proof
Colour: divide the dough into as many portions as you want colours, then add colouring a few drops at a time. Knead each portion until its colour is evenly distributed.
Warmth: proof the dough in a warm place between 24°C and 36°C, as the method specifies. Covering it helps prevent the surface from drying out.
Shaping and filling
Portions: divide the dough into 40 g pieces, shape them into balls and give them a covered rest of about 10 minutes before filling.
Filling: use 1 tsp per bun, then seal and reshape the dough into a ball. The ingredient list provides two filling combinations, but does not specify how to prepare them or how many buns to make with each.
Baking cues
Flour topping: sift a light dusting over the shaped dough before it goes into the oven. Bake at 150°C for about 20 minutes, as directed.
The recipe does not give a visual doneness cue, so use the stated baking time as a guide and check the buns before removing them. Avoid adding extra proofing or baking time unless the dough or oven needs it.
Serving ideas
These buns can be served warm or at room temperature as a snack or a sweet breakfast bread. Their small format also works well for a shared plate.
For a more balanced plate, pair a bun with yoghurt or fruit rather than serving several buns on their own.
Recipe notes & tips
- Keep the 30 g dough butter separate from the butter intended for the fillings.
- Add food colouring gradually so you can control the shade.
- Cover the dough during rests to keep its surface from drying.
- Use 1 tsp of filling per dough portion to help make the buns easier to seal.
- Sift the topping flour lightly rather than piling it onto the buns.
Variations
- Chocolate filling: combine the chocolate milk powder and cocoa powder with their listed butter and sugar for a chocolate option.
- Cheddar filling: use the cheddar and milk powder with their listed butter and sugar for a savoury-sweet centre.
- One colour: leave the food colouring out and proof the dough as a single batch.
- Mixed colours: divide the dough into several portions and colour each one differently.
- Plain buns: omit the filling and shape the dough into balls before the final proof.
Common mistakes to avoid
- Adding butter too early: wait until a dough has formed, then add the butter and salt as directed.
- Skipping the knead: knead for about 20 minutes so the dough is thoroughly worked.
- Leaving dough uncovered: cover it during proofing and the 10-minute rest to prevent a dry surface.
- Overfilling: keep to 1 tsp of filling per portion so the dough can be shaped around it.
- Using a cold proofing spot: choose a warm place within the recipe's stated 24–36°C range.
How to store
Once cool, store the buns in an airtight container at room temperature and eat within 2 days. Rewarm briefly in a low oven, or microwave for a few seconds, until soft.
Frequently asked questions
How warm should the dough be while it proofs?
The recipe gives a warm-place range of 24–36°C. Keep the dough covered while it proofs.
How much filling goes in each bun?
The method specifies 1 tsp of filling per piece of dough.
How long should the dough be kneaded?
Knead it for about 20 minutes with a mixer or by hand, after adding the butter and salt.
Can I leave out the food colouring?
Yes. It is optional, so you can make uncoloured buns or divide the dough and colour only some portions.
How long do the buns bake?
Bake them at 150°C for about 20 minutes. The recipe does not provide another specific doneness test.
Cook it from the original
This recipe comes from fooooods.com. Their page has the author’s own photos, notes and tips — the best place to cook it from.
Open the recipe on fooooods.com