
Homemade Rustic Whole Wheat Bread Recipe
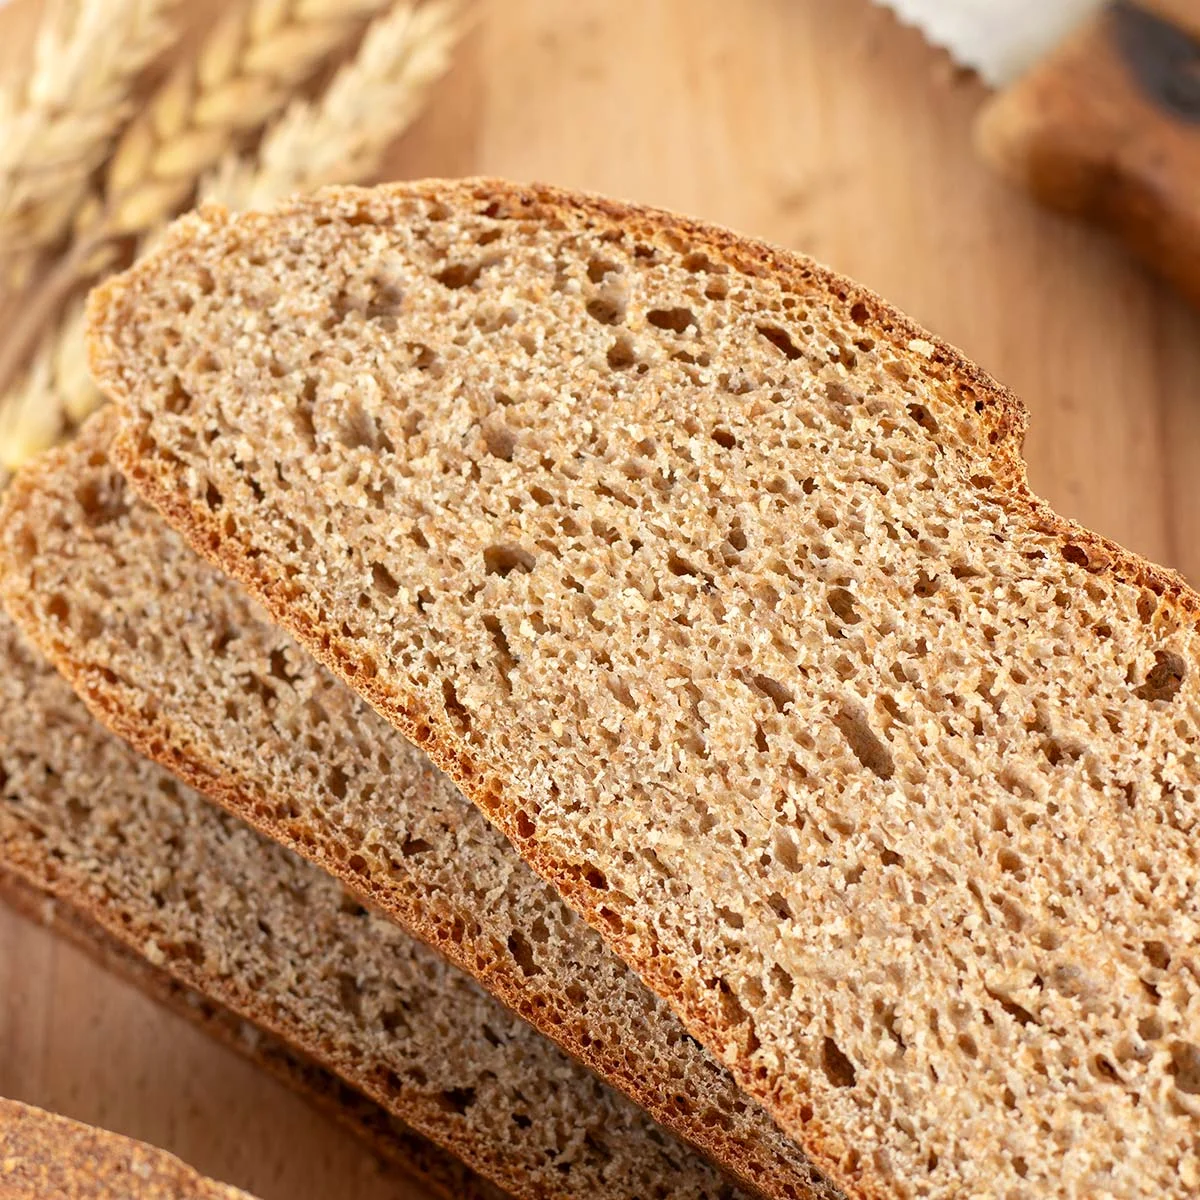
This rustic whole wheat loaf is a simple, dairy-free bread with a soft, chewy crumb and a hearty flavour. It needs just five pantry ingredients and can be made without a bread machine or Dutch oven.
Ingredients
- 360 ml (1½ cups)lukewarm water
- 420 g (3½ cups)wholemeal flour
- 7 g (2¼ teaspoons)instant yeast
- 5 g (1 teaspoon)salt
- 4 g (1 teaspoon)sugar
Instructions
- 1
Activate the yeast
In a large bowl, combine the lukewarm water, instant yeast, salt and sugar. Leave for 5 minutes, until frothy, which indicates that the yeast is active.
- 2
Make the dough
Stir in the flour gradually until a shaggy dough forms. Turn it out onto a floured surface and knead for 5 minutes, until smooth and elastic. Shape the dough into a ball, return it to the bowl, and cover with plastic wrap and a kitchen towel.
- 3
Let it rise
Leave the covered dough at room temperature until it has doubled in size, about 2–3 hours. It should look bubbly and feel soft.
- 4
Shape the loaf
Punch down the dough and knead for 2 minutes, then shape it into a ball. Set it in a parchment-lined 20 cm (8-inch) round pan, cut an X on top, cover, and leave to rise for 15 minutes.
- 5
Bake the bread
Preheat the oven to 250°C (480°F). Bake the loaf for 15 minutes, then reduce the oven to 150°C (300°F) and bake for a further 35 minutes, until firm.
- 6
Cool before slicing
Remove the loaf from the pan, wrap it in a clean towel, and leave it to cool on a rack or wooden surface for at least 20 minutes before slicing.
What is rustic whole wheat bread?
Rustic whole wheat bread is a simple, round loaf made with wholemeal flour, yeast, water, salt and a little sugar. Its unadorned shape and hearty grain flavour make it a home-baking staple rather than a bread tied to one particular regional tradition.
This version uses a two-stage rise and a cross cut on top, giving the dough time to develop while keeping the method straightforward. The result is a soft, chewy loaf with a firm crust.
Nutrition and macros by portion
The nutrition label shows one serving as written: 153 calories, 7g protein, 32g carbs, 1g fat.
| Portion | Adjustment | kcal | Protein | Carbs | Fat |
|---|---|---|---|---|---|
| Lighter | Serve a thinner slice | 107 kcal | 5g | 22g | 1g |
| This serving | As written | 153 kcal | 7g | 32g | 1g |
| Hungry | Serve a larger slice | 230 kcal | 11g | 48g | 2g |
The flour provides most of the carbohydrates and much of the protein, while the small amounts of yeast and other ingredients contribute relatively little fat. Pair a slice with a protein-rich topping and vegetables, or serve it alongside a meal with beans or lentils.
Why wholemeal flour matters
Wholemeal flour retains the grain’s bran and germ, giving the loaf a fuller flavour and a denser feel than bread made with white flour. It also absorbs plenty of water, so the dough may seem more substantial as you knead it.
Water first: the recipe’s 360 ml helps bring the flour together into a workable dough. Add the flour gradually as directed, and aim for a cohesive, slightly tacky dough rather than a dry one.
Getting the yeast started
Lukewarm water helps the yeast begin working; water that feels hot can hinder it. The five-minute rest should leave the mixture looking frothy, as the method describes.
Instant yeast: it is mixed directly into the water with the salt and sugar here. If the mixture does not become frothy, check that the yeast is still active before continuing.
Kneading and the first rise
Knead for the full 5 minutes, until the dough feels smoother and more elastic. A floured work surface helps prevent sticking, but too much extra flour can make the finished loaf dry.
Rise cues: the dough should roughly double in size and look bubbly and soft. The stated 2–3 hours is a guide; the dough’s appearance is the useful check.
Shaping and scoring
After the first rise, punching down and kneading for 2 minutes redistributes the dough before shaping. Form a neat ball and place it in the parchment-lined 20 cm pan for its short second rise.
The X cut gives the loaf a deliberate rustic finish. Make the cut before covering the dough for its 15-minute rise, as the method specifies.
Baking in two stages
The loaf starts in a hot 250°C oven for 15 minutes, then continues at 150°C for 35 minutes. This two-temperature bake is the recipe’s main timing detail, so reduce the heat after the first stage.
Firmness is the stated doneness cue. Once baked, let the bread cool for at least 20 minutes before slicing so the crumb can settle.
Serving the loaf
Serve slices with soup, a salad or a savoury spread for a simple meal. The loaf is also handy for toast or sandwiches once fully cooled.
For easier slicing, use a serrated bread knife and cut with a gentle sawing motion. If serving warm, allow the loaf its full cooling time first, as directed.
Recipe notes & tips
- Use water that feels lukewarm rather than hot when mixing the yeast.
- Measure the flour carefully so the dough does not become unnecessarily dry.
- Knead until the dough feels smooth and elastic, as directed.
- Watch for the dough to double rather than relying only on the clock during the first rise.
- Line the round pan with parchment before shaping the loaf.
- Let the loaf cool for at least 20 minutes before cutting.
Variations
- Seeded crust: scatter seeds over the loaf before baking.
- Herb flavour: mix dried herbs into the flour before adding it to the water.
- Garlic note: add a little garlic powder to the dry ingredients.
- Smaller slices: cut the cooled loaf into thinner pieces for toast or sandwiches.
Common mistakes to avoid
- Water too hot: use lukewarm water so it does not hinder the yeast.
- Skipping the yeast check: wait 5 minutes and look for froth before mixing in the flour.
- Adding too much flour: stir it in gradually and stop when a shaggy dough forms.
- Rushing the first rise: wait until the dough has doubled and looks bubbly.
- Forgetting the temperature change: lower the oven to 150°C after the first 15 minutes.
- Slicing too soon: cool the loaf for at least 20 minutes before cutting.
How to store
Once completely cool, store the loaf wrapped or in an airtight bread container at room temperature for a few days. Rewarm slices in a toaster or warm oven; freeze sliced bread for longer storage and toast from frozen.
Frequently asked questions
Can I use active dry yeast instead of instant yeast?
The recipe specifies instant yeast. If substituting active dry yeast, follow the guidance on its packaging for activation and equivalent quantity.
How do I know when the first rise is complete?
The dough should have doubled in size and look bubbly and soft. The recipe estimates 2–3 hours at room temperature.
What size pan does this recipe use?
Use an 20 cm (8-inch) round pan lined with parchment.
Why is the oven temperature lowered during baking?
The method begins with 15 minutes at 250°C, then lowers the oven to 150°C for another 35 minutes. Follow both stages and use firmness as the stated doneness cue.
Can I slice the bread while it is hot?
It is best to follow the recipe’s cooling step and wait at least 20 minutes before slicing.
Is this loaf suitable for vegans?
The listed ingredients are plant-based and contain no dairy or other animal-derived ingredients.
Cook it from the original
This recipe comes from goeatgreen.com. Their page has the author’s own photos, notes and tips — the best place to cook it from.
Open the recipe on goeatgreen.com