
Mexican Sopes: A Beginner-Friendly Guide to a Flavorful Dish
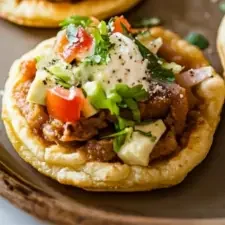
Sopes are small, thick corn masa bases with a raised edge, ready to hold your favourite toppings. This beginner-friendly version keeps the dough simple and offers frying or baking as cooking options.
Ingredients
- 240 g (2 cups)masa harina (corn flour for tortillas and other dough-based dishes)
- 5 g (1 teaspoon)fine salt
- 360 ml (1½ cups), plus extra as neededwarm water
- 240–480 ml (1–2 cups)vegetable oil, for frying, or cooking spray for baking
- As neededcooking spray, for the baking method
Instructions
- 1
Prepare the dough
Combine the masa harina and fine salt, then add 360 ml of warm water and mix to form a dough. Add a little extra water as needed.
- 2
Knead the dough
Knead the masa dough until it holds together and feels smooth.
- 3
Divide and shape
Divide the dough into portions and shape each one into a ball.
- 4
Press the sopes
Press each ball into a thick, round sope.
- 5
Cook the bases
Cook the shaped sopes before forming their rims.
- 6
Shape the rims
While the sopes are warm, pinch around each edge to form a raised rim.
- 7
Fry or bake
For frying, heat the vegetable oil in a large frying pan over medium-high heat. Fry 2 or 3 sopes at a time, turning them frequently for about 2 minutes, until light golden brown. Drain on kitchen paper. For baking, heat the oven to 200°C (400°F), place the sopes on a baking tray, lightly coat them with cooking spray and bake for 5 minutes, or until crisp and golden.
What are sopes?
Sopes are a Mexican dish made from masa, the dough used for corn tortillas. Their thick, round bases and pinched-up edges create a little well for toppings.
This version focuses on the corn base rather than prescribing a filling, so you can finish it with toppings you enjoy. The option to fry or bake makes the method adaptable to your kitchen.
Nutrition and macros by portion
The nutrition label shows one serving as written: 245 calories, 4g protein, 31g carbs, 12g fat.
| Portion | Adjustment | kcal | Protein | Carbs | Fat |
|---|---|---|---|---|---|
| Lighter | Bake with cooking spray | 172 kcal | 2g | 22g | 8g |
| This serving | As written | 245 kcal | 4g | 31g | 12g |
| Hungry | Add another sope | 368 kcal | 5g | 47g | 18g |
Masa harina provides most of the carbohydrates, while vegetable oil contributes most of the fat; the dough itself offers only a modest amount of protein. Pair a sope or two with a generous serving of vegetables and a protein-rich topping for a more balanced plate.
Masa and water
Masa harina: this specially prepared corn flour is the foundation of the dough; it is not the same as ordinary cornflour or cornmeal.
Warm water: mix it in gradually and add extra only if the dough needs it. The mixture should hold together well enough to shape.
Shape the raised edge
Thick bases: press the portions into rounds that are sturdy enough to hold toppings. Very thin rounds will be harder to shape into the characteristic rim.
Pinched rim: form the edge while the sopes are warm and manageable. Work around each one so the raised border encloses the centre.
Choose a cooking method
Frying: cook 2 or 3 at a time in hot vegetable oil, turning frequently for about 2 minutes. Drain them on kitchen paper to remove excess oil.
Baking: spray the sopes lightly and bake at 200°C for 5 minutes, until crisp and golden. Keep an eye on them as they approach the end of the cooking time.
Check the texture
Look for a light golden colour when frying, or a crisp, golden surface when baking. The recipe gives these visual cues rather than a specific internal temperature.
If frying, avoid crowding the pan: cooking just 2 or 3 at once makes it easier to turn the sopes frequently.
Add toppings and serve
Let the bases drain or cool briefly, then add toppings to the centre without covering the raised edge completely. The description suggests juicy meats, crisp vegetables and creamy toppings as options.
Serve them soon after cooking, while the bases are crisp. Prepare the toppings separately so each person can customise their own.
Recipe notes & tips
- Add the extra water gradually so the dough does not become too wet to shape.
- Keep the sopes thick enough to form a raised edge.
- Pinch the rims while the bases are warm.
- Fry only 2 or 3 sopes at a time and turn them frequently.
- Drain fried sopes on kitchen paper before adding toppings.
- For the baked option, use a light coating of cooking spray.
Variations
- Meaty topping: add cooked, juicy meat to the centre before serving.
- Crisp vegetables: top with chopped crunchy vegetables for contrast.
- Creamy finish: add a creamy topping just before serving.
- Mixed toppings: combine meat, vegetables and a creamy element to suit your taste.
Common mistakes to avoid
- Adding water too quickly: mix it in gradually and add more only as needed.
- Making the bases too thin: press them into thick rounds so they can hold a rim and toppings.
- Pinching cold dough: form the edges while the sopes are still warm and easy to shape.
- Crowding the frying pan: cook 2 or 3 at a time so you can turn them frequently.
- Skipping the drain: rest fried sopes on kitchen paper to remove excess oil.
How to store
For the best texture, serve the sopes soon after cooking. If you have leftovers, refrigerate them in an airtight container and reheat in an oven until warm and crisp; keep toppings separate where possible.
Frequently asked questions
Can I bake the sopes instead of frying them?
Yes. Lightly spray them and bake at 200°C for 5 minutes, or until crisp and golden.
How many sopes should I fry at once?
Fry 2 or 3 at a time in a large frying pan, turning them frequently.
How do I know when the fried sopes are ready?
They should be light golden brown after about 2 minutes, with frequent turning.
Can I add more water to the dough?
Yes. The recipe allows extra water as needed; add it gradually while mixing so the dough stays shapeable.
What can I put on top?
The recipe description suggests juicy meats, crisp vegetables and creamy toppings. Add toppings to the centre, inside the raised rim.
Cook it from the original
This recipe comes from carlarecipes.com. Their page has the author’s own photos, notes and tips — the best place to cook it from.
Open the recipe on carlarecipes.com