
Medovik Tort Russian Honey Layer cake
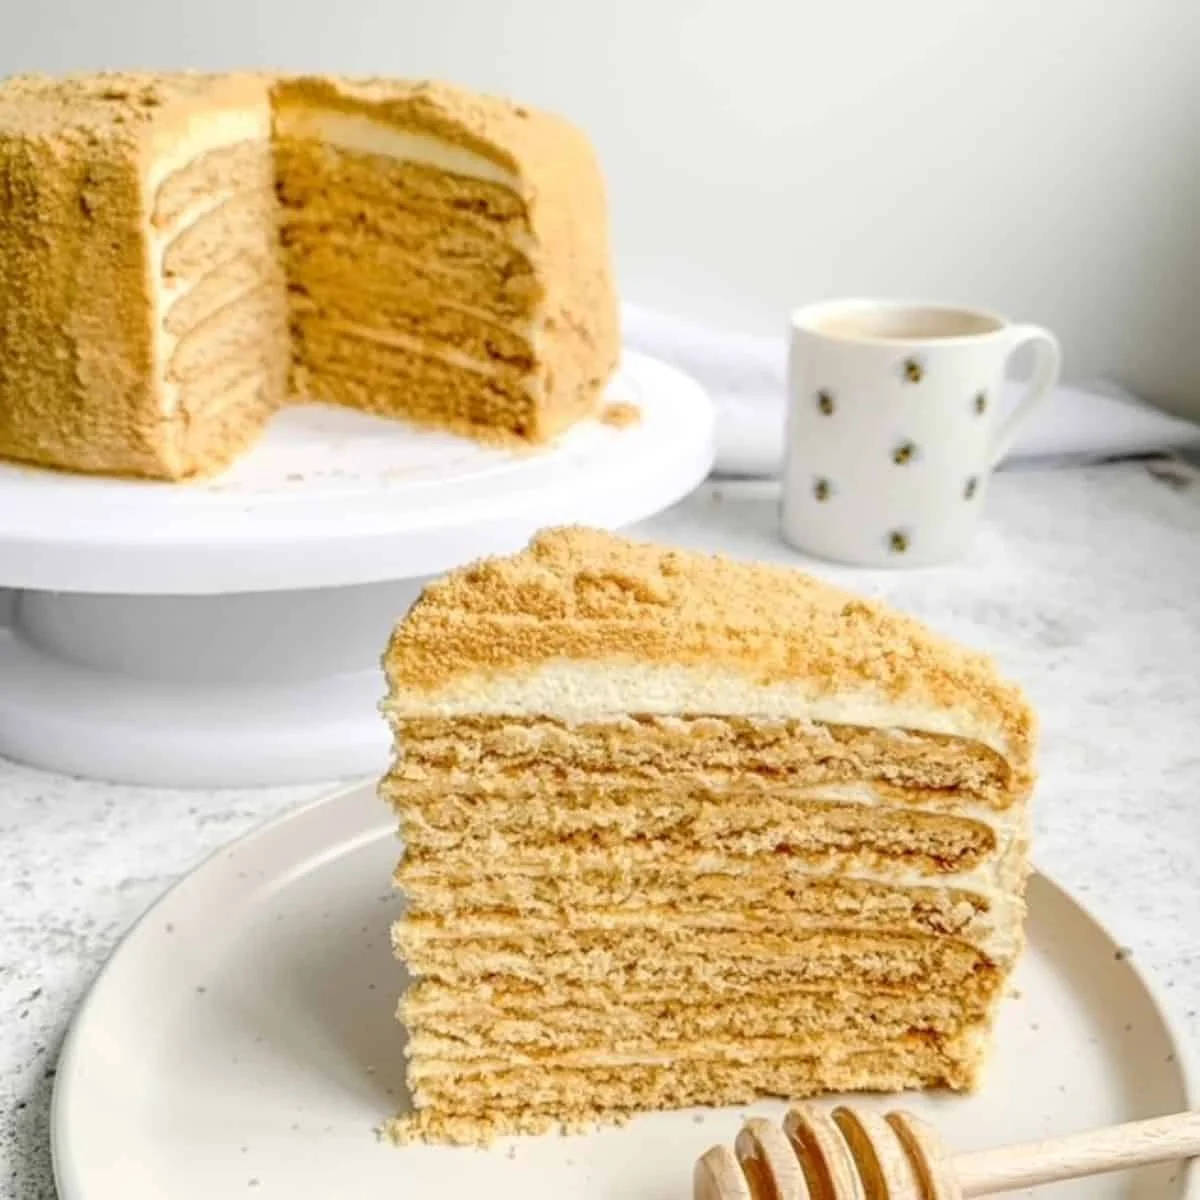
This Medovik tort Russian honey layer cake is a unique birthday or celebration cake. Layered with thin honey cakes and whipped sour cream frosting makes for a deliciously soft and satisfying cake.
Ingredients
- 150 grams White Sugar
- 100 grams Unsalted butter
- 5 Tablespoons Honey
- 3 Large Eggs ((Room Temperature))
- 500 grams Gluten free all-purpose flour
- 1 Teaspoon Baking Soda ((Bicarb of soda))
- 600 ML Heavy whipping cream ((Double cream))
- 200 ML Sour cream
- 200 grams Powdered sugar - Sieved ((Icing sugar))
- 1 Teaspoon Vanilla extract
Instructions
- 1
--- How to make the cake layers ---
- 2
Make a bain-marie with a pan of shallow hot water on low heat with a larger glass bowl on top. (Do not bring the water to the boil)
- 3
Add the butter and sugar into the bowl and stir until butter has melted. Then remove the bowl from the heat and allow it to rest for a few minutes to cool slightly.
- 4
In a small bowl beat the eggs and honey together. Add the eggs and honey mixture to the cooled butter and sugar mixture whisking well. Be sure that the butter and sugar mixture isn't too warm before adding the eggs as you don't want the eggs to scramble.
- 5
Gradually fold in the flour and baking soda to the mixture a few tablespoons at a time. Continue folding until you have a sticky dough mixture. Cover the bowl with plastic wrap and place in the refrigerator for 30 minutes.
- 6
Remove the bowl from the fridge and pour the dough onto plastic wrap and wrap well and place back in the refrigerator for 1 hour.
- 7
Remove the dough from the refrigerator and divide it evenly into 6 pieces and wrap the pieces individually. If the dough is still very sticky place the wrapped dough balls back in the refrigerator for a further 30 minutes.
- 8
Preheat the oven to 180°C/350°F/Gas mark 4
- 9
With a rolling pin roll a dough ball ontop of parchment paper into a thin 8inch circle until around 1/8 inch thick.
- 10
TIP: By rolling the dough on top of parchment paper and covering it with plastic wrap prevents the dough from sticking without the need to use extra flour. This prevents the dough from drying out. See instruction photos.
- 11
Place a plate or the bottom of a round baking tin on top of the rolled dough. (I used a lipped plate and pressed down firmly to make the cut). Trace and cut with a sharp knife into a circle and remove and scrape away the scraps but save them for later. Then evenly pierce the top of the dough with a fork.
- 12
Place the parchment paper with the circle onto a baking tray and place in the oven for around 5-7 minutes until the dough is golden brown. Remove from the oven and place on a cooling rack.
- 13
Make the next circle following the same instructions while the previous circle is in the oven.
- 14
Once all 6 circles have been baked and are cooling. Roll out the scraps on a baking sheet and bake in the oven. Once cooled place in a food processor or food bag and beat with the rolling pin till it resembles crumbs. This will become the crumbs for decorating. Leave all the layers to fully cool before making the cream frosting.
- 15
--- How to make sour cream frosting ---
- 16
In a large bowl or electric stand mixer whisk the heavy whipping cream, sour cream, and vanilla together until fully combined. (2-3 minutes)
- 17
Gradually add powdered sugar until the frosting is smooth, thick, and forms small peaks.
- 18
--- Assembling the Medovik tort ---
- 19
Stack the cake layers with cream layers. Spreading evenly around 4-5 tablespoons of frosting between each layer.
- 20
Once all layers are stacked check that they are straight and then cover the top and sides with the remaining cream frosting evenly.
- 21
Decorate the full cake with the crumb mixture and place it in the refrigerator to rest overnight. As Medovik cake is best served after 24 hours as this allows all the layers to soak in that delicious sour cream frosting.
Cook it from the original
This recipe comes from glutenfreetranquility.com. Their page has the author’s own photos, notes and tips — the best place to cook it from.
Open the recipe on glutenfreetranquility.com