
Italian Bread Recipe: Crusty and Airy
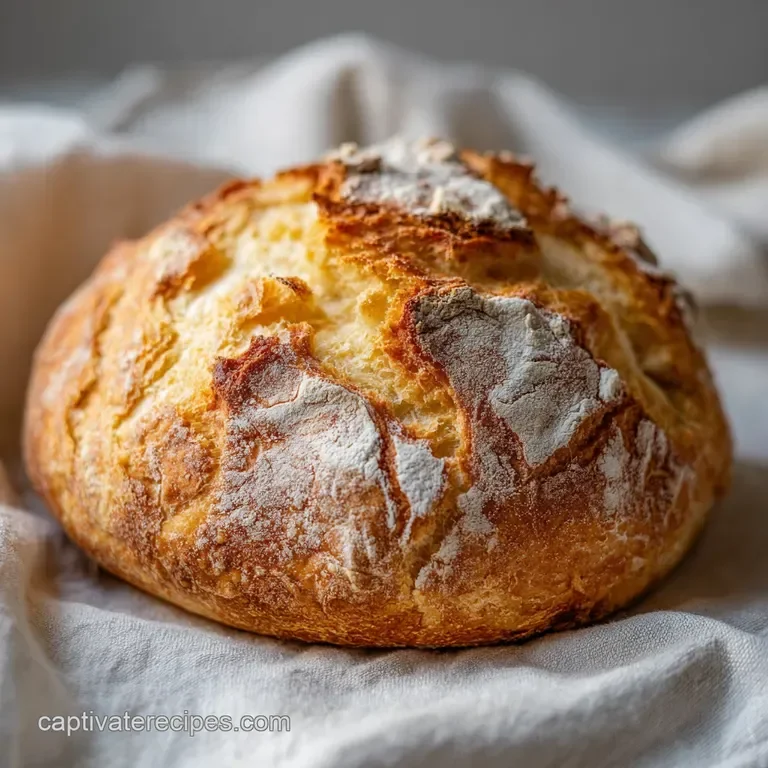
This Italian-style loaf has a crisp, deeply browned crust and a soft, airy centre. A Dutch oven traps steam during the first part of baking, helping the bread rise before its crust sets.
Ingredients
- 375 g (3 cups)all-purpose flour
- 235 ml (1 cup)warm water
- 7 g (2 1/4 tsp)active dry yeast
- 5 g (1 tsp)granulated sugar
- 9 g (1 1/2 tsp)fine sea salt
- 30 ml (2 tbsp)extra virgin olive oil
- 15 ml (1 tbsp)water
- 1 g (1 pinch)cornmeal
Instructions
- 1
Wake the yeast
In a mixing bowl, combine the warm water, sugar and yeast. Leave for 5–10 minutes, until the mixture looks foamy.
- 2
Mix the dough
Stir in the olive oil and salt, then add the flour gradually, one cup at a time, until a shaggy dough forms.
- 3
Knead until smooth
Turn the dough onto a floured surface and knead by hand for 5–7 minutes, until smooth and elastic and it passes the windowpane test.
- 4
Let it rise
Put the dough in a lightly oiled bowl, cover with a damp towel and leave in a warm spot for 60–90 minutes, until doubled in size.
- 5
Shape the loaf
Gently punch down the dough to release air pockets. Shape it into an oval log, building tension across the surface.
- 6
Proof once more
Set the loaf on parchment paper, cover it loosely and leave to rise for another 30–45 minutes.
- 7
Heat the oven
Preheat the oven to 230°C (450°F), with a Dutch oven inside.
- 8
Score the dough
Use a sharp knife to make three deep diagonal slashes across the top of the dough.
- 9
Bake covered
Lift the parchment and dough into the hot Dutch oven, put on the lid and bake for 20 minutes.
- 10
Brown the crust
Remove the lid and bake for another 20–25 minutes, until the crust is deep mahogany brown.
What is Italian bread?
Italian bread is a broad family of loaves rather than one single formula, often served alongside meals or used for sandwiches. This version is shaped as an oval loaf and baked until its crust is crisp and richly coloured.
The method combines familiar bread-making stages—yeast fermentation, kneading and proofing—with a Dutch oven. Its covered start helps create the conditions for a well-risen loaf before the uncovered bake colours the crust.
Nutrition and macros by portion
The nutrition label shows one serving as written: 117 calories, 3g protein, 21g carbs, 2g fat.
| Portion | Adjustment | kcal | Protein | Carbs | Fat |
|---|---|---|---|---|---|
| Lighter | Smaller bread portion | 82 kcal | 2g | 14g | 2g |
| This serving | As written | 117 kcal | 3g | 21g | 2g |
| Hungry | Larger bread portion | 176 kcal | 4g | 31g | 3g |
The flour supplies most of the carbohydrates, while olive oil contributes fat; the yeast and flour provide some protein. Pair a slice with a protein-rich main and vegetables, or serve alongside a balanced meal.
Why the ingredients matter
Yeast and sugar: warm water helps the active dry yeast get started, while the small amount of sugar is included in the foaming mixture. Give it 5–10 minutes and check for visible foam before moving on.
Flour and salt: flour forms the structure of the loaf, and salt seasons the dough. Add the flour gradually, as directed, so you can stop once the mixture comes together as a shaggy dough.
Olive oil: the oil is mixed into the dough and also used to lightly coat the rising bowl. Keep the bowl coating light so the dough can be handled without sticking excessively.
Kneading and the windowpane test
Knead on a floured surface for 5–7 minutes, working the dough until it feels smoother and more elastic. Use only enough flour on the surface to manage the dough; too much extra flour can make it firmer.
For the windowpane test, gently stretch a small piece of dough. It should stretch thinly before tearing; if it breaks straight away, continue kneading and test again.
Proofing and shaping
First rise: keep the covered bowl in a warm spot for 60–90 minutes and look for the dough to double in size. The visual cue is more useful than rushing to a set time.
Shape: after gently pressing out the larger air pockets, form the dough into an oval log. Creating tension across the surface helps the loaf hold its shape as it rises.
Second rise: leave the shaped loaf covered loosely for 30–45 minutes. Handle it gently afterwards so it keeps as much of its risen volume as possible.
The Dutch oven bake
Preheating the Dutch oven inside the oven makes it hot when the loaf goes in. Use oven-safe care when lifting the parchment and dough into the pot.
Bake covered for 20 minutes, then uncover and continue for 20–25 minutes. The recipe's key doneness cue is a deep mahogany-brown crust.
Scoring and crust
Make three deep diagonal slashes with a sharp knife just before baking. Scoring gives the loaf planned places to expand as it bakes.
Aim for clear cuts without pressing down hard enough to deflate the dough. The crust should be deeply browned after its uncovered bake, not merely pale gold.
Serving the loaf
Let the bread cool before slicing so the centre has time to settle. Serve it with soup, a salad or a main dish, or slice it for sandwiches.
The listed cornmeal can be used on the parchment beneath the loaf to help limit sticking. Brush away any excess after baking if it clings to the base.
Recipe notes & tips
- Check that the yeast mixture is foamy after 5–10 minutes before adding the remaining ingredients.
- Add the flour a cup at a time and stop when the dough is shaggy rather than dry.
- Use the dough's doubled size as the cue for the first rise, within the stated 60–90-minute range.
- Score the loaf just before baking with a sharp knife for clean diagonal cuts.
- Use oven gloves when handling the preheated Dutch oven and its lid.
- For the deepest colour, follow the visual cue and continue the uncovered bake until the crust is mahogany brown.
Variations
- Herb aroma: mix dried Italian herbs into the dough with the flour.
- Garlic flavour: add finely chopped garlic to the dough when stirring in the olive oil and salt.
- Seeded top: scatter seeds over the loaf before baking, pressing them on gently.
- Sandwich loaf: shape the dough into a longer log for narrower slices.
- Olive version: fold chopped, well-drained olives into the dough as the flour is added.
Common mistakes to avoid
- Inactive yeast: if the mixture does not foam after 5–10 minutes, check the yeast before continuing.
- Too much flour: adding it all at once can leave a stiff dough; incorporate it gradually as directed.
- Under-kneading: dough that tears quickly in the windowpane test needs more kneading.
- Rushed proofing: shape only after the dough has doubled during its first rise.
- Rough handling: pressing hard after the second rise can deflate the loaf; transfer it gently.
- Pale crust: removing the loaf too soon can leave it under-coloured; bake uncovered until deep mahogany brown.
How to store
Once completely cool, store the loaf in a bread bag or wrapped at room temperature and use within 2–3 days for the best texture. Reheat slices in a toaster or warm the loaf in the oven until heated through. Freeze well-wrapped portions for longer storage and thaw before reheating.
Frequently asked questions
How do I know the yeast is active?
After 5–10 minutes in the warm water and sugar, the mixture should look foamy. If it stays flat, check that the yeast is fresh before making the dough.
What does the windowpane test mean?
Stretch a small piece of dough gently between your fingers. If it can become thin before tearing, it is elastic enough; if it tears quickly, knead for a little longer.
Can I make this without a Dutch oven?
The method specifies a Dutch oven, which provides a covered baking environment. Without one, the loaf may not develop the same crust, so use an oven-safe covered pot only if it is suitable for 230°C.
How long should the dough rise?
The first rise is 60–90 minutes, until the dough has doubled. The shaped loaf then rises for another 30–45 minutes.
When is the bread ready?
Bake it covered for 20 minutes, then uncovered for 20–25 minutes. The recipe's doneness cue is a deep mahogany-brown crust.
Why is my crust not very crisp?
Make sure the oven and Dutch oven are preheated, and complete the uncovered bake until the crust reaches the stated deep colour. Let the loaf cool before storing it, so trapped warmth does not soften the crust.
Cook it from the original
This recipe comes from captivaterecipes.com. Their page has the author’s own photos, notes and tips — the best place to cook it from.
Open the recipe on captivaterecipes.com