
Baked Falafel Pita with Tahini
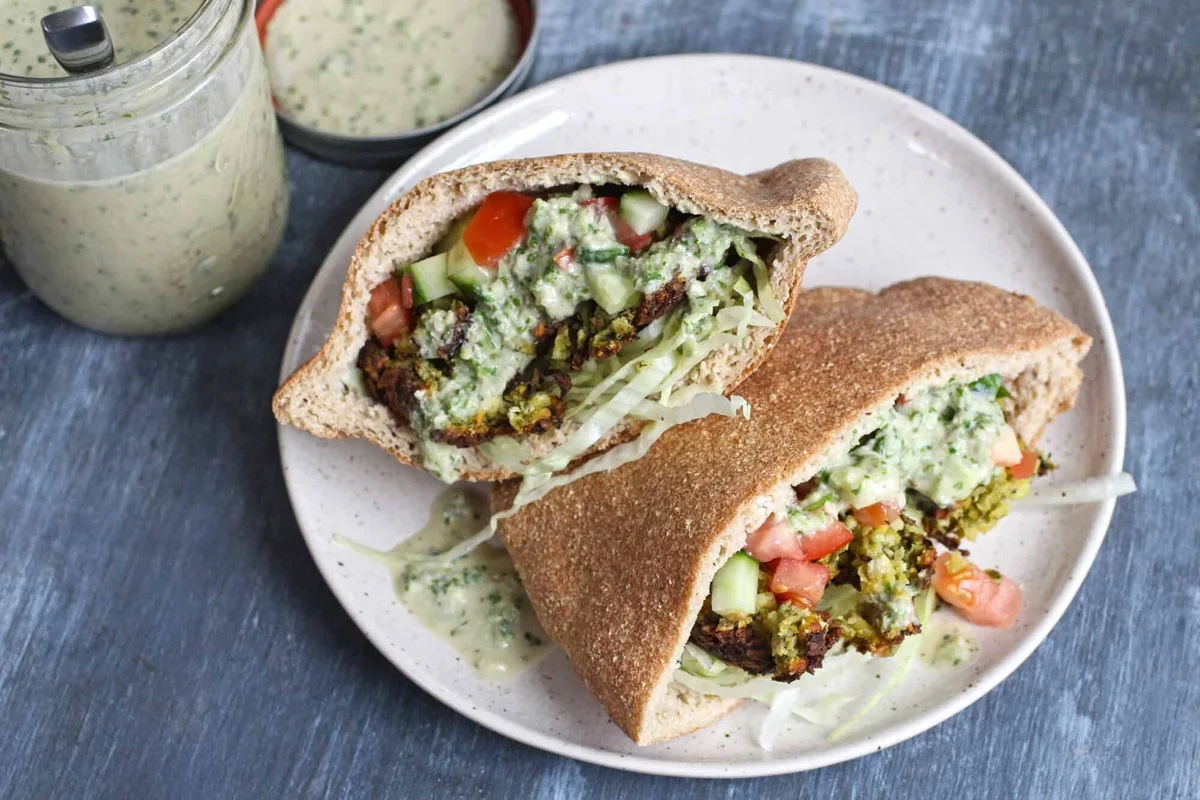
Baked falafel and fresh salad are tucked into homemade pita rounds and finished with a punchy tahini sauce. The falafel bake in a muffin tin rather than being fried, making this a practical sandwich to prepare at home.
Ingredients
- 1 packed cup (about 120 g)Warrior Bread mix
- 1egg white
- 240 ml (1 cup)water
- 15 ml (1 tbsp)apple cider vinegar
- 200 g (1 cup)dried chickpeas
- 60 g (2 cups)spinach
- 15 g (¼ cup)parsley
- 2garlic cloves, sliced
- ½ smallonion, chopped
- 1 tspcumin
- 1 tspcoriander
- 15 ml (1 tbsp)red vinegar
- 1 pinchsalt and pepper
- 120 g (½ cup)tahini paste
- 40 g (¼ cup)cucumber, diced
- 1garlic clove, sliced
- 2jalapeños (optional)
- Juice of 1lemon
- 15 g (¼ cup)parsley
- 1 pinchsalt and pepper
- To tasteshredded lettuce
- To tastecucumber, diced
- To tastetomato, diced
Instructions
- 1
Soak chickpeas
Cover the dried chickpeas with water and leave them to soak overnight.
- 2
Heat the oven
Preheat the oven to 190°C (375°F).
- 3
Mix pita dough
Beat the egg white with the water and apple cider vinegar. Pour into a bowl with the Warrior Bread mix and stir until combined.
- 4
Divide the dough
Split the dough in half and place both portions on a sheet of baking parchment.
- 5
Roll the rounds
Cover with another sheet of parchment and roll the portions into two rounds, each about 20 cm (8 inches) across and 6 mm (¼ inch) thick.
- 6
Bake the pita
Remove the top sheet of parchment and bake for 35 minutes. Take the rounds out of the oven.
- 7
Blend the tahini
Put all the tahini ingredients in a food processor and process until combined and no large pieces remain. Refrigerate the sauce until ready to use.
- 8
Keep processor ready
Scrape the tahini mixture out of the food processor; there is no need to wash it.
- 9
Pulse the falafel
Drain and rinse the chickpeas, then add them to the processor with the falafel ingredients. Pulse to combine, continuing for about 30–50 pulses, until the chickpeas are mostly broken down and the coarse mixture holds together when squeezed.
- 10
Prepare the tin
Preheat the oven to 180°C (350°F). Brush a muffin tin with a little olive oil.
- 11
Bake the falafel
Put about 2 tablespoons of chickpea mixture into each muffin well and press lightly. Bake for 20 minutes, until browned.
- 12
Remove falafel
Take the falafel out of the tin.
- 13
Open the pita
Cut each pita in half, then use a knife to open the centre of each half.
- 14
Fill and serve
Fill each pita half with lettuce, tomato, cucumber and falafel, then spoon over the tahini sauce.
What is baked falafel pita?
Falafel is a Middle Eastern dish of seasoned chickpeas, commonly shaped into balls or patties and served with bread and sauce. This version bakes the mixture in a muffin tin and pairs it with pita, fresh vegetables and tahini.
The chickpeas are soaked overnight and pulsed rather than blended smooth, helping the falafel mixture stay coarse. The herb-filled tahini and crisp toppings bring freshness and contrast to the sandwich.
Nutrition and macros by portion
The nutrition label shows one serving as written: 510 calories, 20g protein, 58g carbs, 23g fat.
| Portion | Adjustment | kcal | Protein | Carbs | Fat |
|---|---|---|---|---|---|
| Lighter | More salad, less tahini | 357 kcal | 14g | 41g | 16g |
| This serving | As written | 510 kcal | 20g | 58g | 23g |
| Hungry | Add another falafel | 765 kcal | 30g | 87g | 35g |
The chickpeas and pita mix provide most of the carbohydrates, while tahini contributes much of the fat and some protein. Chickpeas also add protein, though the exact balance depends on the Warrior Bread mix; serve with extra lettuce and cucumber for a fresh side.
The chickpea mixture
Soaked chickpeas: use dried chickpeas as listed, rather than cooked or tinned ones. Drain and rinse them well before processing.
Pulse gently: stop when the mixture is coarse and holds together when squeezed. A smooth paste will give the falafel a denser texture.
Shaping and baking
Muffin tin: a little olive oil helps prevent sticking, and the wells keep the portions compact as they bake. Add about 2 tablespoons of mixture to each spot and press it down lightly.
Browning: bake for 20 minutes at 180°C (350°F), until the falafel are browned. If they are not ready at that point, use the visible browning cue rather than relying on colour alone.
The pita rounds
Parchment: rolling between two sheets makes the dough easier to handle. Aim for two even rounds about 20 cm across and 6 mm thick.
Baking time: the pita rounds bake for 35 minutes at 190°C (375°F). Let them come out of the oven before cutting and opening them for filling.
A smooth tahini sauce
Blend: process the tahini with cucumber, garlic, jalapeños if using, lemon, parsley, salt and pepper until no large pieces remain. The recipe gives no extra liquid, so stop once the ingredients are combined.
Make ahead: the sauce can wait in the fridge while you prepare the chickpeas and bake the falafel. Stir it before serving if it has settled.
Fresh toppings and serving
Fill each pita half with lettuce, tomato, cucumber and falafel, then add tahini sauce on top. Keep the salad ingredients ready so the sandwiches can be assembled just before eating.
Serve with extra salad or a simple vegetable side. The cool vegetables offset the warmly spiced falafel and creamy, tangy sauce.
Recipe notes & tips
- Soak the dried chickpeas overnight so they are ready to drain and process.
- Pulse in short bursts and check the texture often to avoid turning the falafel mixture into a paste.
- Measure the falafel mixture into the muffin tin for evenly sized portions.
- Keep the tahini sauce chilled while the pita and falafel bake.
- Open the pita carefully with a knife so each half can hold the fillings.
Variations
- Skip the heat: leave out the optional jalapeños for a milder tahini sauce.
- Extra lemon: add more lemon juice to the sauce if you prefer a sharper flavour.
- More herbs: increase the parsley in the falafel mixture for a greener, more herbal bite.
- Change the salad: add extra lettuce, cucumber or tomato to make the filling crunchier.
- Serve as a bowl: arrange the falafel, vegetables and tahini together without filling the pita.
Common mistakes to avoid
- Using cooked chickpeas: the recipe calls for dried chickpeas soaked overnight, so start with those for the intended coarse mixture.
- Over-processing: a smooth purée can make dense falafel; stop when the mixture is coarse and squeezable.
- Skipping the oil: brush the muffin tin with olive oil to help the falafel release.
- Packing the wells tightly: press the mixture down lightly rather than compacting it firmly.
- Cutting before the pita is ready: let the rounds finish their 35-minute bake before slicing and opening them.
How to store
Store the falafel, pita, sauce and chopped toppings separately in covered containers in the fridge, using within 3 days. Reheat the falafel in an oven until warmed through; assemble with the cold toppings and sauce just before serving. The pita is best warmed briefly before filling.
Frequently asked questions
Can I use tinned chickpeas?
The recipe specifies dried chickpeas soaked overnight, which give a different texture from cooked chickpeas. Tinned chickpeas may make the mixture much softer, so they are not a like-for-like swap.
Can I make the tahini sauce ahead?
Yes. Blend it and keep it covered in the fridge until the falafel and pita are ready.
How do I know when the falafel are done?
They are ready after about 20 minutes at 180°C (350°F), when browned.
Can I leave out the jalapeños?
Yes. They are optional, so you can omit them for a milder sauce.
How should I open the pita?
Cut each round in half, then carefully run a knife through the centre of each half to make a pocket.
Can I prepare the components separately?
Yes. Make the tahini sauce ahead and keep the falafel, pita and toppings separate until serving. This helps keep the salad fresh and the pita from becoming soggy.
Cook it from the original
This recipe comes from glutenfreesociety.org. Their page has the author’s own photos, notes and tips — the best place to cook it from.
Open the recipe on glutenfreesociety.org