
Instant Pot Dal Tadka
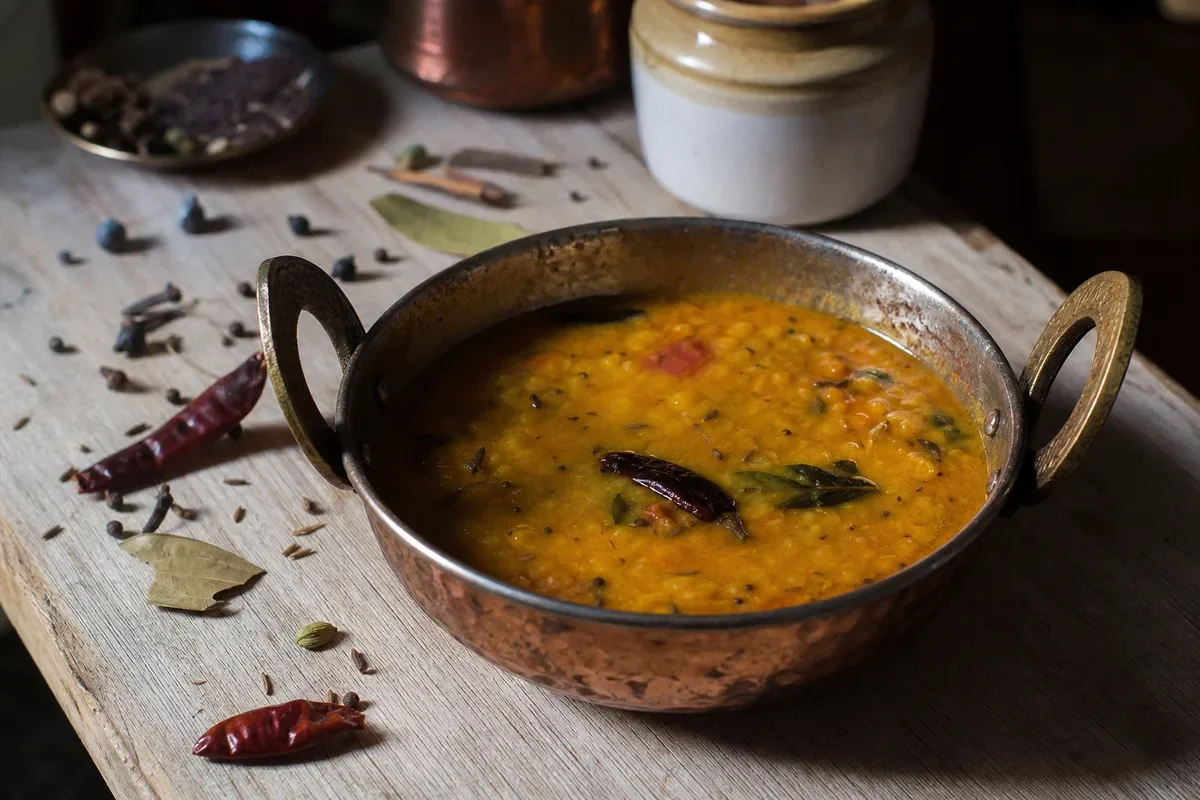
Instant Pot dal tadka pairs soft, creamy lentils with a fragrant, spiced oil poured over the top. It is a comforting Indian meal that comes together with pantry ingredients and can be served with rice or roti.
Ingredients
- 200 g (1 cup)split yellow moong dal or toor dal (arhar dal)
- 720 ml (3 cups)water
- 1 mediumonion, finely chopped
- 1 mediumtomato, finely chopped
- 2 clovesgarlic, minced
- 2.5 cm (1-inch piece)ginger, minced
- 1green chilli, slit (optional, for heat)
- 2.5 ml (1/2 tsp)ground turmeric
- 3.75 ml (3/4 tsp), or to tastesalt
- 30 ml (2 tbsp)ghee or neutral oil (use avocado or rapeseed oil for vegan)
- 5 ml (1 tsp)cumin seeds
- 2–3dried red chillies (or 2.5 ml (1/2 tsp) smoked paprika for mild heat)
- 2.5 ml (1/2 tsp)mustard seeds (optional)
- 1.25 ml (1/4 tsp)asafoetida (hing, optional; skip if gluten-free or unavailable)
- 6–8fresh curry leaves (optional, or substitute a bay leaf)
- 2.5 ml (1/2 tsp)red chilli powder (or cayenne, adjusted to taste)
- To garnishfresh coriander, chopped
- To servelemon wedges
Instructions
- 1
Rinse the lentils
Rinse the dal thoroughly, changing the water until it runs clear, then drain.
- 2
Combine the ingredients
Put the dal, 720 ml water, onion, tomato, garlic, ginger, green chilli, turmeric and salt in the Instant Pot. Stir to combine.
- 3
Pressure cook
Seal the lid and set the Instant Pot to Pressure Cook (Manual) on High for 8 minutes. Let the pressure release naturally for 10 minutes, then quick-release any remaining pressure.
- 4
Whisk until creamy
Open the lid and whisk the dal until creamy. Add hot water if you prefer a thinner consistency.
- 5
Make the tadka
Heat the ghee or oil in a small pan on the hob. Add the cumin seeds and let them splutter, then add the dried red chillies, mustard seeds, asafoetida and curry leaves. Fry for 30–45 seconds, until aromatic.
- 6
Pour over the dal
Stir the red chilli powder into the tadka, then immediately pour it over the hot dal. Mix well.
- 7
Garnish and serve
Finish with chopped coriander and a squeeze of lemon. Serve hot with rice or roti.
What is dal tadka?
Dal is a broad family of Indian dishes made with pulses, while tadka refers to spices briefly fried in hot fat to release their aroma. The finishing mixture is poured over the cooked lentils, bringing a vivid, fragrant accent to a mild, creamy base.
This Instant Pot version cooks the lentils with onion, tomato and aromatics, then adds a separate tadka at the end. That keeps the spice-infused oil distinct and lets you adjust the heat to taste.
Nutrition and macros by portion
The nutrition label shows one serving as written: 210 calories, 0g protein, 0g carbs, 0g fat.
| Portion | Adjustment | kcal | Protein | Carbs | Fat |
|---|---|---|---|---|---|
| Lighter | Use less tadka oil | 147 kcal | 0g | 0g | 0g |
| This serving | As written | 210 kcal | 0g | 0g | 0g |
| Hungry | Larger dal portion | 315 kcal | 0g | 0g | 0g |
The lentils provide most of the carbohydrates and plant protein, while ghee or oil supplies most of the fat. Serve a portion with vegetables or salad alongside rice or roti to round out the plate.
Choosing your lentils
Moong dal: Split yellow moong cooks into a soft, mild base that is easy to whisk creamy.
Toor dal: Split pigeon peas give the dish a heartier lentil character. Either option works here, but the finished texture can vary slightly, so use the whisking step to bring it together.
Build the flavour in two stages
In the pot: Onion, tomato, garlic, ginger, turmeric and green chilli cook with the lentils, giving the dal its savoury base. The green chilli is optional, so leave it out for a milder result.
In the pan: Cumin, dried chillies, mustard seeds, asafoetida and curry leaves bloom briefly in hot ghee or oil. Add the chilli powder last and pour the tadka over the dal straight away so it does not sit in the hot pan.
Get the texture right
After pressure cooking, whisk the lentils until the mixture looks creamy and cohesive. If it is thicker than you like, stir in hot water a little at a time.
The dal should be hot when you add the tadka, so its aromatic oil spreads through the dish as you mix. Keep the tadka ingredients moving and take the pan off the heat if they begin to darken too quickly.
Pressure-release timing
The recipe calls for 8 minutes on High, followed by a 10-minute natural release and then a quick release of the remaining pressure. Allow for the pressure cooker to come to pressure and release; the total time is not specified.
Do not open the cooker until it has depressurised. Once it is safe to open, whisk the dal and adjust its thickness before making the tadka.
Serving ideas
Serve the dal hot with rice or roti, as suggested in the recipe, and add lemon at the table for a bright finish. Chopped coriander makes a fresh garnish.
For a more rounded plate, serve it alongside a vegetable dish or a simple salad. The dal is also substantial enough to spoon over rice as a one-bowl meal.
Dietary and ingredient notes
For a vegan version, use neutral oil instead of ghee. Check the asafoetida label if avoiding gluten, as some products contain wheat; the recipe also says to omit it if gluten-free or unavailable.
The recipe lists curry leaves as optional, with a bay leaf as a substitute. Remove a bay leaf before serving.
Recipe notes & tips
- Rinse the lentils until the water runs clear to remove loose surface starch.
- Chop the onion and tomato finely so they combine readily with the cooked dal.
- Have the tadka ingredients ready before heating the oil, as the spices cook quickly.
- Add hot water gradually when thinning the dal so you can stop at your preferred consistency.
- Use oil rather than ghee for the vegan option.
- Check the asafoetida packaging if you need to avoid gluten.
Variations
- Adjust the heat: Omit the green chilli or reduce the red chilli powder for a milder dal.
- Try smoked paprika: Use 1/2 tsp in place of the dried red chillies for milder heat.
- Choose another lentil: Make the recipe with split yellow moong dal or toor dal as listed.
- Make it vegan: Replace the ghee with neutral oil, such as avocado or rapeseed oil.
- Use a substitute leaf: If curry leaves are unavailable, use a bay leaf and remove it before serving.
Common mistakes to avoid
- Skipping the rinse: Rinse until the water runs clear before draining the dal.
- Opening too early: Complete the 10-minute natural release before quick-releasing the remaining pressure.
- Leaving the dal too thick: Whisk it first, then add hot water gradually if needed.
- Burning the spices: Fry the tadka for only 30–45 seconds, watching for aroma rather than darkening.
- Adding chilli powder too soon: Stir it into the tadka just before pouring it over the hot dal.
- Using unverified asafoetida: Check the label for wheat or omit it if gluten-free.
How to store
Refrigerate leftovers in a covered container and use within 3–4 days. Reheat until piping hot on the hob or in the microwave, adding a little water if the dal has thickened; stir well before serving.
Frequently asked questions
Can I use moong dal or toor dal?
Yes. The recipe lists either split yellow moong dal or toor dal (arhar dal). The texture may vary slightly between the two, so whisk after cooking and add hot water if needed.
How do I make the dal thinner?
Whisk the cooked dal and stir in hot water a little at a time until it reaches the consistency you like.
Can I make this without an Instant Pot?
The supplied method is written for an Instant Pot and does not give hob cooking times or liquid adjustments. Use a stovetop dal method if cooking without a pressure cooker.
How can I make it vegan?
Use neutral oil instead of ghee; avocado or rapeseed oil is suggested.
Is asafoetida gluten-free?
The recipe advises skipping it if gluten-free or unavailable. Check the product label, as some asafoetida blends contain wheat.
What should I serve with dal tadka?
Serve it hot with rice or roti, with lemon wedges and chopped coriander to finish.
Cook it from the original
This recipe comes from bollywoodrecipes.com. Their page has the author’s own photos, notes and tips — the best place to cook it from.
Open the recipe on bollywoodrecipes.com