
Nasi Limau Cakalang Suwir (Shredded Mackerel With Lime Leaves Rice Onigiri)
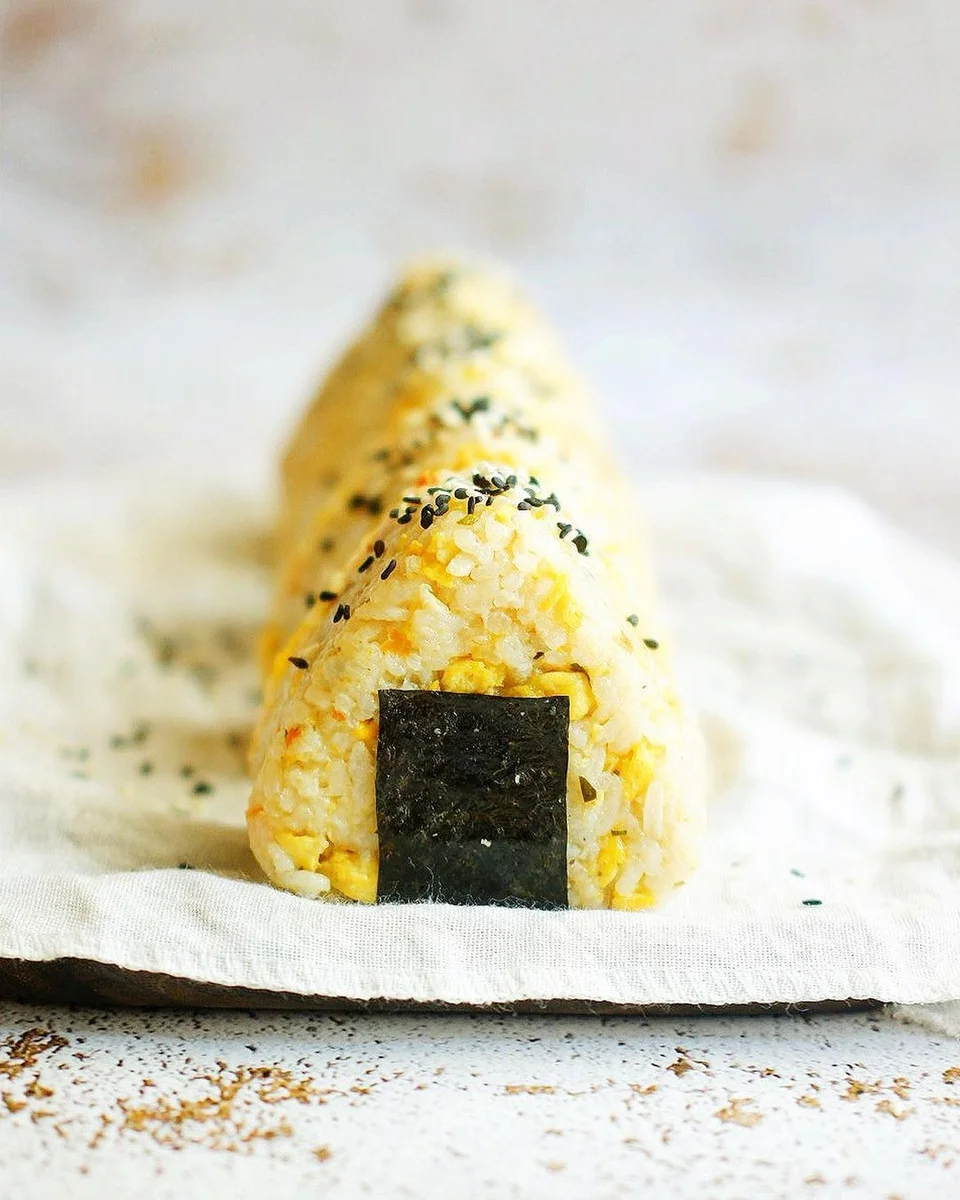
These onigiri combine seasoned rice with a spicy shredded-mackerel filling, wrapped with a strip of seaweed. They make a portable meal, though the supplied method leaves several ingredient quantities unspecified, so adjust the unmeasured components to suit the amount of rice and fish you have.
Ingredients
- to tasteSeaweed sheets, cut into long strips
- 1Onigiri mould
- 1 bowlWater
- 1/2 tbspChicken stock powder
- 1/2 tspSalt
- 1 tbspSugar
- 1 tbspSweet soy sauce
- 1 tspWhite pepper
- 4Garlic cloves
- 7 smallShallots
- 2Candlenuts
- 1 tspGround coriander
- 5 cm eachTurmeric and ginger
- 10Bird’s eye chillies
- 150 gLong chillies
- to tasteMackerel, shredded
- to tasteCooking oil
- to tasteAromatic spices
- to tasteTomatoes, smashed
- to tasteWater
- to tasteBasil leaves
- to tasteLime juice
- to tasteCooked rice
- to tasteEggs
- to tasteSalt, for seasoning the eggs
- 1 tbspCooking oil, for the rice
- to tasteShallots, minced
- to tasteGarlic, minced
- to tasteKaffir lime leaves
- to tasteChilli, minced
- to tasteLemongrass
- 2 tspChicken stock powder, for the rice seasoning
- 1 tspSalt, for the rice seasoning
- 1 tspSugar, for the rice seasoning
- 2–3 tspSalt, to mix into the rice
- 1 tspChicken stock powder, to mix into the rice
- 1 tspSugar, to mix into the rice
Instructions
- 1
Blend the spices
For the mackerel, blend the paste spices in a food processor.
- 2
Cook the spice paste
Heat oil in a large pan and sauté the blended spices for 5 minutes, until darker in colour. Add the aromatic spices and cook for 2 minutes, then add the smashed tomatoes.
- 3
Add the mackerel
Reduce the heat and add the shredded mackerel, seasoning ingredients and water.
- 4
Mix the filling
Turn the heat up to high and mix everything together for 2–3 minutes.
- 5
Finish the filling
Add the basil leaves and stir until just wilted. Turn off the heat, squeeze in some lime juice and discard the aromatic spices.
- 6
Season the eggs
For the rice, transfer the cooked rice to a bowl. Scramble the eggs and season them with salt.
- 7
Fry the aromatics
Heat 1 tbsp oil in a pan. Sauté the minced shallots, garlic, kaffir lime leaves and chilli for 2 minutes.
- 8
Season the aromatics
Add the lemongrass, 2 tsp chicken stock powder, 1 tsp salt and 1 tsp sugar. Stir for 2–3 minutes, until darker in colour.
- 9
Mix the rice
Transfer the sautéed ingredients and scrambled eggs into the rice. Add 2–3 tsp salt, 1 tsp chicken stock powder and 1 tsp sugar, then mix well. Remove the lemongrass.
- 10
Fill the mould
Scoop 2 tbsp rice into the onigiri mould. Press it with a small spoon to make a hollow in the middle.
- 11
Add the filling
Put 2 tbsp shredded mackerel into the hollow and cover it with more rice.
- 12
Prevent sticking
Dip the spoon and mould into the bowl of water occasionally to stop the rice sticking.
- 13
Add the seaweed
Place a strip of seaweed on one side of each onigiri.
What are mackerel onigiri?
Onigiri are Japanese rice balls, often shaped by hand or with a mould and filled or seasoned before being wrapped with nori. This version uses a shredded fish filling and rice flavoured with aromatics, so each bite brings together savoury rice, spicy fish and seaweed.
The method combines that format with ingredients such as sweet soy sauce, bird’s eye chillies, basil and kaffir lime leaves. The result depends on balancing the seasoning and keeping the rice firm enough to hold its shape.
The mackerel filling
Spice paste: blending the paste ingredients first helps them cook evenly and coat the shredded fish. The method does not specify amounts for several filling ingredients, including the fish, oil, tomatoes and water, so scale them to your quantity of cooked fish.
Fresh finish: basil goes in near the end and should only be stirred until wilted. Lime juice is added off the heat, which keeps its bright flavour noticeable.
Seasoning the rice
Aromatic base: the shallots, garlic, kaffir lime leaves and chilli are sautéed before the lemongrass and seasonings are added. Cook until the mixture darkens as directed, taking care not to let it scorch.
Final mixing: fold the cooked aromatics and scrambled eggs through the rice, then add the stated seasonings. Since the amount of rice is not given, taste and adjust carefully rather than assuming the listed salt suits every batch.
Shaping without sticking
Water: dampen the spoon and mould occasionally as you work; this helps the seasoned rice release cleanly. Use only enough water to moisten the surfaces, so the rice does not become wet.
Filling: make a hollow with the spoon, add the measured 2 tbsp of fish and cover it fully with rice. Press gently to seal the centre without crushing the grains.
Texture and doneness
Rice: use cooked rice that is cohesive enough to mould, and mix the seasonings through it evenly. The method gives no rice quantity or cooking instructions, so it assumes the rice is already cooked.
Fish: the filling is ready when it is mixed through and heated for the stated 2–3 minutes, then the basil has just wilted. Avoid prolonged cooking after adding the basil and lime.
Serving the onigiri
Seaweed: attach a strip to one side of each shaped rice ball just before serving, as the method directs. This gives you a convenient place to hold it.
On the side: serve these as a snack or light meal with simple vegetables or a crisp salad. The filling is already seasoned, so keep accompaniments fairly plain.
Recipe notes & tips
- Keep the cooked rice covered while you prepare the filling so it stays easy to shape.
- Blend the paste spices thoroughly for a more even-textured filling.
- Add the basil only at the end so it does not lose its fresh flavour.
- Taste the rice mixture before shaping, as its amount is not stated in the method.
- Wet the mould and spoon intermittently rather than soaking them.
- Seal the fish completely inside the rice to make the onigiri easier to handle.
Variations
- Milder filling: remove some bird’s eye chillies before blending the spice paste.
- Extra lime: add a little more lime juice to the cooked filling to sharpen its flavour.
- More herbs: fold in extra basil just before turning off the heat.
- Seaweed wrap: use a wider strip of seaweed if you prefer more to hold on to.
- Hand-shaped rice: form the onigiri by hand if you do not have a mould, keeping your hands damp.
Common mistakes to avoid
- Sticky mould: dip the mould and spoon in water occasionally so the rice releases cleanly.
- Loose filling: make a well and cover the fish fully with rice to help the onigiri hold together.
- Burnt paste: stir the blended spices as they cook and lower the heat if they darken too quickly.
- Overcooked basil: add it at the end and stop cooking as soon as it wilts.
- Over-seasoned rice: taste as you add salt because the rice quantity is unspecified.
How to store
Store the shaped onigiri in an airtight container in the refrigerator and eat within 1 day for the best texture. Reheat until hot throughout, or bring to room temperature before eating; the rice may firm up when chilled.
Frequently asked questions
Can I shape these without an onigiri mould?
Yes. Use damp hands to form the rice around the filling, pressing gently to seal it.
Can I prepare the filling ahead?
Yes. Make it ahead and refrigerate it in a covered container, then warm it before filling the rice.
Why does the rice stick to the mould?
The method recommends dipping the spoon and mould into water occasionally. Damp surfaces help the rice release more easily.
How spicy will the filling be?
It includes bird’s eye chillies and long chillies, but their heat varies. Reduce the chillies to taste if you prefer a milder filling.
Can I use a different fish?
A similar cooked, flaky fish can be used, though the flavour will differ from mackerel. Shred it and follow the filling method.
How much rice and mackerel do I need?
The supplied recipe does not state their quantities, despite giving a yield of 4 servings. Choose amounts based on the number and size of onigiri you want, keeping the stated 2 tbsp filling per moulded ball as a guide.
Cook it from the original
This recipe comes from fooooods.com. Their page has the author’s own photos, notes and tips — the best place to cook it from.
Open the recipe on fooooods.com