
Apple pie
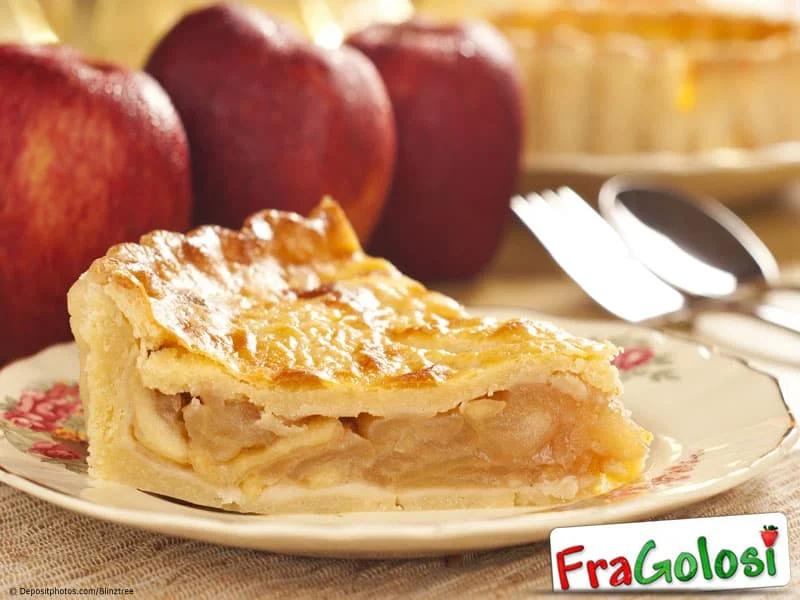
This apple pie pairs a crisp, buttery shortcrust pastry with spiced Golden apples and a crumb layer that helps absorb their juices. It takes a little chilling and careful assembly, but makes a generous dessert to share.
Ingredients
- 300 gplain flour
- 180 gbutter
- 75 ml (5 tablespoons)ice-cold water
- 1 pinchsalt
- 1 kgGolden apples
- 180 gsugar
- 50 gplain biscuits
- zest and juice of 1/2untreated lemon
- 1 pinchcinnamon
- 1 pinchnutmeg
- a few small piecesbutter
- 50 gsugar
- a littlemilk
Instructions
- 1
Mix the flour
Sift the flour onto a work surface and make a well in the centre. Add the butter, cut into pieces, and the salt.
- 2
Make the pastry
Rub the butter into the flour with your fingertips until the mixture resembles fine crumbs. Add the cold water gradually and knead quickly. Shape the dough into a ball, wrap it in cling film and chill for about 2 hours.
- 3
Prepare the apples
Once the pastry has rested, wash, peel and thinly slice the apples. Put them in a bowl and toss with the lemon juice, then mix in the cinnamon, nutmeg, 180 g sugar and grated lemon zest.
- 4
Line the tin
Take the pastry from the fridge just before using it. Roll out a little more than half to about 0.5 cm thick. Butter and flour a fluted tart tin, or line it with baking paper, then use the pastry to line it.
- 5
Add the filling
Trim away excess pastry and scatter the crumbled biscuits over the base. Arrange the apple slices evenly on top, leaving no gaps.
- 6
Cover the pie
Dot the apples with small pieces of butter. Roll out the remaining pastry into a second disc and lay it over the filling. Seal the edges by pinching them together or pressing them with a fork.
- 7
Decorate and heat
Use any leftover pastry to make small decorations and place them on the pie. Preheat the oven to 200°C.
- 8
Vent and bake
Prick the pastry lid in several places with a fork to let steam escape. Brush the top with a little milk and bake for 20 minutes.
- 9
Finish baking
Lower the oven temperature to 180°C and bake for a further 10 minutes, or until the top is well browned.
- 10
Caramelise the sugar
Remove the pie from the oven and sprinkle it with 50 g sugar. Return it to the switched-off oven so the sugar melts and caramelises.
What is Italian apple pie?
Apple pie has many forms, and this Italian version is built around pasta brisée, a buttery shortcrust pastry. Rather than using a crumb topping, it encloses the fruit beneath a pastry lid.
Golden apples are tossed with lemon and warm spices, while crushed biscuits line the base. That layer helps catch some of the fruit juices as the pie bakes.
Nutrition and macros by portion
The nutrition label shows one serving as written: 670 calories, 7g protein, 105g carbs, 26g fat.
| Portion | Adjustment | kcal | Protein | Carbs | Fat |
|---|---|---|---|---|---|
| Lighter | Smaller slice, plain yoghurt | 469 kcal | 5g | 74g | 18g |
| This serving | As written | 670 kcal | 7g | 105g | 26g |
| Hungry | Larger slice | 1005 kcal | 11g | 158g | 39g |
The flour, apples, biscuits and both amounts of sugar supply most of the carbohydrates, while the butter makes the pastry the main source of fat. There is some protein from the flour and biscuits, but this is primarily a dessert rather than a protein-rich dish. Pair a slice with plain yoghurt or serve it after a meal with vegetables and a protein source.
The pastry and its texture
Cold butter: rub it into the flour with your fingertips until the mixture looks like fine crumbs. Work quickly so the butter stays cool and the pastry does not become tough.
Chilling: rest the wrapped dough in the fridge for about 2 hours. This gives it time to firm up, making it easier to roll and shape.
Choosing and seasoning the apples
Golden apples: peel and slice them evenly so they fit neatly inside the pastry shell. Toss them with lemon juice soon after cutting to slow discolouration.
Spice and citrus: cinnamon, nutmeg and grated lemon zest flavour the filling, while the juice adds brightness. Mix everything thoroughly so the seasoning is distributed across the slices.
Building the filling
Biscuit layer: scatter the crumbs over the pastry base before adding the fruit. They provide a simple barrier between the base and the juicy apples.
Even filling: arrange the slices closely and fill the shell without leaving gaps. Dot the top with butter before adding the pastry lid.
Sealing and venting the pie
Sealed edges: pinch the top and bottom pastry together, or press them with a fork, to enclose the filling. Small decorations can be made with any leftover dough.
Steam vents: prick the lid in several places before baking. The holes give steam a way out and help prevent pressure from building beneath the pastry.
Two-stage baking
Initial heat: bake at 200°C for 20 minutes after brushing the lid with a little milk. This starts the pastry browning.
Lower heat: reduce the oven to 180°C and bake for another 10 minutes, or until the surface is well browned. After adding the final sugar, use the switched-off oven to melt it.
How to serve it
Let the pie settle before slicing so the filling is easier to serve. It is good on its own or with a spoonful of custard, cream or yoghurt.
For a less sweet plate, serve a modest slice with plain yoghurt or fresh fruit. The pastry and filling are rich, so a simple accompaniment works well.
Recipe notes & tips
- Keep the butter cold and handle the pastry as briefly as possible.
- Chill the pastry for about 2 hours, as directed, before rolling it out.
- Slice the apples to a similar thickness so they can be arranged evenly.
- Dust the work surface lightly with flour if the pastry begins to stick.
- Make several fork holes in the pastry lid so steam can escape.
- Watch for a well-browned top during the final 10 minutes at 180°C.
Variations
- Change the spice: use a little extra cinnamon instead of the nutmeg.
- Add raisins: mix a small handful through the apples before filling the pie.
- Try a different apple: use another firm baking apple in place of Golden apples.
- Make a lattice lid: cut the pastry top into strips and weave them over the filling.
- Serve with custard: add a spoonful alongside each slice.
Common mistakes to avoid
- Warm pastry: it can be difficult to handle, so keep the dough chilled until you are ready to roll it.
- Overworking the dough: this can make the pastry tough; mix and knead it quickly.
- Gaps in the filling: arrange the apple slices closely and evenly before adding the lid.
- Unsealed edges: pinch or fork-press the pastry edges together to enclose the filling.
- No steam vents: prick the top with a fork before baking so steam can escape.
- Skipping the temperature change: lower the oven to 180°C after the first 20 minutes and bake for another 10.
How to store
Once cool, cover the pie and keep it in the fridge for up to 3 days. Reheat slices in a low oven until warmed through, or serve them at room temperature.
Frequently asked questions
How long does the pastry need to chill?
The recipe calls for about 2 hours in the fridge. Keep it wrapped while it rests.
Can I prepare the apples while the pastry chills?
Yes. Slice and season them after the pastry has rested, as in the method, and coat them with lemon juice to help prevent browning.
Why are crushed biscuits spread over the base?
They form a layer beneath the apples that can absorb some of the fruit juices as the pie bakes.
How do I know the pie is ready?
After 20 minutes at 200°C and a further 10 minutes at 180°C, the surface should be well browned. The recipe also uses the switched-off oven to melt the sugar sprinkled over the top.
Can I make the pie without a fluted tin?
Yes. The method allows for a tart tin lined with baking paper instead of one that has been buttered and floured.
Can I freeze leftover apple pie?
The recipe does not give freezing instructions. For the best pastry texture, store leftovers covered in the fridge and reheat them in the oven.
Cook it from the original
This recipe comes from fragolosi.it. Their page has the author’s own photos, notes and tips — the best place to cook it from.
Open the recipe on fragolosi.it