
No-bake Cheesecake
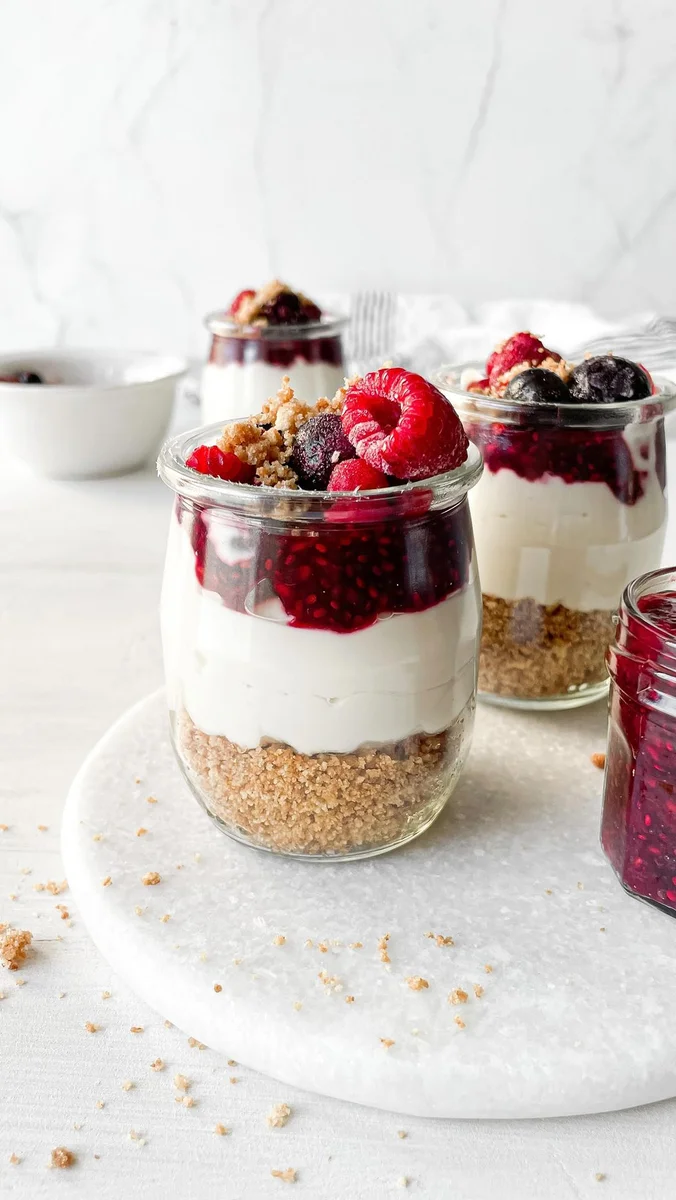
This no-bake cheesecake layers buttery crushed cookies with a tangy cream cheese and Greek yoghurt filling. It is a simple make-ahead dessert that sets in the fridge rather than needing an oven.
Ingredients
- 65 g (around ½ cup of crumbs)graham cookies or another crunchy cookie of your choice
- 2 tbsp (30 g)melted butter
- 115 g, at room temperaturecream cheese
- 160 g (⅔ cup)Greek yoghurt
- 2 tbspmaple syrup
- 1 tbsplemon juice
Instructions
- 1
Crush the cookies
Grind the cookies in a blender, or put them in a sealed bag and crush them with a rolling pin or the back of a cup.
- 2
Mix with butter
Add the melted butter to the crumbs and mix until combined.
- 3
Whisk the filling
Put the cream cheese, Greek yoghurt, maple syrup and lemon juice in a bowl. Whisk until the mixture is smooth and free of lumps.
- 4
Cook the berry jam
Put the berry jam ingredients in a pot over medium heat. Stir for a few minutes, until bubbly.
- 5
Cool the jam
Set the jam aside to cool while you assemble the jars.
- 6
Chill to serve
Store the jars in the fridge until serving time.
What is no-bake cheesecake?
No-bake cheesecake is a chilled dessert with a crumb base and a creamy filling, rather than a baked custard-style centre. This version pairs cream cheese with Greek yoghurt, maple syrup and lemon juice for a tangy, softly sweet filling.
Cookie crumbs and butter provide a crisp, rich contrast to the filling. The method also describes a berry jam layer, though its ingredients and quantities are not included in the supplied recipe.
Nutrition and macros by portion
The nutrition label shows one serving as written: 285 calories, 6g protein, 20g carbs, 20g fat.
| Portion | Adjustment | kcal | Protein | Carbs | Fat |
|---|---|---|---|---|---|
| Lighter | Use less butter | 200 kcal | 4g | 14g | 14g |
| This serving | As written | 285 kcal | 6g | 20g | 20g |
| Hungry | Serve a larger jar | 428 kcal | 9g | 30g | 30g |
The cookies and maple syrup provide most of the carbohydrates, while butter and cream cheese contribute much of the fat. Cream cheese and Greek yoghurt provide some protein, though the dessert is not especially protein-rich; serve it with fresh berries or alongside a meal with a substantial protein source to balance the plate.
The cookie base
Fine crumbs: crush the cookies evenly so the butter can coat them throughout and the base holds together in the jars.
Butter: mix it into the crumbs while melted, then divide the mixture between the jars. Pressing it down gently makes a more compact layer.
A smooth filling
Room-temperature cream cheese: it is easier to whisk smoothly when it is not cold straight from the fridge.
Whisking: add the filling ingredients to a bowl and mix until no lumps remain. Stop once it is smooth rather than continuing to whisk for longer than needed.
The berry layer
Gentle heat: stir the berry jam ingredients over medium heat for a few minutes, until the mixture bubbles.
Cooling: let the jam cool while assembling the jars, as the recipe directs. The supplied ingredient list does not specify the jam ingredients, so check the original recipe if you need that layer.
Layering the jars
Build the jars with the buttery crumbs and cheesecake filling, then add the cooled jam if using it. The method does not give quantities or detailed layering instructions, so divide the components evenly between four servings.
Small jars make the layers easy to see and serve. Chill the assembled dessert until you are ready to eat it.
Serving and timing
The recipe gives no total preparation or chilling time, so allow enough time for the jars to become thoroughly chilled before serving.
Serve straight from the fridge. The tangy filling and sweet, buttery base work well as a small dessert after a meal.
Recipe notes & tips
- Crush the cookies finely for a base that is easy to spoon through.
- Let the cream cheese come to room temperature before mixing to help prevent lumps.
- Stir the melted butter thoroughly through the crumbs before dividing them between jars.
- Whisk the filling only until smooth and lump-free.
- Cool the berry jam before adding it to the jars.
- Keep the finished jars chilled until serving.
Variations
- Cookie choice: use another crunchy biscuit in place of graham cookies.
- Citrus note: add a little finely grated lemon zest to the filling.
- Fruit topping: serve with fresh berries if you are not making the jam layer.
- Maple sweetness: adjust the maple syrup slightly to suit your taste.
- Individual servings: assemble the mixture in small glasses instead of jars.
Common mistakes to avoid
- Cold cream cheese: bring it to room temperature first so it whisks more smoothly.
- Large cookie pieces: crush them more finely so the base holds together.
- Uneven butter coating: mix the crumbs thoroughly before layering them.
- Lumpy filling: whisk until smooth, checking the sides and bottom of the bowl.
- Hot jam: let it cool before adding it to the assembled jars.
- Skipping the chill: keep the jars in the fridge until serving so the dessert is properly cold.
How to store
Cover the jars and keep them in the fridge; eat within 2–3 days. Serve chilled, as reheating would soften the filling and crumb layers.
Frequently asked questions
Can I make these cheesecake jars ahead?
Yes. Assemble them ahead and keep them covered in the fridge until serving. The recipe does not specify a chilling time.
Can I use a different type of cookie?
Yes. The recipe allows any crunchy cookie in place of graham cookies.
How do I avoid lumps in the filling?
Use room-temperature cream cheese and whisk the filling until it is smooth.
What does the berry jam need?
The method says to cook the berry jam ingredients over medium heat, stirring until bubbly, then cool it. Those ingredients are not listed in the supplied recipe, so consult the original recipe for their quantities.
Can I freeze the cheesecake jars?
Freezing is not specified in the recipe. For the intended texture, keep them covered in the fridge and serve chilled.
Cook it from the original
This recipe comes from fooooods.com. Their page has the author’s own photos, notes and tips — the best place to cook it from.
Open the recipe on fooooods.com