
Cheesy Garlic Chicken Wraps
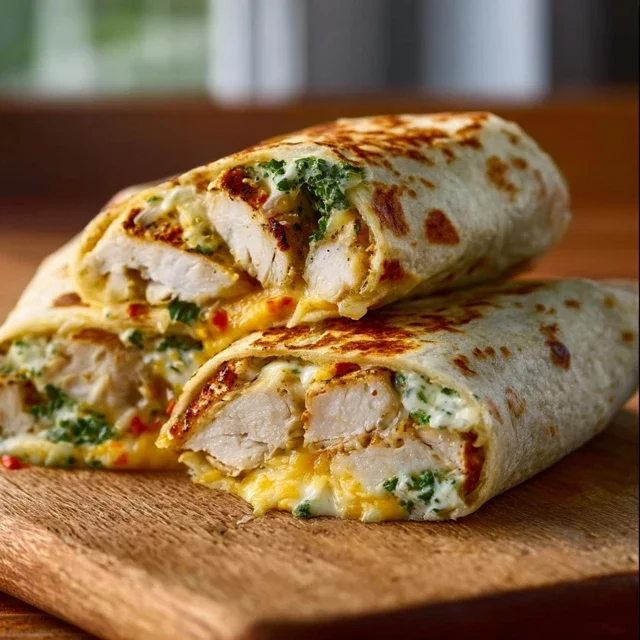
These cheesy garlic chicken wraps pair seasoned chicken with a creamy garlic sauce and melted cheddar, tucked into tortillas and toasted until crisp. The method describes a quick skillet meal, though the supplied ingredient list is missing several items called for in the instructions.
Ingredients
- 2 tablespoons (30 ml), dividedolive oil or butter
- 2 cups (about 225 g)sharp cheddar cheese, freshly shredded
- 1/4 cup (60 ml)sour cream or full-fat Greek yoghurt
- 3–4 clovesgarlic, minced
- 1 teaspoononion powder
- 1 teaspoonpaprika
- 1/2 teaspoon, or to tastesalt
- 1/4 teaspoon, or to tasteblack pepper
- 2 tablespoons, optionalfresh parsley or chives, chopped
Instructions
- 1
Mix the sauce
In a medium bowl, combine the softened cream cheese, sour cream, minced garlic, salt and pepper. Mix until smooth, then set aside.
- 2
Cook the chicken
Pat the chicken pieces dry and season them generously with onion powder, paprika, salt and pepper. Heat 1 tablespoon (15 ml) of olive oil in a large frying pan over medium-high heat. Arrange the chicken in a single layer and cook for 3–4 minutes per side, until golden and cooked through. Remove it from the pan.
- 3
Make the filling
Turn the heat down to low and return the chicken to the pan. Pour over the creamy garlic sauce and stir gently to coat. Turn off the heat, then mix in 1 cup (about 110 g) of the shredded cheddar and the optional parsley until the cheese just starts to melt.
- 4
Fill the tortillas
Place a tortilla on a clean surface and spoon about one-quarter of the chicken mixture into its centre, leaving a border. Sprinkle over some of the remaining cheddar. Fold in the left and right sides, then roll tightly from the bottom up to make a secure wrap.
- 5
Toast the wraps
Wipe the pan clean and set it over medium heat. Put the wraps in seam-side down and toast for 2–3 minutes per side, until golden-brown and crisp and the cheese has melted. Rest for a minute, then slice in half and serve straight away.
What are cheesy garlic chicken wraps?
A chicken wrap is a hand-held meal of cooked filling folded inside a tortilla. This American-style version gets its creamy, savoury character from garlic sauce and cheddar, then a brief pan-toast gives the tortilla a crisp outside.
The supplied method has a familiar skillet-to-wrap flow, but the ingredient list is incomplete: it does not give quantities for the chicken or tortillas, and it omits the cream cheese used in the sauce. Check the original recipe details before cooking so you can source and measure those ingredients.
Nutrition and macros by portion
The nutrition label shows one serving as written: 720 calories, 0g protein, 0g carbs, 0g fat.
| Portion | Adjustment | kcal | Protein | Carbs | Fat |
|---|---|---|---|---|---|
| Lighter | Use less cheddar | 504 kcal | 0g | 0g | 0g |
| This serving | As written | 720 kcal | 0g | 0g | 0g |
| Hungry | Add an extra wrap | 1080 kcal | 0g | 0g | 0g |
The supplied nutrition listing gives 720 kcal per serving but reports zero for protein, carbohydrate and fat, so those macros are not usable here. In the listed ingredients, cheddar and oil or butter contribute most of the fat, while the wraps and chicken mentioned in the method would provide much of the carbohydrate and protein. Pair a wrap with salad or vegetables for a more balanced plate.
Getting the sauce smooth
Cream cheese: the method calls for softened cream cheese, but it is absent from the ingredient list and has no quantity. It should be soft enough to mix smoothly with the sour cream, garlic and seasoning.
Garlic: mince it finely so it disperses through the sauce rather than leaving large, sharp pieces. The listed 3–4 cloves give the sauce a pronounced garlic flavour.
Seasoning and browning the chicken
Dry surface: pat the chicken pieces dry before seasoning; excess moisture can slow browning in the pan.
Single layer: cook the chicken with space around the pieces so it can turn golden. The method gives 3–4 minutes per side, but the chicken should also be cooked through before you remove it from the pan.
Melting the filling
Low heat: after returning the chicken to the pan, lower the heat before adding the sauce. This helps warm the filling gently rather than scorching the dairy.
Cheddar: stir in 1 cup (about 110 g) with the heat off, just until it begins to melt. Keep the rest for sprinkling inside the wraps before rolling.
Rolling and toasting
Leave a border: keep the filling centred and away from the tortilla edges to make folding easier. Bring in the sides first, then roll from the bottom to contain the filling.
Seam-side down: start toasting with the join against the pan so the wrap holds its shape. Turn it after 2–3 minutes per side, looking for a crisp, golden exterior.
Serving the wraps
Serve these immediately after the short rest, while the tortilla is crisp and the cheese is still melted. A simple green salad or crunchy vegetables make a fresh contrast to the rich filling.
The ingredient list does not state a tortilla size or quantity, so the method's one-quarter portion per wrap cannot be matched precisely without checking the full source recipe.
Recipe notes & tips
- Soften the cream cheese before mixing, as directed in the method.
- Shred the cheddar freshly so it melts readily into the filling.
- Cook the chicken in a single layer and in batches if your pan is crowded.
- Keep the sauce on low heat and turn the hob off before stirring in the first portion of cheddar.
- Wipe the pan before toasting so browned residue does not mark the tortillas.
- Rest the toasted wraps for a minute before slicing to help the filling settle.
Variations
- Use chives: choose the listed chopped chives instead of parsley for a mild onion note.
- Choose Greek yoghurt: use the listed full-fat Greek yoghurt in place of sour cream.
- Switch the cooking fat: use the listed butter instead of olive oil.
- Adjust the garlic: use 3 cloves for a gentler flavour or 4 for a stronger one.
- Add extra herbs: use the optional parsley or chives in the filling as directed.
Common mistakes to avoid
- Missing chicken quantity: check the original recipe before cooking, as the ingredient list gives no amount.
- Missing tortillas: confirm the size and number needed before starting; the method does not specify either.
- Forgotten cream cheese: the sauce method includes it, but the ingredient list does not, so verify the amount from the source.
- Wet chicken: pat the pieces dry before seasoning so they can brown properly.
- Overheating the sauce: keep the pan on low and turn off the heat before adding cheddar.
- Loose wraps: fold in both sides before rolling from the bottom to keep the filling enclosed.
How to store
Refrigerate leftover wraps in an airtight container and use within 3 days. Reheat in a frying pan over medium-low heat until hot throughout; this helps restore some crispness to the tortilla.
Frequently asked questions
How much chicken should I use?
The supplied ingredient list does not give a chicken quantity, although the method requires chicken pieces. Check the original recipe before preparing the filling rather than guessing.
How many tortillas does this recipe need?
The method describes one-quarter of the mixture per tortilla, but the ingredient list does not specify a tortilla quantity or size. Confirm those details in the original recipe.
Can I make the sauce without cream cheese?
The method specifically calls for softened cream cheese, but the ingredient list omits it. Verify the full ingredient details before substituting or leaving it out.
How can I tell when the chicken is cooked?
The method says to cook the pieces for 3–4 minutes per side until golden and cooked through. Check the thickest pieces before removing them from the pan.
Can I prepare the wraps ahead?
They are best toasted and served straight away for a crisp tortilla. You can prepare the filling ahead, refrigerate it, and assemble and toast the wraps when ready to eat.
Cook it from the original
This recipe comes from besthomemaderecipes.com. Their page has the author’s own photos, notes and tips — the best place to cook it from.
Open the recipe on besthomemaderecipes.com