
Loaded Fries
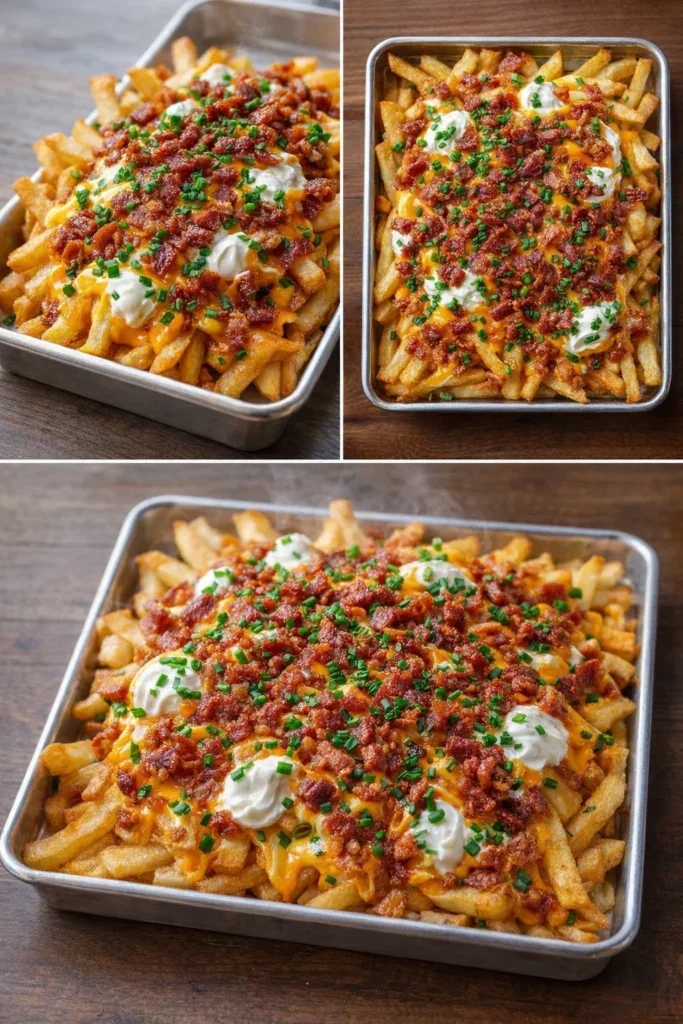
Loaded fries are oven-baked chips finished with melted cheese, bacon, sour cream and fresh toppings. They make a quick, generous sharing dish, with crisp fries and creamy, savoury toppings in every portion.
Ingredients
- 1 packagefrozen French fries
- 200 g (2 cups)grated cheese, such as Cheddar, mozzarella or a blend
- 150 g (1 cup)bacon bits
- 120 ml (1/2 cup)soured cream
- 8 g (2 tablespoons)chives or spring onions
- 35 g (1/4 cup)jalapeños (optional)
Instructions
- 1
Bake the fries
Heat the oven according to the instructions on the fries’ packaging. Spread the frozen fries over a baking tray and bake until golden and crisp, about 20 minutes.
- 2
Melt the toppings
Take the fries out of the oven and scatter over the grated cheese and bacon bits. Return the tray to the oven for a further 5 minutes, until the cheese has melted.
- 3
Garnish and serve
Drizzle the soured cream over the fries. Add the chives or spring onions and jalapeños, if using, then serve hot.
What are loaded fries?
Loaded fries are a casual American-style dish of chips covered with toppings and served hot. This version pairs melted cheese and bacon with cool soured cream, fresh alliums and optional jalapeños.
The method keeps things simple: bake the fries first, then return them to the oven briefly with the toppings. That helps the chips turn crisp before the cheese melts.
Nutrition and macros by portion
The nutrition label shows one serving as written: 450 calories, 12g protein, 50g carbs, 25g fat.
| Portion | Adjustment | kcal | Protein | Carbs | Fat |
|---|---|---|---|---|---|
| Lighter | Use less cheese and bacon | 315 kcal | 8g | 35g | 18g |
| This serving | As written | 450 kcal | 12g | 50g | 25g |
| Hungry | Serve a larger portion | 675 kcal | 18g | 75g | 38g |
The fries provide most of the carbohydrates, while the cheese and bacon contribute much of the fat and protein. Soured cream adds more fat, so pair a portion with a crisp salad or vegetables for a more balanced plate.
Choosing the fries and cheese
Frozen fries: Choose a variety that bakes up crisp, and arrange it in a single layer so the pieces brown rather than steam. Sweet potato fries can be used for a sweeter variation.
Cheese: Cheddar gives a savoury, familiar flavour, while mozzarella melts smoothly. A blend can bring both qualities; grate it yourself if you want it to melt evenly.
Getting the texture right
Crisp base: Follow the packet’s oven temperature and timing, since brands and fry thickness vary. Look for golden edges and a crisp surface before adding the toppings.
Melted topping: Five minutes back in the oven is a guide, not a strict rule. Take the tray out once the cheese is melted, before the fries have time to soften too much.
Bacon and fresh garnishes
Bacon: Use cooked bacon bits so they only need warming with the cheese. Crispy pancetta is another option, or use a vegetarian alternative.
Garnishes: Add soured cream after baking to keep it cool and creamy. Chives or spring onions bring a fresh note, while jalapeños add optional heat.
Timing and serving
The oven does most of the work: allow about 20 minutes for the fries, then another 5 minutes to melt the cheese. Check the packet directions as the oven setting and cooking time depend on the fries.
Serve the tray as soon as it is garnished, while the fries are hot and the cheese is soft. It works well as a sharing snack or alongside a simple salad.
Making the tray your own
Keep the toppings balanced by spreading the cheese and bacon across the tray rather than piling them in one spot. That way, more of the fries get some topping.
For different tastes at the table, serve extra soured cream and jalapeños on the side. This makes it easy for everyone to add more or less.
Recipe notes & tips
- Spread the frozen fries out so they have room to crisp.
- Check the packet for the correct oven temperature and cooking time.
- Use cooked bacon bits, as the short topping bake is mainly to warm them.
- Add the soured cream after baking so it stays cool.
- Serve straight away for the best contrast between crisp fries and melted cheese.
Variations
- Sweet potato fries: Swap in frozen sweet potato fries and bake according to their packet.
- Cheese blend: Combine Cheddar and mozzarella for a savoury flavour and a smooth melt.
- Pancetta topping: Use cooked crispy pancetta in place of the bacon bits.
- Vegetarian version: Replace the bacon bits with a vegetarian alternative.
- Extra heat: Add more jalapeños at the table for a spicier finish.
Common mistakes to avoid
- Crowded tray: Fries can soften instead of crisping; spread them in a single layer or use another tray.
- Toppings added too soon: Cheese can melt before the fries are crisp; bake the fries first.
- Overbaking the cheese: The fries may soften and the cheese can dry out; remove the tray once it has melted.
- Cold fries at serving: The dish loses its crispness as it sits; garnish and serve immediately.
- Too much soured cream: A heavy drizzle can cover the toppings; add a little first and offer the rest separately.
How to store
For the best texture, serve the fries straight away. Store any leftovers in a covered container in the fridge for up to 3 days; reheat in an oven until hot, knowing the fries may be softer. Add fresh soured cream and garnishes after reheating.
Frequently asked questions
Can I use sweet potato fries?
Yes. Bake them according to their packet instructions, since their timing may differ from standard fries.
Can I make loaded fries without bacon?
Yes. Leave it out or use a vegetarian alternative. The cheese and garnishes still make a satisfying topping.
When should I add the soured cream?
Add it after the fries come out of the oven. This keeps it cool and creamy rather than heating it with the cheese.
How can I keep the fries crisp?
Spread them in a single layer and bake until golden before adding toppings. Serve as soon as the cheese has melted.
Can I prepare the toppings ahead?
You can grate the cheese and prepare the garnishes in advance. Bake the fries and assemble the tray just before serving for the best texture.
Cook it from the original
This recipe comes from benefitrecipes.com. Their page has the author’s own photos, notes and tips — the best place to cook it from.
Open the recipe on benefitrecipes.com