
Pickle De Gallo Recipe
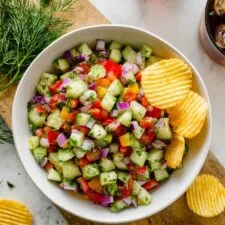
Pickle de gallo is a crisp, tangy relish made with finely diced dill pickles, fresh vegetables and a little chilli. Chill it for the flavours to mingle, then serve it with tacos, grilled food or tortilla chips.
Ingredients
- 680 g (24 oz; about 10 baby pickles)baby dill pickles, finely diced
- ½sweet yellow onion, finely diced
- 1red pepper, deseeded and finely diced
- 30 ml (2 tablespoons)pickle brine, from the jar
- 1 clovegarlic, minced
- 2.5 ml (½ teaspoon)kosher salt
- 1serrano or jalapeño pepper, finely diced
Instructions
- 1
Mix the ingredients
Put the diced baby dill pickles, onion and red pepper in a mixing bowl with the pickle brine, minced garlic, salt and diced serrano or jalapeño. Stir until evenly combined.
- 2
Marinate the mixture
Cover the bowl with a lid or cling film and refrigerate for at least 2 hours, allowing the flavours to mingle.
- 3
Stir and serve
Give the pickle de gallo a thorough stir before serving it chilled with tacos or tortilla chips.
What is pickle de gallo?
Pickle de gallo is a pickle-led take on pico de gallo, the fresh Mexican salsa traditionally made with chopped vegetables. This version has a Mexican-American twist: dill pickles and their brine bring a sharp, savoury tang to the mix.
Finely dicing the ingredients makes each bite crunchy and well balanced. A rest in the fridge gives the onion, garlic and chilli time to mingle with the pickles.
Nutrition and macros by portion
The nutrition label shows one serving as written: 30 calories, 1g protein, 6g carbs, 0g fat.
| Portion | Adjustment | kcal | Protein | Carbs | Fat |
|---|---|---|---|---|---|
| Lighter | Use less brine | 21 kcal | 1g | 4g | 0g |
| This serving | As written | 30 kcal | 1g | 6g | 0g |
| Hungry | Serve a larger portion | 45 kcal | 2g | 9g | 0g |
The pickles and vegetables provide most of the carbohydrates, while the recipe contains very little fat and only a small amount of protein. Pair a serving with a protein-rich taco filling or grilled food, and add extra fresh vegetables to round out the plate.
Choosing the ingredients
Dill pickles: Baby pickles are easy to dice finely and give the relish its main flavour. Drain them before chopping, but save the brine for the dressing.
Fresh vegetables: Yellow onion and red pepper add sweetness and crunch alongside the pickles. Serrano gives a sharper chilli kick, while jalapeño is a useful alternative.
Getting an even dice
Small, similar-sized pieces help the ingredients mix evenly and make the relish easier to spoon onto tacos. Take particular care with the onion and pepper so they do not overwhelm a mouthful.
A sharp knife helps keep the vegetables neat rather than crushing them. Mince the garlic finely so its flavour disperses through the bowl.
Why the chilling time matters
The recipe calls for at least 2 hours in the fridge. During that time the brine carries the garlic and chilli flavours through the chopped ingredients.
Keep the bowl covered while it marinates so the relish stays chilled and does not pick up other fridge smells. Stir it again just before serving to redistribute the brine.
Balancing tang and heat
The pickles and brine provide plenty of acidity, while the onion and pepper bring a little sweetness. The salt helps bring those flavours together, so taste the relish before adding any extra.
Chilli heat can vary by pepper. If you prefer a milder result, remove the seeds and inner membranes before dicing.
Serving ideas
Spoon the relish over tacos or alongside grilled meat for a bright, crunchy contrast. It also works as a dip with tortilla chips.
Because it is sharply flavoured, serve it as a topping or side rather than expecting it to stand in for a mild salsa. A little goes a long way alongside richer foods.
Recipe notes & tips
- Drain the pickles well before dicing so the relish does not become watery.
- Dice the vegetables to a similar size for an even texture.
- Use a serrano for a sharper heat or a jalapeño for a gentler option.
- Cover the bowl before chilling to keep the relish fresh.
- Stir thoroughly just before serving, as the brine can settle at the bottom.
Variations
- Milder chilli: Remove the seeds and membranes before chopping the pepper.
- Extra crunch: Dice the vegetables just before mixing and keep the pieces small and distinct.
- More brine: Add a little extra pickle brine for a looser, tangier relish.
- Herb finish: Stir in chopped coriander just before serving for a fresh herbal note.
- Taco topping: Spoon it over tacos with your preferred filling for a sharp, crunchy contrast.
Common mistakes to avoid
- Large pieces: They can overpower each bite; dice the vegetables finely and evenly.
- Skipping the chill: The flavours will be less blended; refrigerate for at least 2 hours.
- Too much brine: The relish can turn watery; measure the brine and drain the pickles first.
- Over-seasoning: Pickles and brine are already salty; taste before adding more salt.
- Leaving it uncovered: It may pick up fridge smells; cover the bowl while it marinates.
How to store
Store the relish in a covered container in the fridge and use it within 3 days for the best texture. It is served cold, so stir it and serve straight from the fridge rather than reheating it.
Frequently asked questions
How long does pickle de gallo need to marinate?
Chill it for at least 2 hours so the flavours can mingle. Stir it well just before serving.
Can I make it less spicy?
Yes. Remove the chilli seeds and inner membranes before dicing, or use less chilli.
Can I use a different kind of pickle?
Dill pickles give this recipe its distinctive tang. A different pickle may change the flavour and sweetness, so taste before adjusting the salt.
What can I serve with pickle de gallo?
Serve it with tacos, grilled meat or tortilla chips. Its bright acidity works especially well alongside richer foods.
Can I prepare it ahead?
Yes. Make it at least 2 hours ahead and keep it covered in the fridge. Stir before serving.
Does pickle de gallo need cooking?
No. It is a no-cook relish; combine the ingredients and chill them before serving.
Cook it from the original
This recipe comes from bakingwithmaya.com. Their page has the author’s own photos, notes and tips — the best place to cook it from.
Open the recipe on bakingwithmaya.com