
Stuffed Bell Peppers Without Rice
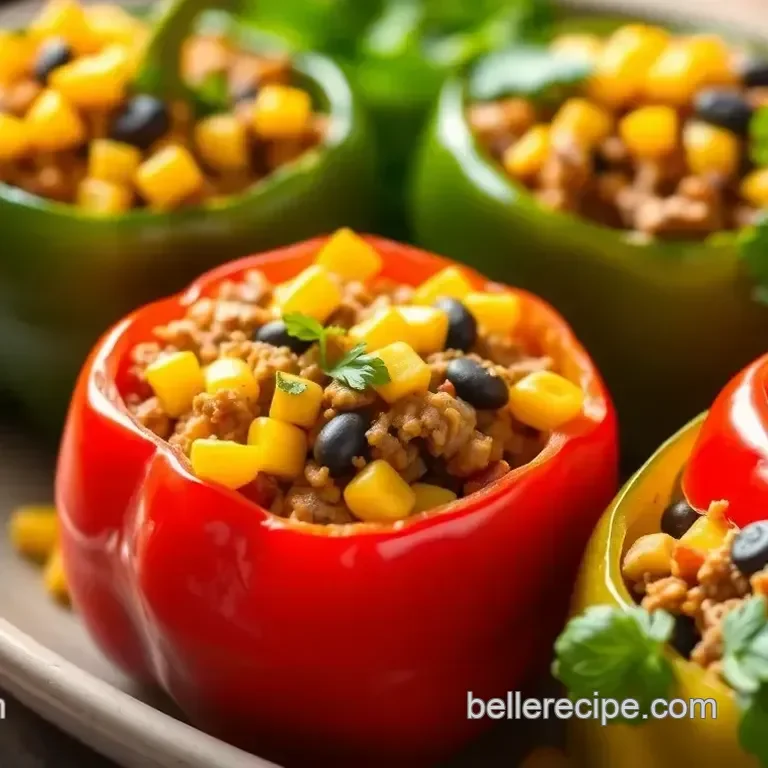
These stuffed bell peppers are filled with turkey or beef, black beans, corn, salsa and melted cheese instead of rice. They make a hearty oven-baked dinner that is easy to portion for family meals or meal prep.
Ingredients
- 450 g (1 lb)lean ground turkey or beef
- 1 can, 425 g (15 oz), rinsed and drainedblack beans
- 150 g (1 cup)corn kernels, fresh, frozen or canned
- 1 smallonion, diced
- 2 clovesgarlic, minced
- 5 g (1 tsp)ground cumin
- 5 g (1 tsp)smoked paprika
- 5 g (1 tsp)chilli powder
- to tastesalt and pepper
- 30 ml (2 tbsp)olive oil
- 150 g (1 cup)shredded cheddar or pepper jack cheese
- 4 largebell peppers, any colour
- 240 ml (1 cup)salsa or diced tomatoes
Instructions
- 1
Heat the oven
Preheat the oven to 190°C (375°F).
- 2
Prepare the peppers
Cut the tops off the bell peppers, remove the seeds and set the peppers aside.
- 3
Soften the aromatics
Warm the olive oil in a frying pan over medium heat. Cook the onion for about 3–4 minutes until soft, then add the garlic and cook for 1 minute, until fragrant.
- 4
Cook the filling
Add the ground turkey or beef, breaking it up as it cooks, and brown it until cooked through, about 5–7 minutes. Stir in the black beans, corn, cumin, smoked paprika, chilli powder, salt and pepper, then cook for 3–4 minutes to combine the flavours. Take the pan off the heat and stir in half of the shredded cheese.
- 5
Fill the peppers
Spoon the meat mixture into each pepper and press it down gently. Stand the filled peppers upright in a baking dish and pour the salsa or diced tomatoes over the tops.
- 6
Bake with cheese
Cover the dish with foil and bake for 25 minutes. Remove the foil, scatter the remaining cheese over the peppers and bake for another 5–10 minutes, until the cheese is melted and bubbling.
- 7
Cool and serve
Leave the peppers to cool slightly before serving.
What are stuffed bell peppers?
Stuffed peppers are a familiar American-style baked dinner: whole peppers are filled with a savoury mixture and cooked until tender. Versions often use rice, but this recipe gets its substance from beans, corn and ground meat instead.
The combination makes a filling that is varied in texture, while salsa or diced tomatoes add moisture as the peppers bake. Cheese stirred into the filling and melted on top brings the ingredients together.
Nutrition and macros by portion
The nutrition label shows one serving as written: 300 calories, 25g protein, 20g carbs, 15g fat.
| Portion | Adjustment | kcal | Protein | Carbs | Fat |
|---|---|---|---|---|---|
| Lighter | Use lean turkey, less cheese | 210 kcal | 18g | 14g | 11g |
| This serving | As written | 300 kcal | 25g | 20g | 15g |
| Hungry | Add another pepper | 450 kcal | 38g | 30g | 23g |
The ground meat and cheese provide most of the protein and fat, while the beans, corn and peppers contribute carbohydrates and fibre. Serve a pepper with a green salad or another vegetable side to round out the plate.
The filling ingredients
Ground meat: Turkey keeps the flavour relatively mild, while beef gives the filling a richer taste. Either works here; brown it thoroughly before adding the beans and corn.
Beans and corn: Rinsing and draining the black beans helps keep excess liquid out of the filling. Fresh, frozen or canned corn can be used, as long as frozen or canned kernels are drained as needed.
Seasonings: Cumin, smoked paprika and chilli powder give the mixture warmth and savoury depth. Add salt and pepper to taste, bearing in mind that salsa and cheese can also be salty.
Prepare the peppers
Cutting off the tops and removing the seeds creates space for the filling while leaving the peppers intact. Choose peppers that can stand upright in the baking dish so the filling stays in place.
If a pepper wobbles, arrange it snugly beside the others in the dish. The recipe bakes them upright, so avoid cutting them in half.
Brown the meat first
Cook the onion until soft before adding the garlic; this gives the aromatics time to mellow without letting the garlic cook for too long. Break the meat into small pieces as it browns so it is easy to combine with the beans and corn.
The filling gets a short additional cook after the seasonings and vegetables go in. Stir in the first half of the cheese after taking the pan off the heat, as directed.
Bake until tender
The covered bake gives the peppers time to soften while the filling heats through. Keep the dish covered for the first 25 minutes, then uncover it so the remaining cheese can melt and bubble.
The stated extra bake is 5–10 minutes. Check that the cheese is melted and bubbling before taking the dish out, then let the peppers cool slightly before serving.
Choose salsa or tomatoes
Salsa brings its own seasoning and a more pronounced flavour; diced tomatoes offer a simpler, less seasoned topping. Use 240 ml of either, poured over the filled peppers before covering the dish.
A cheddar topping is familiar and savoury, while pepper jack adds a little more spice. Both options are mixed into the filling in part and sprinkled over the top in part.
What to serve alongside
These peppers make a complete-feeling centrepiece on their own, with meat, beans and corn in each portion. For a larger meal, serve them with a simple green salad or another vegetable side.
A spoonful of extra salsa can accompany the peppers at the table. Since the recipe already includes beans and corn, keep additional sides simple if you want the peppers to remain the focus.
Recipe notes & tips
- Choose peppers that sit upright in your baking dish to make filling and baking easier.
- Drain the beans well so the filling does not become watery.
- Break the meat into small pieces as it cooks for an evenly mixed filling.
- Use a baking dish that holds the peppers snugly to help keep them upright.
- Let the peppers cool slightly before serving so the filling settles.
Variations
- Use turkey: Choose lean ground turkey for a milder-tasting filling.
- Use beef: Swap in lean ground beef for a richer flavour.
- Change the cheese: Use cheddar or pepper jack according to your preference.
- Choose the topping: Use salsa for extra seasoning or diced tomatoes for a simpler finish.
- Adjust the heat: Use more or less chilli powder to suit your taste.
Common mistakes to avoid
- Skipping the bean rinse: Excess canning liquid can make the filling wet; rinse and drain the beans.
- Leaving the seeds in: They take up space in the pepper; remove them before filling.
- Adding the cheese too early: Stir the first half in after removing the pan from the heat.
- Skipping the foil: The peppers may not soften as intended; cover the dish for the first 25 minutes.
- Overbaking the topping: The cheese only needs another 5–10 minutes uncovered; check for melted, bubbling cheese.
How to store
Refrigerate leftover peppers in an airtight container and eat within 3–4 days. Reheat until hot throughout in the oven or microwave; keep them covered in the oven to help prevent the filling from drying out.
Frequently asked questions
Can I use turkey or beef?
Either lean ground turkey or lean ground beef works. Cook the meat until browned and cooked through before adding the beans, corn and seasonings.
Can I use frozen or canned corn?
Yes. The recipe allows fresh, frozen or canned kernels; drain canned corn, and make sure frozen corn is thawed or heated through in the pan.
Should I use salsa or diced tomatoes?
Both are suitable. Salsa gives a more seasoned topping, while diced tomatoes have a simpler flavour.
How do I keep the peppers upright?
Choose peppers with a stable base and arrange them snugly in the baking dish. This helps them remain upright while they bake.
Can I prepare the peppers ahead?
You can prepare the filling and peppers in advance, then fill and bake them when needed. Keep prepared ingredients covered in the refrigerator until assembly.
How do I know they are ready?
Follow the covered bake of 25 minutes, then bake uncovered for 5–10 minutes more. The recipe’s final cue is melted, bubbling cheese.
Cook it from the original
This recipe comes from bellerecipe.com. Their page has the author’s own photos, notes and tips — the best place to cook it from.
Open the recipe on bellerecipe.com