
Crispy and Juicy Chicken Cutlets
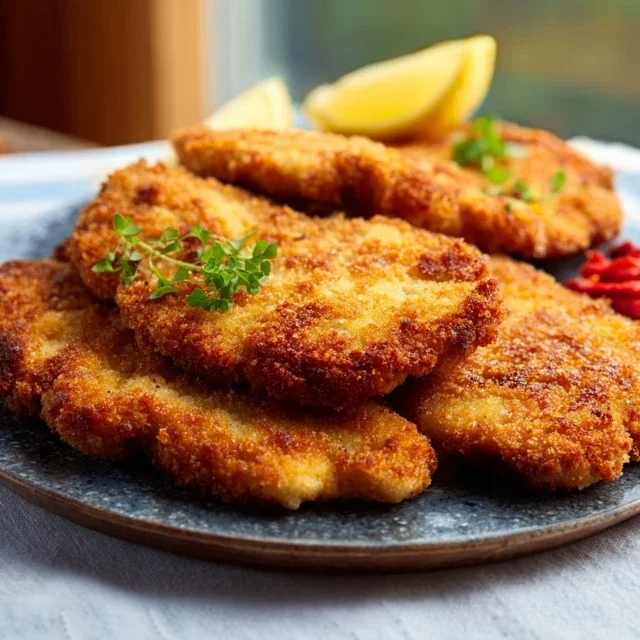
These Italian-American chicken cutlets pair a crisp, Parmesan-seasoned panko coating with thin, tender chicken. The three-stage breading and quick pan-fry make them a satisfying dinner in about 25 minutes.
Ingredients
- 2 large (about 450 g total)boneless, skinless chicken breasts
- 125 g (1 cup)plain flour
- 2 largeeggs
- 120 g (2 cups)panko breadcrumbs
- 50 g (½ cup)grated Parmesan
- 1 teaspoongarlic powder
- 1 teaspoononion powder
- 1 teaspoondried Italian seasoning
- 1 teaspoon, divided, plus more for finishingsalt
- ½ teaspoon, dividedfreshly ground black pepper
- 360 ml (1½ cups)neutral oil, such as rapeseed, vegetable or avocado oil
- To tastefresh parsley, chopped, for garnish
- To tastelemon wedges, for serving
Instructions
- 1
Butterfly the chicken
Place a chicken breast on a chopping board. Hold your knife parallel to the board and slice horizontally through the thickest part, stopping short of cutting all the way through. Open the breast like a book. Repeat with the second breast.
- 2
Pound and season
Put one butterflied breast between two pieces of cling film and use the flat side of a meat mallet to pound it to an even 6 mm thickness. Repeat with the other breast. Season both sides of all four cutlets generously with salt and pepper.
- 3
Prepare the coating
Set out three shallow dishes. In the first, mix the flour with ½ teaspoon of the salt and ¼ teaspoon of the pepper. In the second, whisk the eggs until smooth. In the third, combine the panko, Parmesan, garlic powder, onion powder, Italian seasoning and the remaining ½ teaspoon of salt and ¼ teaspoon of pepper.
- 4
Bread the cutlets
Coat each cutlet in the seasoned flour and shake off any excess. Dip it fully into the egg, letting excess drip away, then press it into the panko mixture so both sides have a thick, even coating. Set it on a wire rack and repeat with the remaining cutlets.
- 5
Heat the oil
Pour about 1.3 cm of oil into a large, heavy-based frying pan and heat over medium-high heat until it shimmers, about 175°C (350°F). Carefully add two cutlets, leaving space between them.
- 6
Fry until golden
Fry the cutlets for 2–3 minutes per side, until deep golden brown and cooked through. Transfer them to a wire rack to drain so the coating stays crisp.
- 7
Finish and serve
Sprinkle the hot cutlets with a pinch of salt and fresh parsley. Fry the remaining two cutlets in the same way, then serve straight away with lemon wedges for squeezing.
What are chicken cutlets?
Chicken cutlets are thin pieces of chicken, often breaded and fried until crisp. This Italian-American take uses panko and Parmesan for a crunchy, savoury coating.
Butterflying and pounding the breasts creates four evenly thin pieces, so they cook quickly while the coating turns golden.
Nutrition and macros by portion
The nutrition label shows one serving as written: 420 calories, 0g protein, 0g carbs, 0g fat.
| Portion | Adjustment | kcal | Protein | Carbs | Fat |
|---|---|---|---|---|---|
| Lighter | Use less frying oil | 294 kcal | 0g | 0g | 0g |
| This serving | As written | 420 kcal | 0g | 0g | 0g |
| Hungry | Add a larger side | 630 kcal | 0g | 0g | 0g |
The chicken supplies most of the protein, while flour and panko contribute carbohydrates. The coating, Parmesan and frying oil provide much of the fat; serve a cutlet with vegetables or salad for a balanced plate.
Why panko and Parmesan work
Panko: these coarse Japanese-style breadcrumbs leave a light, crisp texture around the chicken.
Parmesan: grated cheese seasons the crumbs with a savoury edge and helps make the crust more flavourful. Garlic, onion and Italian seasoning build on that without adding a complicated marinade.
The three-stage coating
Flour: a light, even dusting gives the egg something to cling to, so shake off loose flour before dipping.
Egg: coat every surface, then allow excess to drip away to avoid damp, heavy patches.
Panko: press the crumbs onto both sides for an even layer, but handle the breaded cutlets gently so the coating stays in place.
Pounding for even cooking
Even thickness: aim for about 6 mm across each cutlet. This helps the thinner edges and thicker centre finish cooking at roughly the same time.
Gentle pressure: use the flat side of the mallet and work across the chicken rather than striking hard in one spot, which can tear the meat.
Frying and checking doneness
Oil temperature: wait until the oil shimmers before adding the chicken. If it is too cool, the crumb coating can absorb oil; if it is too hot, it may brown before the chicken is cooked through.
Small batches: fry two cutlets at a time as directed, keeping space around them. Look for a deep golden crust and check that the chicken is cooked through before serving.
Keep the crust crisp
Wire rack: drain the cooked cutlets on a rack rather than stacking them or leaving them on a flat plate, where trapped steam can soften the underside.
Serve promptly: add the finishing salt and parsley while the cutlets are hot, and bring the lemon wedges to the table so each person can squeeze them over their portion.
What to serve alongside
A green salad or steamed vegetables add freshness alongside the rich, crisp coating. Roasted potatoes or a simple pasta side make the meal more substantial.
Keep sauces on the side if you want to preserve the crunch; a spoonful of tomato sauce or a lemony dressing can be added at the table.
Recipe notes & tips
- Use a wire rack under the breaded cutlets while you finish coating the rest.
- Keep the cutlets in a single layer when placing them in the pan.
- Let excess egg drip off before pressing the chicken into the panko.
- Use a thermometer to check the oil if you are unsure whether it is hot enough.
- Have the lemon wedges and parsley ready before frying, so the cutlets can be served hot.
Variations
- Add fresh herbs: mix finely chopped parsley into the panko for a more herbal coating.
- Use pecorino: replace the Parmesan with finely grated pecorino for a sharper, saltier flavour.
- Add chilli: mix a pinch of chilli flakes into the breadcrumb mixture for gentle heat.
- Serve with tomato sauce: offer warm tomato sauce on the side to keep the crust crisp until serving.
- Make a sandwich: tuck a cutlet into a soft roll with salad leaves and a squeeze of lemon.
Common mistakes to avoid
- Uneven thickness: pound each cutlet to about 6 mm so it cooks evenly.
- Loose coating: shake off excess flour and egg, then press the panko firmly onto both sides.
- Cool oil: wait for it to shimmer before frying so the coating does not soak up excess oil.
- Crowded pan: fry only two cutlets at a time so they brown rather than steam.
- Soft underside: drain the fried cutlets on a wire rack instead of stacking them on a plate.
How to store
Refrigerate leftovers in an airtight container for up to 3 days. Reheat in an oven or air fryer until hot to help revive the crust; microwaving will soften the coating.
Frequently asked questions
Can I prepare the cutlets ahead?
You can bread them shortly before cooking and keep them in a single layer on a rack in the fridge. Fry just before serving for the crispiest coating.
How can I tell when the chicken is cooked through?
The cutlets should be deep golden and cooked through after 2–3 minutes per side. A food thermometer inserted into the thickest part can confirm doneness.
Can I use regular breadcrumbs instead of panko?
Yes, but the coating will be finer and may not have the same airy crunch. Use the same amount and coat the chicken in the same way.
Can I bake these cutlets instead?
This method is written for frying, which gives the specified crust and texture. Baking will produce a different result, so check that the chicken is cooked through before serving.
Why is my breading falling off?
Excess flour or egg can make the coating slip. Shake off the flour, let excess egg drip away, and press the panko onto the chicken before frying.
Can I freeze cooked cutlets?
Yes. Cool them, freeze in a single layer, then transfer to a sealed freezer-safe container. Reheat from frozen in an oven until hot throughout.
Cook it from the original
This recipe comes from besthomemaderecipes.com. Their page has the author’s own photos, notes and tips — the best place to cook it from.
Open the recipe on besthomemaderecipes.com