
Pressure cooker roast
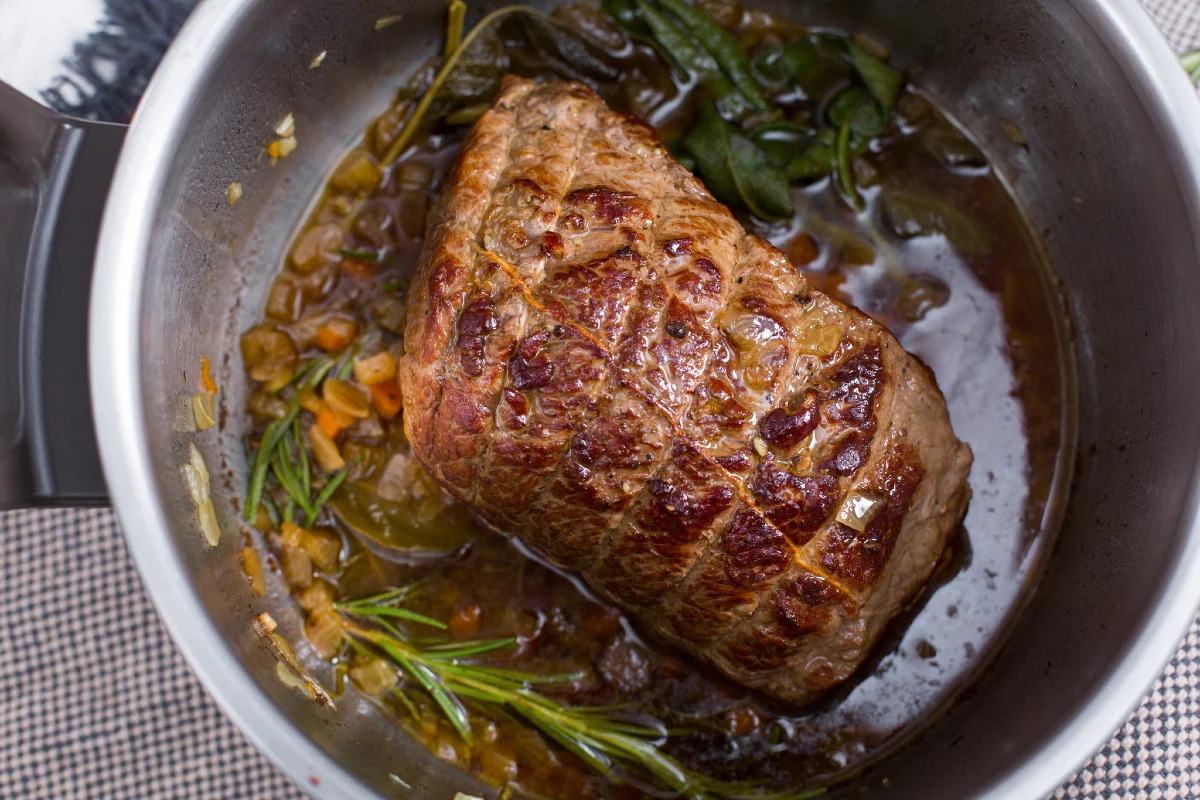
This pressure cooker roast is beef browned with vegetables, white wine and herbs, then cooked until tender. It gives you the character of a traditional roast in less time, with the cooking juices ready to spoon over the meat.
Ingredients
- 1 kgbeef topside, tied
- 1 stalkcelery
- 1carrot
- 1onion
- 200 gwhite wine
- 1 sprigrosemary
- 1 sprigsage
- 1 sprigbay
- to tastefine salt
- to tasteextra-virgin olive oil
- to tasteblack pepper
Instructions
- 1
Heat the oil
Use a tied piece of beef; if yours is not tied, tie it before cooking. Pour a little oil into a 4.5-litre pressure cooker and heat over medium-high heat, then add the beef.
- 2
Brown the beef
Brown the meat thoroughly on all sides, turning it with tongs without piercing it. Transfer it to a chopping board, then pour the white wine into the cooker.
- 3
Deglaze and chop
Scrape up the browned bits from the base of the cooker and pour the liquid into a small bowl. Roughly chop the celery and onion.
- 4
Soften the vegetables
Roughly chop the carrot as well. Add a little more oil to the cooker, then add the vegetables and cook them over medium-low heat until softened.
- 5
Add herbs and beef
Pour the reserved cooking liquid back into the cooker. Return the beef and add the rosemary, sage and bay.
- 6
Pressure cook
Add a pinch of salt and a little black pepper, then close the pressure cooker. Cook over medium-high heat until it comes to pressure and makes a continuous hissing sound, then lower the heat to medium and cook for 20 minutes. Turn off the heat and let the pressure fall completely before opening the lid.
What is pressure cooker roast?
A pressure cooker roast is a joint of beef browned first, then cooked under pressure with vegetables, wine and herbs. It draws on the familiar roast-and-braise approach, but the sealed cooker shortens the cooking time.
This version builds flavour in the same pot: the browned residue is lifted with white wine, then returned to the vegetables and beef. Tying the joint helps it hold its shape as it cooks.
Nutrition and macros by portion
The nutrition label shows one serving as written: 258 calories, 0g protein, 2g carbs, 12g fat.
| Portion | Adjustment | kcal | Protein | Carbs | Fat |
|---|---|---|---|---|---|
| Lighter | Use less olive oil | 181 kcal | 0g | 1g | 8g |
| This serving | As written | 258 kcal | 0g | 2g | 12g |
| Hungry | Serve a larger slice | 387 kcal | 0g | 3g | 18g |
The beef is the main source of protein, while the wine and vegetables contribute most of the small amount of carbohydrate; olive oil supplies most of the fat. Pair a portion with vegetables and a modest serving of potatoes or another starchy side for a more complete plate.
Choosing the beef
The cut: Babilla is a lean beef cut from the hindquarter, sold in English-speaking shops under varying names; topside is a useful equivalent to ask for. A tied joint stays compact and is easier to slice after cooking.
The browning: Turn the meat with tongs and avoid piercing it. This helps keep the joint intact while giving the cooker base browned bits that enrich the cooking liquid.
Building the cooking base
The wine: White wine loosens the browned residue from the base of the cooker. Scrape the base well, then reserve the liquid so it can be added back with the beef.
The vegetables: Roughly chopped celery, carrot and onion form the aromatic base. Cook them over medium-low heat until softened before adding the meat and herbs.
Getting the pressure right
The cue: Start the 20-minute cooking period once the cooker is under pressure and making a continuous hiss. Reduce the heat to medium at that point, rather than keeping it at the initial higher setting.
The release: Let the pressure fall completely after switching off the heat. Do not try to open the lid while the cooker is still pressurised.
Checking texture and serving
The finished joint should be tender enough to slice comfortably, while still holding together. Let the pressure release fully before lifting out the beef, and slice it across the grain for a more tender bite.
Spoon some of the cooking juices over the slices. Serve with potatoes or another starchy side and a green vegetable to make a balanced plate.
Working with the timing
The recipe gives a total time of 50 minutes, including browning, preparing the vegetables and bringing the cooker to pressure. The 20-minute pressure-cooking period begins only once the cooker has reached pressure.
Allow for the cooker to depressurise completely before serving; the method does not give a separate release time. Keep the lid closed during this stage.
Recipe notes & tips
- Ask the butcher for a joint suitable for tying if the beef is not already prepared.
- Pat the beef dry before browning so the surface can colour rather than steam.
- Turn the beef with tongs instead of piercing it with a fork.
- Scrape the base thoroughly when deglazing to lift the browned residue into the wine.
- Wait for a steady, continuous hiss before starting the 20-minute cooking period.
- Wait until the pressure has fallen completely before opening the cooker.
Variations
- Red wine: Replace the white wine with red wine for a deeper flavour.
- Extra herbs: Add another sprig of rosemary or sage for a more pronounced herbal note.
- More vegetables: Increase the celery, carrot or onion if you would like more vegetables in the cooking juices.
- Thicker juices: After removing the cooked beef, simmer the liquid uncovered until it reaches the consistency you prefer.
- Sliced leftovers: Chill the remaining beef and slice it thinly for sandwiches.
Common mistakes to avoid
- Piercing the joint: This can let juices escape; turn it carefully with tongs instead.
- Skipping the browning: The cooking liquid misses the savoury browned bits; colour the beef on all sides first.
- Leaving residue behind: The base loses flavour; scrape it well when deglazing with the wine.
- Starting the timer too early: The 20 minutes begins once the cooker reaches pressure, not when it is first put on the heat.
- Forcing the lid open: The cooker must depressurise fully before it is safe to open.
- Keeping the heat high: Reduce it to medium when the cooker reaches pressure and begins its continuous hiss.
How to store
Cool leftovers promptly and refrigerate them in an airtight container for up to 3 days. Reheat slices gently with some of the cooking juices until piping hot; avoid drying the meat out with prolonged high heat.
Frequently asked questions
Can I use a different cut of beef?
Choose a joint suited to roasting or braising and ask your butcher for a cut that can be tied. The texture may vary with the cut and the size of the joint.
Do I need to tie the beef?
The method calls for a tied joint, which helps it keep a compact shape. Ask the butcher to tie it if it is not already prepared.
When do I start the 20-minute timer?
Start timing once the cooker has reached pressure and makes a continuous hissing sound. Lower the heat to medium at that point.
Can I open the pressure cooker as soon as the heat is off?
No. Let the pressure fall completely first, then open the lid once the cooker is no longer pressurised.
How should I serve pressure cooker roast?
Slice the beef and spoon the cooking juices over it. Potatoes and a green vegetable make straightforward accompaniments.
Can I make it ahead?
Yes. Refrigerate the cooked beef with its juices, then reheat it gently in the juices before serving.
Cook it from the original
This recipe comes from giallozafferano.es. Their page has the author’s own photos, notes and tips — the best place to cook it from.
Open the recipe on giallozafferano.es