
Sloppy Joe Recipe
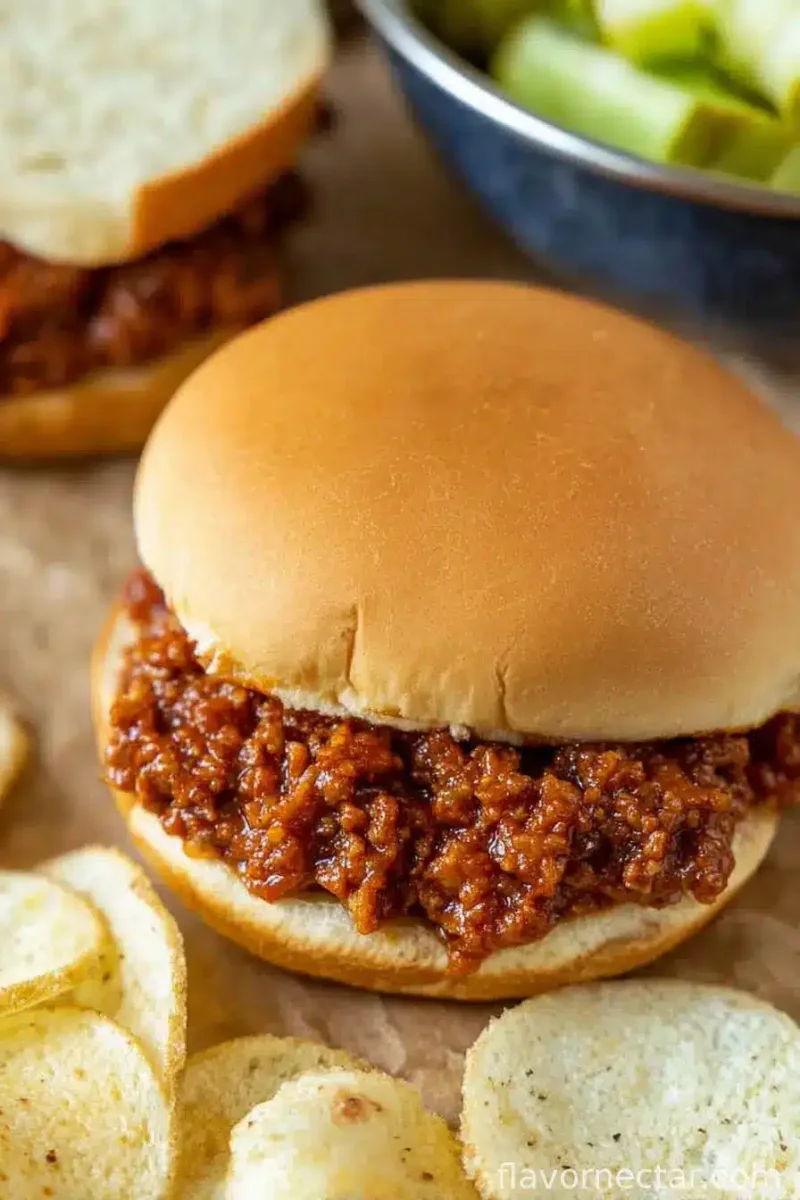
A classic American sandwich of browned beef simmered in a tangy tomato sauce, piled into toasted buns. It makes a hearty weeknight dinner in about 30 minutes.
Ingredients
- 450 g (1 pound)ground beef
- 15 ml (1 tablespoon)olive oil
- 1 smallonion, finely chopped
- ½green pepper, diced
- 2 clovesgarlic, minced
- 240 ml (1 cup)tomato sauce
- 30 ml (2 tablespoons)tomato paste
- 15 ml (1 tablespoon)Worcestershire sauce
- 15 ml (1 tablespoon)brown sugar
- 5 ml (1 teaspoon)chilli powder
- to tastesalt and black pepper
- 4hamburger buns
Instructions
- 1
Soften the vegetables
Warm the olive oil in a large frying pan over a medium heat. Add the chopped onion and diced green pepper and sauté for about 3 minutes, until softened.
- 2
Brown the beef
Add the ground beef and cook for 5–7 minutes, breaking it up with a spoon, until browned and cooked through. Drain off any excess fat if needed.
- 3
Add the garlic
Stir in the minced garlic and cook for 1 minute, until fragrant.
- 4
Mix in the sauce
Add the tomato sauce, tomato paste, Worcestershire sauce, brown sugar, chilli powder, salt and black pepper. Stir until combined.
- 5
Simmer until thick
Turn the heat to low and simmer for 8–10 minutes, stirring occasionally, until the mixture has thickened.
- 6
Fill the buns
Spoon the beef mixture into toasted hamburger buns and serve hot.
What is a Sloppy Joe?
A Sloppy Joe is an American sandwich filled with minced beef cooked in a loose, savoury tomato sauce. Its name suits the generous, saucy filling, which is usually eaten in a soft bun.
This version balances tomato, Worcestershire sauce and a little brown sugar, with onion, pepper and garlic adding savoury depth. The short simmer lets the sauce cling to the beef without losing its spoonable texture.
Nutrition and macros by portion
The nutrition label shows one serving as written: 480 calories, 27g protein, 43g carbs, 20g fat.
| Portion | Adjustment | kcal | Protein | Carbs | Fat |
|---|---|---|---|---|---|
| Lighter | Serve open-faced | 336 kcal | 19g | 30g | 14g |
| This serving | As written | 480 kcal | 27g | 43g | 20g |
| Hungry | Add an extra bun | 720 kcal | 41g | 65g | 30g |
The beef supplies most of the protein and fat, while the buns provide much of the carbohydrate; the sauce and vegetables contribute smaller amounts. Pair a sandwich with salad or other vegetables for a plate with more fresh produce alongside.
The flavour base
Onion and green pepper: soften these first so they become tender before the beef and sauce go in.
Tomato and seasoning: tomato sauce provides the liquid, while tomato paste brings concentrated flavour. Worcestershire sauce, brown sugar and chilli powder round out the tangy, gently spiced mixture.
Getting the beef right
Break the beef into small pieces as it cooks so it mixes evenly with the vegetables and sauce. Let it brown rather than stirring constantly, and drain excess fat if needed before adding the garlic.
A sauce that clings
Keep the mixture at a gentle simmer for 8–10 minutes, stirring now and then to prevent sticking. It is ready when the sauce has thickened and coats the beef, but remains moist enough to spoon into the buns.
Toast the buns
Toasting gives the cut sides a little structure against the saucy filling. Spoon the mixture onto the buns just before serving so they stay easier to handle.
What to serve alongside
Serve these sandwiches hot with a crisp green salad, coleslaw or sliced vegetables for contrast. For a heartier meal, add oven-baked chips or wedges.
Recipe notes & tips
- Chop the onion and pepper finely so they soften quickly and distribute through the filling.
- Break up the beef as it browns to avoid large clumps in the finished sauce.
- Drain excess fat after browning if the pan looks greasy.
- Stir occasionally during simmering, especially around the edges of the pan.
- Toast the buns close to serving time so they retain some texture.
Variations
- Add heat: increase the chilli powder slightly for a spicier filling.
- Make it smokier: add a little smoked paprika alongside the chilli powder.
- Use turkey: swap the beef for ground turkey and cook it through before adding the sauce.
- Add more vegetables: stir in finely diced mushrooms with the onion and pepper.
- Choose wholemeal buns: use wholemeal hamburger buns for a different texture.
Common mistakes to avoid
- Crowding the pan: use a large skillet so the beef can brown rather than steam.
- Leaving large pieces: break the beef apart with a spoon as it cooks for an even filling.
- Skipping the simmer: give the sauce the full 8–10 minutes to thicken and coat the meat.
- Using high heat to simmer: keep it low and stir occasionally to reduce the chance of sticking.
- Filling buns too early: spoon the mixture in just before serving to help prevent soggy buns.
How to store
Refrigerate leftover filling in a sealed container for up to 3 days, separate from the buns. Reheat the filling in a pan over a low heat, stirring until piping hot; add a splash of water if it has thickened too much.
Frequently asked questions
Can I make the filling ahead?
Yes. Cook the filling, cool it promptly and refrigerate it in a sealed container. Reheat until piping hot and toast the buns just before serving.
How can I tell when the sauce is thick enough?
It should coat the beef and stay on a spoon rather than running freely around the pan. Simmer a little longer on low if it still looks thin.
Do I need to drain the beef?
Only if there is excess fat in the pan. The recipe calls for draining it if needed after the beef has browned.
Can I freeze the filling?
Freeze the cooled filling in a sealed, freezer-safe container. Thaw it in the refrigerator and reheat thoroughly; freeze the filling without the buns.
What can I use instead of hamburger buns?
Serve the filling in another soft roll, or spoon it over a baked potato or rice if you do not have buns.
Cook it from the original
This recipe comes from flavornectar.com. Their page has the author’s own photos, notes and tips — the best place to cook it from.
Open the recipe on flavornectar.com