
Roasted Broccolini
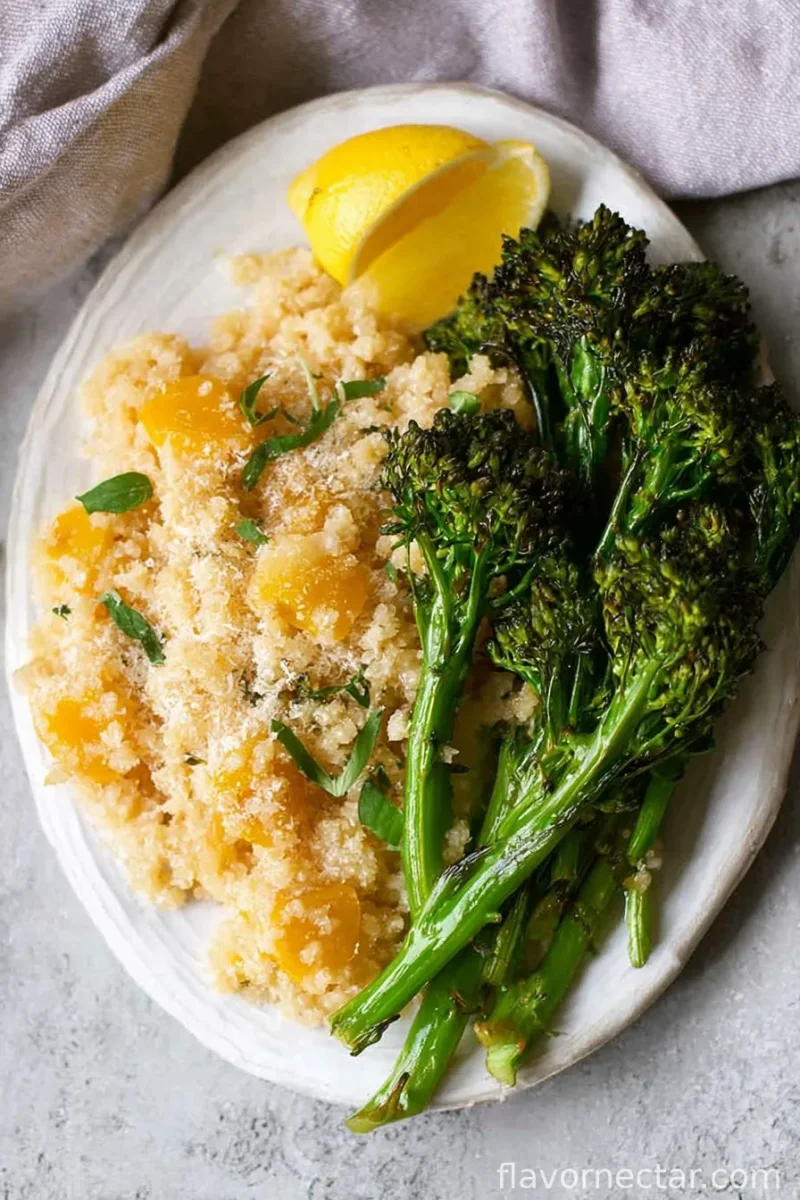
Roasted broccolini is a quick side dish with tender stems, crisp edges and bright garlic-and-lemon flavour. Roast it for an easy way to bring a vivid green vegetable to the dinner table.
Ingredients
- 454 g (1 lb)broccolini, trimmed
- 30 ml (2 tablespoons)extra virgin olive oil
- 3garlic cloves, minced
- 2.5 g (1/2 teaspoon)sea salt
- 0.5 g (1/4 teaspoon)black pepper
- 0.5 g (1/4 teaspoon), optionalcrushed red pepper flakes
- 1 smalllemon, zested and juiced
- 10 g (2 tablespoons), optional, for servinggrated Parmesan cheese
Instructions
- 1
Heat the oven
Preheat the oven to 220°C (425°F). Line a baking sheet with parchment paper.
- 2
Season the broccolini
In a large bowl, toss the broccolini with the olive oil, minced garlic, sea salt, black pepper and crushed red pepper flakes, if using, until evenly coated.
- 3
Arrange on the tray
Spread the broccolini in an even layer on the prepared baking sheet.
- 4
Roast until tender
Roast in the preheated oven for 16–18 minutes, until the broccolini is tender and its edges start to crisp.
- 5
Finish and serve
Remove from the oven and immediately drizzle with the lemon juice and zest. Sprinkle with Parmesan, if desired, and serve warm.
What is roasted broccolini?
Broccolini is a green vegetable with slender stems and small florets, often cooked whole as a side. This American-style preparation uses roasting to bring out browned edges, then adds lemon for a fresh, tangy finish.
The method is simple: coat the vegetables with oil and seasonings, roast them in a hot oven, and add the lemon at the end. Parmesan is an optional savoury topping.
Nutrition and macros by portion
The nutrition label shows one serving as written: 70 calories, 2g protein, 6g carbs, 6g fat.
| Portion | Adjustment | kcal | Protein | Carbs | Fat |
|---|---|---|---|---|---|
| Lighter | Use less olive oil | 49 kcal | 1g | 4g | 4g |
| This serving | As written | 70 kcal | 2g | 6g | 6g |
| Hungry | Larger broccolini portion | 105 kcal | 3g | 9g | 9g |
The listed nutrition per serving is 70 kcal, with 6 g of carbohydrate, 6 g of fat and 2 g of protein. Olive oil is the main source of fat, while the broccolini contributes most of the carbohydrate and some protein. To make a more balanced plate, serve it with a protein-rich main and a source of grains or potatoes.
The key ingredients
Broccolini: Trim the ends as listed and use stems and florets together. Keeping the pieces in a single layer helps them roast rather than steam.
Olive oil and garlic: The oil coats the vegetables and helps them brown, while minced garlic seasons them throughout. Toss thoroughly so the garlic is distributed across the tray.
Lemon and Parmesan: Lemon zest and juice go on after roasting, keeping their flavour bright. Parmesan is optional and adds a salty, savoury finish.
Getting the roast right
Even coating: Toss the broccolini in a large bowl until the oil and seasonings cover it well. This helps the flavour reach both the stems and florets.
Single layer: Spread the pieces evenly across the prepared baking sheet. If they are piled up, they are less likely to develop crisp edges.
How to judge doneness
Roast for 16–18 minutes at 220°C, looking for tender broccolini with edges beginning to crisp. The recipe gives both the time and these visual and texture cues, so use them together.
The stems should be tender rather than limp, with some browning at the edges. Serve soon after adding the lemon and optional Parmesan.
Timing and preparation
The stated total time is 28 minutes, including a 16–18-minute roast. Prepare the tray and toss the broccolini while the oven heats to keep the cooking process straightforward.
Zest and juice the lemon before the broccolini comes out of the oven, so you can finish it immediately while hot.
What to serve with it
Serve this as a vegetable side alongside a main course, with the lemon helping to balance richer or more savoury flavours. It also fits easily into a meal with grains or potatoes.
For a more filling plate, pair it with a protein-rich main; keep the broccolini as the fresh, lightly seasoned element.
Recipe notes & tips
- Dry the trimmed broccolini before tossing so the oil and seasonings coat it well.
- Spread the pieces in one even layer on the baking sheet.
- Use the red pepper flakes only if you want a little heat.
- Zest the lemon before juicing it to make both parts easier to handle.
- Add the lemon juice and zest as soon as the tray comes out of the oven.
- Add Parmesan just before serving, if using.
Variations
- More heat: Increase the crushed red pepper flakes to suit your taste.
- Extra lemon: Add more zest at the end for a stronger citrus note.
- No Parmesan: Leave off the optional cheese for a dairy-free version.
- Cheesier finish: Add the listed Parmesan just before serving.
- Milder seasoning: Omit the crushed red pepper flakes.
Common mistakes to avoid
- Crowded tray: The broccolini may soften rather than crisp; spread it in an even layer.
- Uneven coating: Some pieces may taste under-seasoned; toss thoroughly with the oil and seasonings.
- Overcooking: The stems can become limp; check for tenderness and crisping edges within the 16–18-minute window.
- Lemon added too early: Its fresh finish can be muted; drizzle on the juice and zest immediately after roasting.
- Skipping the trim: Tough stem ends can remain; trim the broccolini before seasoning.
How to store
Refrigerate leftovers in a covered container and use within 3–4 days. Reheat in the oven until warmed through; the broccolini may be softer than when freshly roasted.
Frequently asked questions
Can I make this without red pepper flakes?
Yes. The flakes are optional, so leave them out for a milder side.
How do I know when the broccolini is ready?
After 16–18 minutes at 220°C, it should be tender, with edges beginning to crisp.
Do I need to add the Parmesan?
No. Parmesan is optional and can be left off.
When should I add the lemon?
Add the juice and zest immediately after removing the broccolini from the oven, as directed.
Can I prepare the broccolini ahead?
You can trim it ahead of time, then toss and roast it when ready to serve for the best texture.
Cook it from the original
This recipe comes from flavornectar.com. Their page has the author’s own photos, notes and tips — the best place to cook it from.
Open the recipe on flavornectar.com