
Açaí and nut bowl
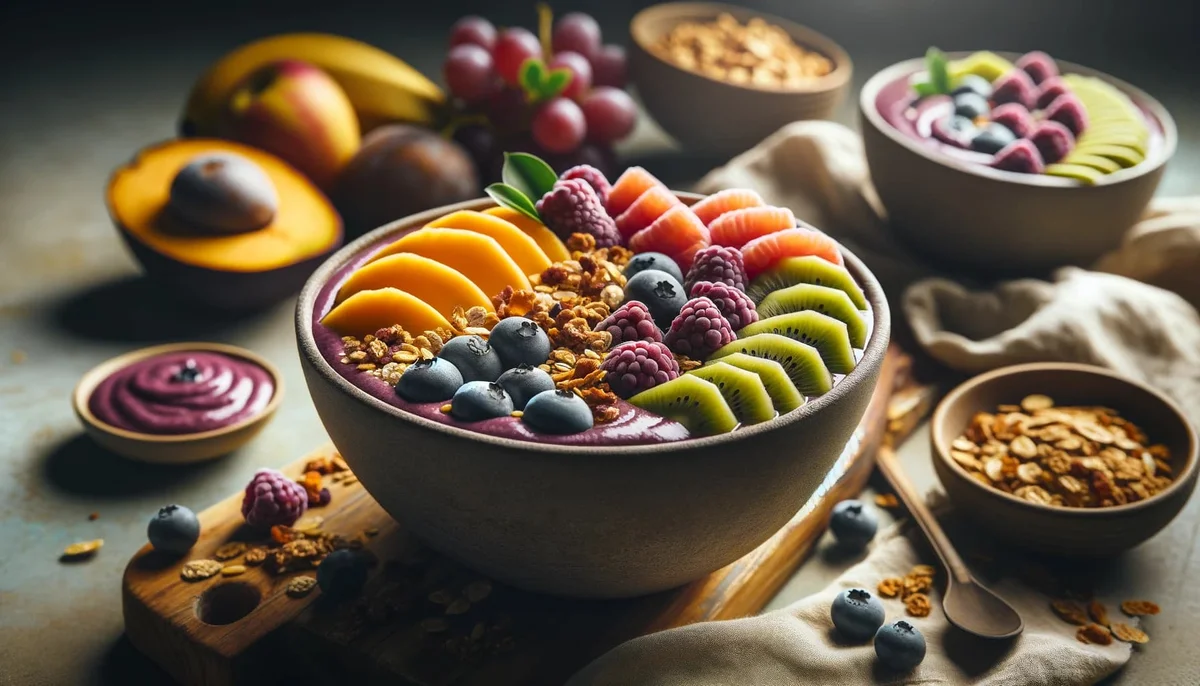
This vegan açaí bowl blends açaí pulp and ripe banana into a creamy base, then adds nuts, fresh fruit, chocolate granola and chia. It makes a colourful breakfast or snack with a mix of smooth, crunchy and fruity textures.
Ingredients
- 2 tablespoons (30 g)açaí pulp
- 1ripe banana
- ½ cup (about 60 g)mixed nuts (almonds, walnuts and hazelnuts)
- to tastefresh fruit, such as mango, kiwi and raspberries
- to tastechocolate granola
- 1 tablespoon (about 15 g)chia seeds
Instructions
- 1
Blend the açaí
Put the açaí pulp and sliced ripe banana in a blender with a little water or plant-based drink. Blend until smooth and creamy.
- 2
Fill the bowl
Pour the blended açaí mixture into a large bowl.
- 3
Add the toppings
Scatter the mixed nuts evenly over the açaí, then add the fresh fruit, cut into small pieces.
- 4
Finish the bowl
Sprinkle chocolate granola over the top and finish with 1 tablespoon of chia seeds.
- 5
Serve and enjoy
Enjoy the açaí and nut bowl once assembled.
What is an açaí bowl?
An açaí bowl is a thick, spoonable blend of açaí pulp, often served with fruit and crunchy toppings. Açaí is a fruit from the Amazon region of South America, and bowls made with it are especially associated with Brazilian food culture.
This version pairs açaí with banana for a creamy base, while nuts, fresh fruit, chocolate granola and chia provide a variety of textures.
Nutrition and macros by portion
The nutrition label shows one serving as written: 835 calories, 0g protein, 0g carbs, 0g fat.
| Portion | Adjustment | kcal | Protein | Carbs | Fat |
|---|---|---|---|---|---|
| Lighter | Use less granola | 585 kcal | 0g | 0g | 0g |
| This serving | As written | 835 kcal | 0g | 0g | 0g |
| Hungry | Add more fruit and nuts | 1253 kcal | 0g | 0g | 0g |
The banana and fruit provide most of the carbohydrates, while the nuts and chia contribute much of the fat and some protein. The granola can add further carbohydrates and fat, depending on the product. To balance the plate, serve a smaller amount of granola and add an unsweetened drink alongside.
Getting the base right
Açaí and banana: Blend them together with only a little water or plant-based drink at first. Add more only if needed to help the blender run, so the mixture stays thick enough to eat with a spoon.
Banana: A ripe banana blends readily and adds sweetness to balance the açaí. Slice it before blending to help it break down evenly.
Choosing the toppings
Mixed nuts: Almonds, walnuts and hazelnuts give the bowl a crunchy contrast to its smooth base. Scatter them over the surface so you get some in each spoonful.
Fresh fruit: Mango, kiwi and raspberries are suggested options; cut them into small pieces for easier eating. Add the chocolate granola and chia last to keep their textures distinct.
Texture and timing
The method takes 15 minutes in total, with no cooking required. The base is ready when it looks smooth and creamy, without noticeable pieces of banana.
For the best contrast, assemble the toppings just before serving. If the blended base seems too loose, avoid adding more liquid and serve it as it is rather than trying to thicken it with unlisted ingredients.
Serving the bowl
Serve it straight after adding the toppings, while the fruit is fresh and the granola is crisp. A spoon is the easiest way to enjoy the thick base and layered toppings together.
For a more balanced breakfast, pair the bowl with an unsweetened drink and adjust the amount of granola to suit your appetite.
Recipe notes & tips
- Slice the banana before blending so it mixes into the açaí more easily.
- Start with just a little water or plant-based drink and add more only if the blender needs it.
- Cut the fresh fruit into small pieces so it is easy to combine with the base.
- Distribute the nuts evenly to spread the crunch across the bowl.
- Add the granola just before eating to help it stay crisp.
Variations
- Change the fruit: Use other fresh fruit you have available in place of the suggested mango, kiwi and raspberries.
- Switch the nuts: Choose a different mix of nuts while keeping the same crunchy topping idea.
- Make it smoother: Blend the nuts into the base instead of scattering them over the top.
- Adjust the crunch: Add more or less chocolate granola to suit your preference.
- Use a plant-based drink: Choose one instead of water when blending for a different-tasting base.
Common mistakes to avoid
- Adding too much liquid: The base can become thin; begin with a little and add more only as needed.
- Blending in large banana pieces: They may not break down evenly; slice the banana first.
- Cutting the fruit too large: Big pieces are awkward to eat with the base; cut them into small pieces.
- Adding granola too early: It can lose its crunch; sprinkle it on just before serving.
- Piling toppings in one spot: Some bites may lack variety; spread them across the bowl.
How to store
For the best texture, assemble and eat the bowl straight away. If needed, refrigerate the blended base in a covered container and add the toppings just before serving; the recipe does not give a specific storage time. Reblend or stir the base before serving if it has separated.
Frequently asked questions
Can I use frozen açaí pulp?
Yes. Use it in place of the açaí pulp listed, following the pack instructions if it needs thawing before blending.
Can I make the bowl without a blender?
The method relies on blending the açaí and banana into a smooth base. Without a blender, the result may be less creamy, so mash the banana thoroughly and mix it with the açaí as evenly as possible.
Which fresh fruit works best?
Mango, kiwi and raspberries are suggested, but other fresh fruit can be used. Cut it into small pieces for easy spoonfuls.
Can I prepare it ahead?
You can blend the base ahead and keep it covered in the fridge, then add the toppings when ready to eat. The granola is best added at the last moment so it stays crisp.
How can I keep the base thick?
Use only a little water or plant-based drink when blending, adding more only if needed. Too much liquid makes the mixture thinner.
Cook it from the original
This recipe comes from b3tterfoods.com. Their page has the author’s own photos, notes and tips — the best place to cook it from.
Open the recipe on b3tterfoods.com