
Cheesy Bell Stuffed Peppers
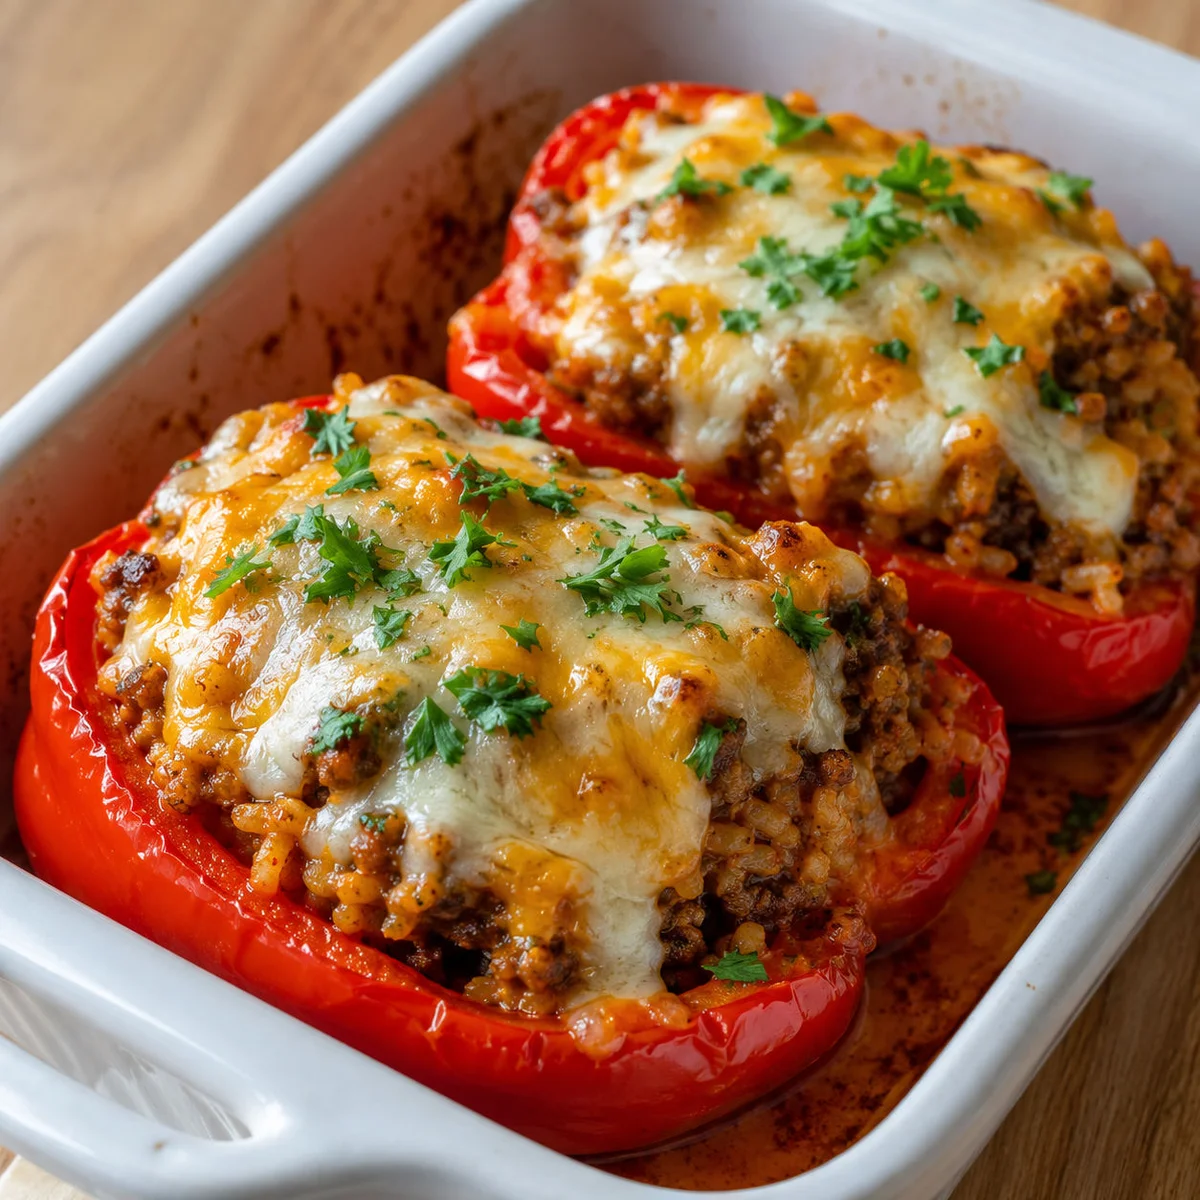
These American-style stuffed peppers are filled with seasoned beef, tomatoes and rice, then topped with mozzarella and sharp cheddar. They make a comforting oven-baked dinner, with the cheese turning golden and bubbling as the peppers soften.
Ingredients
- 4 largebell peppers (red, orange or yellow), halved lengthways and seeded
- 15 mlolive oil, for brushing
- 120 mltomato sauce, for the baking dish
- 450 g80/20 ground beef
- 1 mediumyellow onion, finely diced
- 3 clovesgarlic, minced
- 1 can (411 g)diced tomatoes, with their liquid
- 185 gcooked white rice
- 1 tspItalian seasoning
- ½ tspsmoked paprika
- 15 mlolive oil
- to tastesalt and black pepper
- 100 gmozzarella, freshly grated
- 55 gsharp cheddar, freshly grated
- 2 tbspfresh flat-leaf parsley, chopped
Instructions
- 1
Prepare the dish
Heat the oven to 190°C. Spread a thin, even layer of tomato sauce over the bottom of a 23 × 33 cm baking dish.
- 2
Ready the peppers
Cut the peppers in half lengthways and remove the seeds and white membranes. Lightly brush the cut sides with olive oil, then place them cut-side up in the dish.
- 3
Brown the beef
Heat 15 ml olive oil in a large frying pan over medium heat. Cook the diced onion for 4–5 minutes, until soft and translucent, then add the garlic and cook for 30 seconds. Add the beef, breaking it up as it cooks, and brown it until no pink remains, about 7 minutes. Drain off excess fat.
- 4
Make the filling
Stir in the diced tomatoes and their liquid, Italian seasoning, smoked paprika, salt and pepper. Simmer for 2 minutes, then remove from the heat and fold in the cooked rice. Taste and adjust the seasoning.
- 5
Fill and top
Spoon the filling evenly into the pepper halves, piling it slightly above the edges. Mix the mozzarella and cheddar, then generously cover each pepper with the cheese.
- 6
Bake until bubbling
Cover the dish tightly with foil and bake for 25 minutes. Remove the foil and bake for another 10 minutes, until the cheese is golden and bubbling at the edges. Scatter the chopped parsley over the peppers before serving.
What are stuffed peppers?
Stuffed peppers are a familiar American home-cooking dish: hollowed peppers are filled with a savoury mixture and baked until tender. The filling here combines ground beef, rice and tomatoes, with cheese added for a rich, bubbling top.
The method builds flavour in a pan before the peppers go into the oven. That gives the beef and aromatics a head start, while the covered bake helps the pepper halves soften.
Nutrition and macros by portion
The nutrition label shows one serving as written: 430 calories, 32g protein, 28g carbs, 23g fat.
| Portion | Adjustment | kcal | Protein | Carbs | Fat |
|---|---|---|---|---|---|
| Lighter | Use leaner beef | 301 kcal | 22g | 20g | 16g |
| This serving | As written | 430 kcal | 32g | 28g | 23g |
| Hungry | Serve a larger portion | 645 kcal | 48g | 42g | 35g |
The white rice and tomatoes supply most of the carbohydrates, while the beef provides much of the protein. The beef and two cheeses contribute most of the fat; pair a pepper with a green salad or steamed vegetables for a fresh, balanced plate.
Why this filling works
Beef and rice: the beef makes the filling savoury and substantial, while cooked rice gives it body and helps it sit neatly inside the pepper halves.
Tomatoes and seasoning: diced tomatoes keep the mixture moist, and Italian seasoning with smoked paprika adds savoury, gently smoky notes. The tomato sauce beneath the peppers adds another layer of moisture as they bake.
Build flavour in the pan
Onion and garlic: let the onion soften before adding the garlic, which needs only 30 seconds so it does not burn. Brown the beef thoroughly, breaking it into small pieces for an even filling.
Drain the fat: remove excess fat after browning, as directed, but keep the tomato liquid in the filling. The tomatoes simmer briefly with the seasonings before the cooked rice is folded in.
Keep the peppers upright
Cut sides up: arrange the halves in a snug single layer so they can hold their filling. A thin layer of tomato sauce in the dish provides a moist base without replacing the filling’s seasoning.
Fill generously: mound the mixture just above each rim, then cover it with the cheese blend. If the halves vary in size, distribute the filling evenly rather than forcing every pepper to take the same amount.
Watch the bake
Covered stage: seal the dish tightly with foil and bake for 25 minutes. This lets the peppers cook through while shielding the cheese from browning too soon.
Uncovered finish: bake for 10 more minutes after removing the foil. Look for golden cheese bubbling at the edges, then finish with parsley just before serving.
Choose peppers and cheese
Pepper colour: red, orange and yellow peppers all suit the filling; choose large ones that can be halved and filled. Removing the white membranes as well as the seeds leaves a clean cavity.
Cheese blend: mozzarella gives a soft, stretchy topping, while sharp cheddar contributes a more pronounced flavour. Grating both freshly makes them easy to mix and distribute over the peppers.
What to serve alongside
A crisp green salad or a simple serving of steamed vegetables makes a fresh contrast to the rich beef and cheese. The peppers already contain rice, so a light side is an easy way to round out the plate.
Serve the peppers hot from the oven, allowing the bubbling cheese to settle briefly before lifting them from the dish.
Recipe notes & tips
- Use a baking dish that holds the pepper halves in a snug single layer.
- Drain excess fat from the browned beef before adding the tomatoes.
- Use cooked rice so it can be folded into the filling after the short simmer.
- Grate the mozzarella and cheddar shortly before topping the peppers.
- Keep the foil tightly sealed during the first 25 minutes of baking.
- Scatter the parsley over the peppers just before serving.
Variations
- Add chilli: stir a pinch of chilli flakes into the tomato and beef mixture.
- Change the cheese: use another melting cheese in place of the mozzarella or cheddar.
- Use brown rice: fold cooked brown rice into the filling instead of white rice.
- Add herbs: mix chopped fresh basil into the filling before stuffing the peppers.
- Make it meat-free: replace the beef with cooked lentils and use the same tomato and rice mixture.
Common mistakes to avoid
- Crowded peppers: they can be awkward to fill; arrange the halves snugly in one layer before adding the mixture.
- Burnt garlic: it can turn bitter; add it after the onion has softened and cook for only 30 seconds.
- Excess fat: it can make the filling greasy; drain it from the pan after browning the beef.
- Dry filling: the rice can absorb moisture; include the diced tomatoes and all their liquid.
- Cheese browning too soon: the tops may colour before the peppers soften; keep the dish covered for the first 25 minutes.
- Under-seasoned filling: taste it before stuffing the peppers and adjust the salt and pepper at that stage.
How to store
Refrigerate cooled leftovers in an airtight container for up to 3 days. Reheat in a covered ovenproof dish until hot throughout, or microwave individual portions until piping hot.
Frequently asked questions
Can I prepare the peppers ahead?
You can make the filling and prepare the pepper halves ahead, then keep them covered in the fridge separately. Fill and bake when ready to serve.
Do I need to cook the rice first?
Yes. The recipe uses 185 g cooked white rice, which is folded into the filling after it simmers.
How do I know the peppers are ready?
The recipe’s cue is golden, bubbling cheese after the final 10 minutes uncovered. The peppers should also be softened by the end of baking.
Can I use a different pepper colour?
Yes. Red, orange or yellow bell peppers are all listed for this recipe.
Can I freeze leftovers?
The peppers can be frozen in an airtight, freezer-safe container, though the texture of the peppers and cheese may soften after thawing. Defrost in the fridge and reheat until hot throughout.
What can I serve with stuffed peppers?
Try a green salad or steamed vegetables alongside them. The filling already includes rice, so a lighter side works well.
Cook it from the original
This recipe comes from cuisinegenial.com. Their page has the author’s own photos, notes and tips — the best place to cook it from.
Open the recipe on cuisinegenial.com