
Honey & oat biscuits
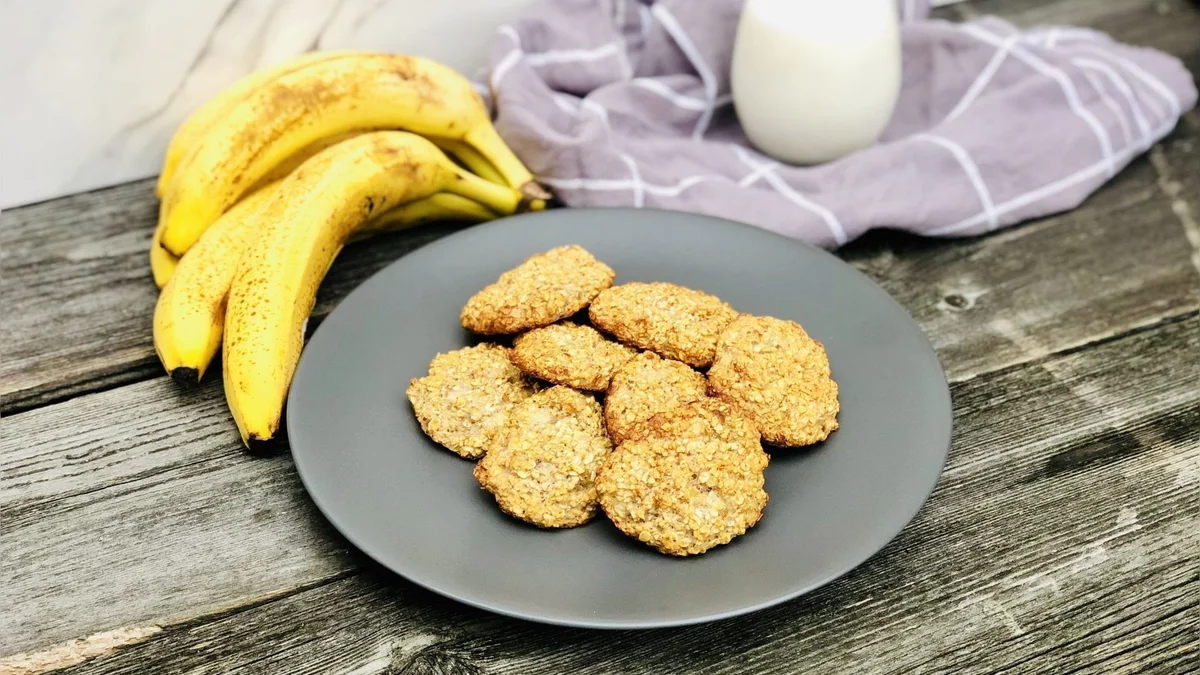
These simple oat and banana biscuits are mixed by hand and baked until golden. They make a straightforward breakfast or snack, with milk served alongside.
Ingredients
- 45oats
- 1egg
- 0.5banana
- 120 ml (½ cup)semi-skimmed milk
- 0.1 tbsphoney
- to tastecinnamon
- a pinchsalt
Instructions
- 1
Preheat the oven
Heat the oven to 200°C.
- 2
Mash the banana
Mash the banana in a bowl with a fork. A riper, older banana will usually be sweeter and easier to mash.
- 3
Add oats and egg
Add the oats, honey and egg to the bowl.
- 4
Season and stir
Add cinnamon and a pinch of salt, then stir the mixture together.
- 5
Shape the biscuits
Divide the mixture evenly into palm-sized cookies and arrange them on a non-stick baking tray.
- 6
Bake until golden
Bake for 25–30 minutes, or until golden brown. For softer, chewier cookies, use the shorter end of the time; bake a little longer for more crunch.
- 7
Serve with milk
Serve with a glass of hot or cold milk.
What are honey and oat biscuits?
These are small, home-baked oat biscuits bound with mashed banana and egg, with a little honey for sweetness. Oat-based bakes have a long history in Britain and elsewhere in northern Europe, where oats have been a familiar baking grain.
This version keeps the method simple: mash, stir, shape and bake. The banana helps hold the mixture together, while the baking time lets you choose a softer or crisper finish.
Nutrition and macros by portion
The nutrition label shows one serving as written: 375 calories, 0g protein, 0g carbs, 0g fat.
| Portion | Adjustment | kcal | Protein | Carbs | Fat |
|---|---|---|---|---|---|
| Lighter | Use less honey | 263 kcal | 0g | 0g | 0g |
| This serving | As written | 375 kcal | 0g | 0g | 0g |
| Hungry | Make a larger batch | 563 kcal | 0g | 0g | 0g |
The oats and banana provide most of the carbohydrate, while the egg contributes protein and some fat; the honey adds a small amount of sugar. The milk served alongside adds protein and carbohydrate, so pair the biscuit with fruit if you want a more varied plate.
Choosing the ingredients
Ripe banana: A soft, spotty banana mashes readily and brings more sweetness than a firm one. With only half a banana in the mixture, mash it thoroughly so it distributes evenly.
Oats and egg: Oats give the biscuits their substance, and the egg helps bind them. Stir until the oats are coated rather than leaving dry patches in the bowl.
Milk: The milk is served alongside the biscuits rather than mixed into the dough in the method. Have it hot or cold, as preferred.
Shaping the mixture
Even portions: Divide the mixture into similar palm-sized biscuits so they bake at roughly the same rate. Place them on a non-stick tray as directed.
Handle gently: The mixture may be softer than conventional biscuit dough. Shape it carefully and avoid pressing the portions too thin.
Getting the texture right
Softer centres: Start checking around 25 minutes for a softer, chewier result. The biscuits should look set rather than wet.
More crunch: Bake towards 30 minutes or a little longer if you prefer a crisper finish, watching for a golden-brown colour. The biscuits will firm further as they cool.
Timing and doneness
Oven temperature: Preheat to 200°C before putting the tray in, so the biscuits begin baking at the intended temperature.
Use the visual cue: The method gives a 25–30 minute range, but ovens and biscuit thickness can affect the exact time. Look for golden-brown edges and a set surface.
Serving ideas
With milk: Follow the simple serving suggestion and pair the biscuits with a glass of hot or cold milk. The milk is a drink on the side, not part of the biscuit mixture.
At the table: Serve them warm once they have had a brief chance to firm up, or let them cool fully for a less tender texture.
Recipe notes & tips
- Use a ripe banana so it mashes smoothly with a fork.
- Stir thoroughly to spread the banana and egg through the oats.
- Keep the biscuits similar in size to help them bake evenly.
- Check at 25 minutes if you prefer a softer centre.
- Allow the biscuits to cool briefly so they can firm up before serving.
Variations
- Add cinnamon: Stir it through with the pinch of salt for a warm spice note.
- Use a riper banana: Choose one with brown spots for a sweeter-tasting biscuit.
- Make them crunchier: Bake a little longer than the softer 25-minute option, checking their colour.
- Serve with warm milk: Heat the milk before pouring a glass to accompany the biscuits.
- Try smaller biscuits: Shape smaller portions and keep an eye on them, as they may bake sooner.
Common mistakes to avoid
- Using a firm banana: It is harder to mash evenly; choose a ripe one and work it thoroughly with a fork.
- Uneven portions: Different-sized biscuits bake at different rates; divide the mixture into similar palm-sized shapes.
- Taking them out too soon: A pale, unset surface may need more time; bake until golden brown.
- Baking without checking: The texture changes across the 25–30 minute range; check near 25 minutes and adjust to taste.
- Expecting the milk in the dough: It is listed for serving alongside; the method does not add it to the biscuit mixture.
How to store
Cool the biscuits completely, then keep them in an airtight container in the fridge for up to 3 days. Reheat briefly in the oven or microwave, or enjoy them cold; the texture may soften during storage.
Frequently asked questions
Can I make the biscuits softer?
Yes. Check them at around 25 minutes and take them out when set but still tender. They will firm up as they cool.
How do I make them crunchier?
Bake towards 30 minutes or a little longer, watching for a golden-brown colour so they do not over-brown.
Does the milk go into the mixture?
No. The method uses the milk as a drink to serve alongside the biscuits.
Can I use an unripe banana?
You can, but it will be firmer and less sweet. A ripe banana is easier to mash and suits this recipe well.
How can I tell when the biscuits are done?
Look for a golden-brown colour and a set surface. Use the 25–30 minute range as a guide and adjust for your preferred texture.
Cook it from the original
This recipe comes from fitlap.com. Their page has the author’s own photos, notes and tips — the best place to cook it from.
Open the recipe on fitlap.com