
Yaki Onigiri (Grilled Rice Balls)
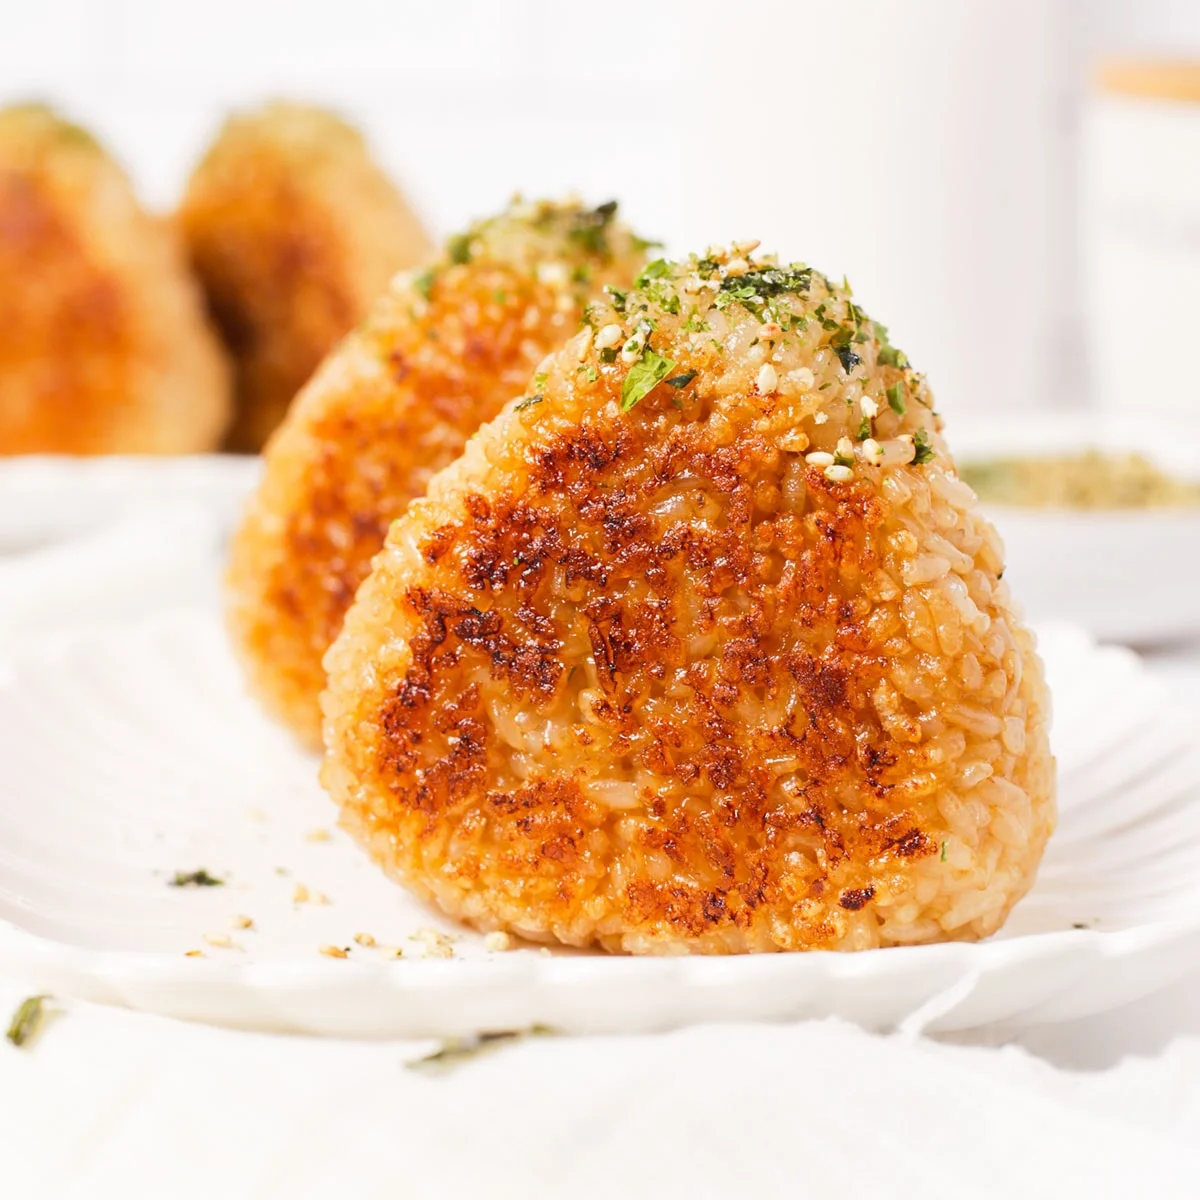
Yaki onigiri are Japanese rice balls pan-fried until crisp and golden outside while staying soft inside. They make a quick snack or light lunch, especially with a bowl of miso soup.
Ingredients
- 400 g (2 cups)cooked sushi rice, hot (medium- or short-grain)
- 15 ml (1 tablespoon)soy sauce, light or regular
- 2.5 ml (½ teaspoon), optionaltoasted sesame oil
- As neededneutral oil, for cooking
- To tastesoy sauce or your preferred sauce, for brushing
- To taste, optionalfurikake, for garnish
Instructions
- 1
Season the rice
Put the hot cooked sushi rice in a mixing bowl. Drizzle over the soy sauce and sesame oil, then fluff and mix with a slicing motion until the rice is mostly even in colour.
- 2
Shape by hand
Divide the seasoned rice into four equal portions. Wet your hands, gather one portion and firmly compact it between both hands into a triangle. Repeat with the remaining portions, wetting your hands between each one.
- 3
Use a mould
If using a mould, fill it with rice and press firmly to shape the rice ball. Repeat with the remaining rice, adjusting the amount for the capacity of your mould if needed.
- 4
Pan-fry the rice
Set a pan over medium heat and add enough oil to lightly cover its base. When the oil is hot, place the onigiri in the pan with a triangular side down. Cook for about 3–4 minutes per side, until golden brown and crisp; fry the edges too if you like.
- 5
Brush with sauce
Once both sides are golden brown, turn the heat to low. Brush each side with soy sauce or your preferred sauce, then fry for a further 15–30 seconds until crisp again. Keep the heat low and avoid frying for too long after adding the sauce, as it can burn.
- 6
Garnish and serve
Sprinkle with furikake if you like and enjoy while warm.
What are yaki onigiri?
Onigiri are Japanese rice balls, often shaped by hand or in a mould. Yaki means grilled or cooked over heat; in this version, the rice balls are pan-fried until their surfaces turn crisp.
This recipe seasons the rice simply with soy sauce and optional sesame oil, then adds another brush of sauce at the end. That approach gives the outside savoury flavour while keeping the inside soft.
Nutrition and macros by portion
The nutrition label shows one serving as written: 92 calories, 2g protein, 19g carbs, 1g fat.
| Portion | Adjustment | kcal | Protein | Carbs | Fat |
|---|---|---|---|---|---|
| Lighter | Use less cooking oil | 64 kcal | 2g | 13g | 0g |
| This serving | As written | 92 kcal | 2g | 19g | 1g |
| Hungry | Make larger rice balls | 138 kcal | 3g | 28g | 1g |
The rice supplies most of the carbohydrates, while the soy sauce contributes salt and the small amount of cooking oil and optional sesame oil contributes fat. The rice provides a little protein, but this is a light meal; serve it with miso soup and a protein-rich side if you want a more balanced plate.
The rice matters
Hot rice: use freshly cooked medium- or short-grain sushi rice, as its stickiness helps the balls hold their shape. The recipe seasons the rice while it is hot.
Even seasoning: drizzle the soy sauce and sesame oil around the rice, then fluff with a slicing motion. This distributes the seasoning without turning the rice into a dense paste.
Shape firmly
Wet hands: dampen your hands before shaping each portion to help keep the sticky rice from clinging to them.
Compact triangles: press the rice firmly enough to hold together, but keep the shape tidy so it can sit steadily in the pan. If using a mould, press the rice firmly and allow for differences in mould capacity.
Build a crisp crust
Hot pan: heat the oil over medium heat before adding the rice balls. Lightly covering the base of the pan gives the sides contact with the oil for browning.
Patient frying: cook each side for about 3–4 minutes, letting it develop a golden, crisp surface before turning. The edges can be fried as well if you want more crispness.
Brush at the end
Low heat: lower the temperature before brushing on the sauce. Soy sauce can burn quickly, so the final 15–30 seconds should be brief.
Texture cue: the rice balls are ready when both broad sides are golden brown and crisp, with the added sauce briefly cooked on the surface.
Serve while warm
Miso soup: serve the onigiri warm with miso soup for a simple light meal, as suggested in the recipe.
Finish: add furikake if you like, or leave the rice balls plain. Their crisp exterior and soft centre are best enjoyed soon after frying.
Recipe notes & tips
- Keep the rice hot while seasoning and shaping so it remains easy to form.
- Wet your hands again between portions to make shaping easier.
- Press the rice firmly so each triangle holds together in the pan.
- Wait until the oil is hot before adding the onigiri.
- Turn the heat down before brushing on soy sauce to help prevent burning.
Variations
- Skip the sesame oil: leave it out for a simpler soy-seasoned rice.
- Change the finish: brush on your preferred sauce in place of soy sauce.
- Add furikake: sprinkle it over the cooked rice balls for a savoury garnish.
- Fry the edges: turn the triangles onto their edges for extra crisp surfaces.
- Use a mould: press the rice into a mould if you prefer evenly shaped portions.
Common mistakes to avoid
- Loose shaping: compact the rice firmly so the triangles do not fall apart in the pan.
- Dry hands: wet your hands before shaping and between portions to reduce sticking.
- Cold pan: heat the oil before adding the rice balls so they can brown.
- Turning too soon: give each side about 3–4 minutes to become golden and crisp before flipping.
- High heat for the sauce: reduce the heat to low before brushing, as soy sauce can burn.
How to store
For the best crisp texture, serve the onigiri straight after frying. If you have leftovers, refrigerate them in a covered container and reheat in a lightly oiled pan until warmed through and crisp again.
Frequently asked questions
Can I shape the onigiri with a mould?
Yes. Fill the mould with rice and press firmly. Moulds vary in capacity, so adjust how much rice you use to suit yours.
Do I need to use sesame oil?
No. The sesame oil is optional, so you can leave it out and season the rice with soy sauce alone.
How long should I fry each side?
Cook each side for about 3–4 minutes over medium heat, until golden brown and crisp. The edges can be fried too if you like.
When should I brush on the soy sauce?
Wait until both sides are golden brown, then turn the heat to low and brush on the sauce. Fry for only another 15–30 seconds.
Can I use a different sauce?
Yes. The recipe allows for your preferred sauce instead of soy sauce for brushing.
What should I serve with yaki onigiri?
Miso soup makes a simple accompaniment and turns the rice balls into a light meal.
Cook it from the original
This recipe comes from twoplaidaprons.com. Their page has the author’s own photos, notes and tips — the best place to cook it from.
Open the recipe on twoplaidaprons.com