
Honey Buttermilk Buns
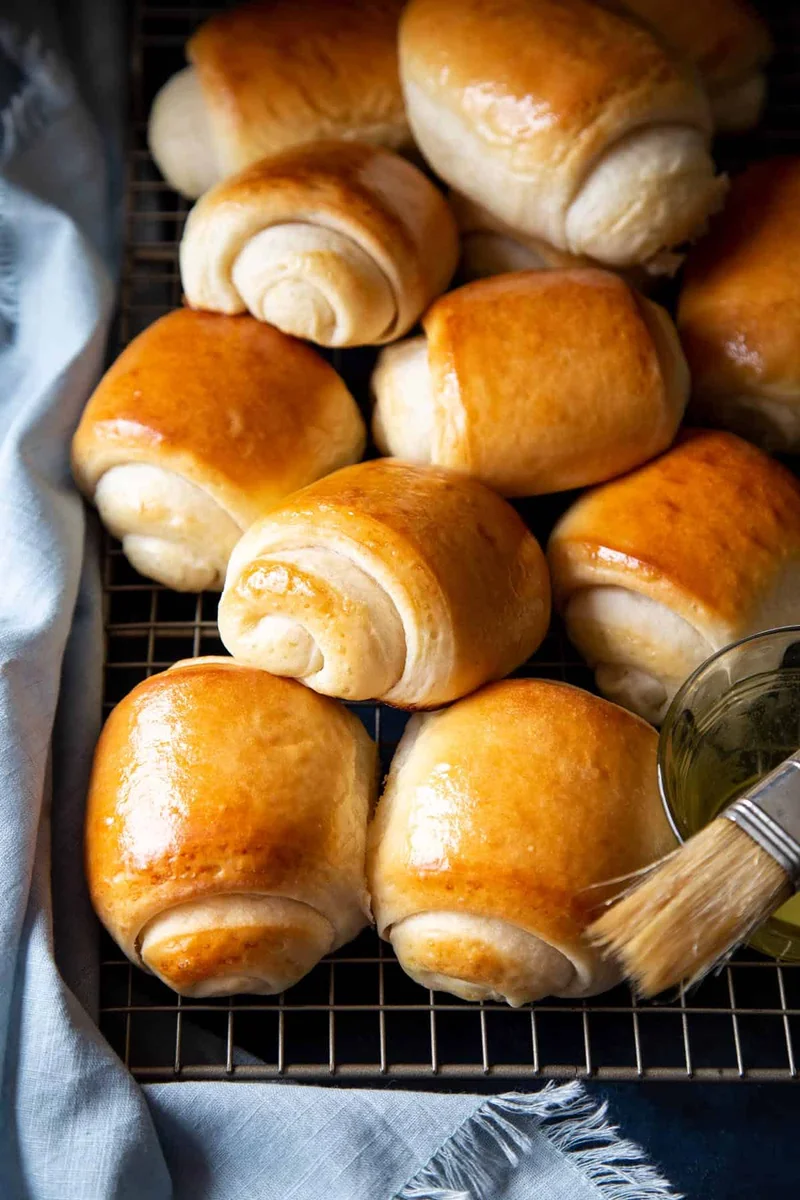
Soft, lightly sweet American dinner rolls made with honey and buttermilk, with a tender crumb and golden top. Shape them as rolled Lion House-style buns or as simple round rolls for a holiday meal or everyday dinner.
Ingredients
- 30 ml (2 tablespoons)warm water
- 2 teaspoons (or 6 g active dry yeast)instant yeast
- 236 g (1 cup), warmedbuttermilk
- 85 g (3 oz), dividedunsalted butter
- 84 g (¼ cup), dividedhoney
- 400 g (3 cups)plain flour
- ¾ teaspoonkosher salt
- as neededoil or non-stick cooking spray
- to taste, optionalsalted butter, for brushing
- as neededextra flour, for rolling
- 1 largeegg
- 15 ml (1 tablespoon)water or milk
Instructions
- 1
Bloom the yeast
Put the warm water and 1 teaspoon of the honey in a small bowl. Sprinkle the yeast over the surface and leave for 5–10 minutes, until the mixture puffs up.
- 2
Warm the liquids
Warm the buttermilk in a large measuring jug or glass bowl in the microwave for 30 seconds. Melt 57 g (2 oz) of the butter for 30 seconds, then stir it and the honey into the buttermilk. Check that the mixture is below 43°C (110°F); it should feel warm, not hot.
- 3
Knead the dough
Combine the flour and salt in the bowl of a stand mixer. Pour in the warm buttermilk mixture and bloomed yeast mixture, then knead with the dough hook on speed 2 for about 10 minutes. The dough should begin pulling away from the bowl, while remaining very soft and somewhat sticky.
- 4
Let it rise
Oil a glass bowl, your hands and a dough scraper. Scrape the dough onto a floured surface, quickly shape it into a ball and place it in the oiled bowl. Cover and leave in a warm place for 1–2 hours, until at least doubled in size.
- 5
Prepare the tray
Line a large baking sheet with parchment paper or a silicone mat.
- 6
Roll the dough
For Lion House-style rolls, turn the dough onto a lightly floured surface and roll it into a rectangle measuring about 30 × 38 cm (12 × 15 inches) and 6 mm (¼ inch) thick.
- 7
Brush with butter
Melt the remaining 28 g (1 oz) of unsalted butter and brush it over the surface of the dough.
- 8
Cut and roll
Use a pizza wheel to cut the dough in half horizontally, then cut each half into six rectangles measuring about 6 × 15 cm (2½ × 6 inches). Roll up each rectangle and place it seam-side down on the prepared baking sheet, spacing the rolls 2.5–5 cm (1–2 inches) apart.
- 9
Shape round rolls
For round dinner rolls, skip steps 6–8. Divide the dough into 12 equal portions, shape them into balls and space them evenly on the prepared baking sheet.
- 10
Proof the rolls
Cover the rolls with a sheet of oiled plastic wrap and leave them to rise for 1 hour.
- 11
Heat the oven
Preheat the oven to 190°C (375°F).
- 12
Brush and bake
Beat the egg with 15 ml (1 tablespoon) of water or milk to make an egg wash. Brush a light coating over the rolls and bake for 15–20 minutes, until golden brown.
- 13
Finish the rolls
Take the rolls out of the oven and, if desired, brush the tops with melted salted butter.
What are honey buttermilk buns?
These are soft American dinner rolls enriched with buttermilk, butter and honey. They suit holiday tables as well as weeknight meals, and can be shaped into neat spirals or familiar round buns.
The rolled shape is inspired by Lion House Rolls, a style associated with American home baking. Here, a soft, slightly sticky dough and a buttery layer help give the rolls their tender texture.
Nutrition and macros by portion
The nutrition label shows one serving as written: 200 calories, 0g protein, 0g carbs, 0g fat.
| Portion | Adjustment | kcal | Protein | Carbs | Fat |
|---|---|---|---|---|---|
| Lighter | Skip the butter brushing | 140 kcal | 0g | 0g | 0g |
| This serving | As written | 200 kcal | 0g | 0g | 0g |
| Hungry | Serve two rolls | 300 kcal | 0g | 0g | 0g |
The flour supplies most of the carbohydrates, while the butter contributes much of the fat; the egg also adds some protein and fat. Pair a bun with a protein-rich main and vegetables to make it part of a more rounded plate.
Building a soft dough
Buttermilk: warming it gently helps it blend with the melted butter and honey. Keep the mixture below 43°C (110°F) so it is warm rather than hot when it meets the yeast.
Flour and salt: mixing these together first distributes the salt before the liquids go in. The dough is meant to stay soft and a little sticky, so resist adding lots of extra flour during kneading.
Working with the yeast
Blooming: the yeast sits in warm water with a teaspoon of honey for 5–10 minutes. A puffy surface is the cue that the mixture has activated.
Kneading: give the dough about 10 minutes on speed 2 with a dough hook. It should start to pull away from the bowl but does not need to become firm or dry.
Shaping the rolls
Lion House style: roll the dough into a 30 × 38 cm rectangle about 6 mm thick, brush it with melted butter, then cut and roll the pieces. Set each one seam-side down so it holds its shape on the tray.
Round style: divide the dough into 12 equal portions and shape each into a ball. Either shape works; leave room between the rolls as they rise and bake.
Proofing and baking cues
First rise: leave the covered dough in a warm place for 1–2 hours, until it has at least doubled. The time can vary with the warmth of the room, so use the change in size as your guide.
Second rise: after shaping, cover the rolls and let them rise for 1 hour. Bake at 190°C for 15–20 minutes, watching for an evenly golden top.
Serving the buns
These rolls are a natural match for roast dinners, soups and stews, or a holiday spread. Their gentle sweetness also works well alongside savoury fillings or a cheeseboard.
Serve them warm if you like, with salted butter on the side. For a more balanced plate, pair a roll with a source of protein and plenty of vegetables.
Recipe notes & tips
- Measure the flour carefully and avoid packing it into the measuring cup.
- Use a lightly oiled scraper and hands when moving the sticky dough.
- Keep the buttermilk mixture warm, not hot, before adding it to the yeast.
- Use just enough extra flour to roll and shape the dough without making it firm.
- Space the shaped rolls 2.5–5 cm apart so they have room to rise.
- Check the rolls at 15 minutes and remove them once their tops are golden.
Variations
- Round buns: divide the dough into 12 portions and shape them into balls instead of rolling rectangles.
- Milk egg wash: use milk in place of water when beating the egg for brushing.
- Butter finish: brush the baked tops with melted salted butter for a richer finish.
- Smaller rolls: divide the dough into more portions and check for doneness earlier.
- Seeded tops: sprinkle seeds over the egg wash before baking.
Common mistakes to avoid
- Hot buttermilk: it can be too harsh on the yeast; let the mixture cool below 43°C before mixing.
- Too much extra flour: it can make the buns less soft; use only a light dusting for shaping.
- Rushing the first rise: the dough should at least double before you shape it.
- Skipping the second rise: allow the shaped rolls their full 1-hour rise for a lighter result.
- Loose spirals: roll each piece firmly and place it seam-side down on the tray.
- Overbaking: check at 15 minutes and take the rolls out when golden.
How to store
Store cooled rolls in an airtight container at room temperature for up to 2 days. Reheat briefly in a low oven until warmed through; freeze well-wrapped rolls for up to 2 months and thaw before reheating.
Frequently asked questions
Can I use active dry yeast?
Yes. The recipe gives 6 g as an alternative to the instant yeast. Bloom it in the warm water and honey as directed.
How do I know when the dough has risen enough?
After the first rise, it should be at least double its original size. The timing may fall anywhere between 1 and 2 hours depending on how warm the room is.
Can I make the rolls round instead?
Yes. Skip the rectangle, buttering and cutting steps, divide the dough into 12 equal portions and shape them into balls.
Why is the dough sticky?
It is meant to be very soft and somewhat sticky, even after kneading. Oil your hands and scraper, and add only a little flour when shaping.
Can I prepare the rolls ahead?
The recipe's method does not include an overnight proof. For best results, follow the two rises and bake them on the day you plan to serve them.
How can I tell when the rolls are baked?
Bake for 15–20 minutes at 190°C (375°F), until the tops are golden brown.
Cook it from the original
This recipe comes from wildwildwhisk.com. Their page has the author’s own photos, notes and tips — the best place to cook it from.
Open the recipe on wildwildwhisk.com