
Soft and Puffy Sourdough Pita Bread
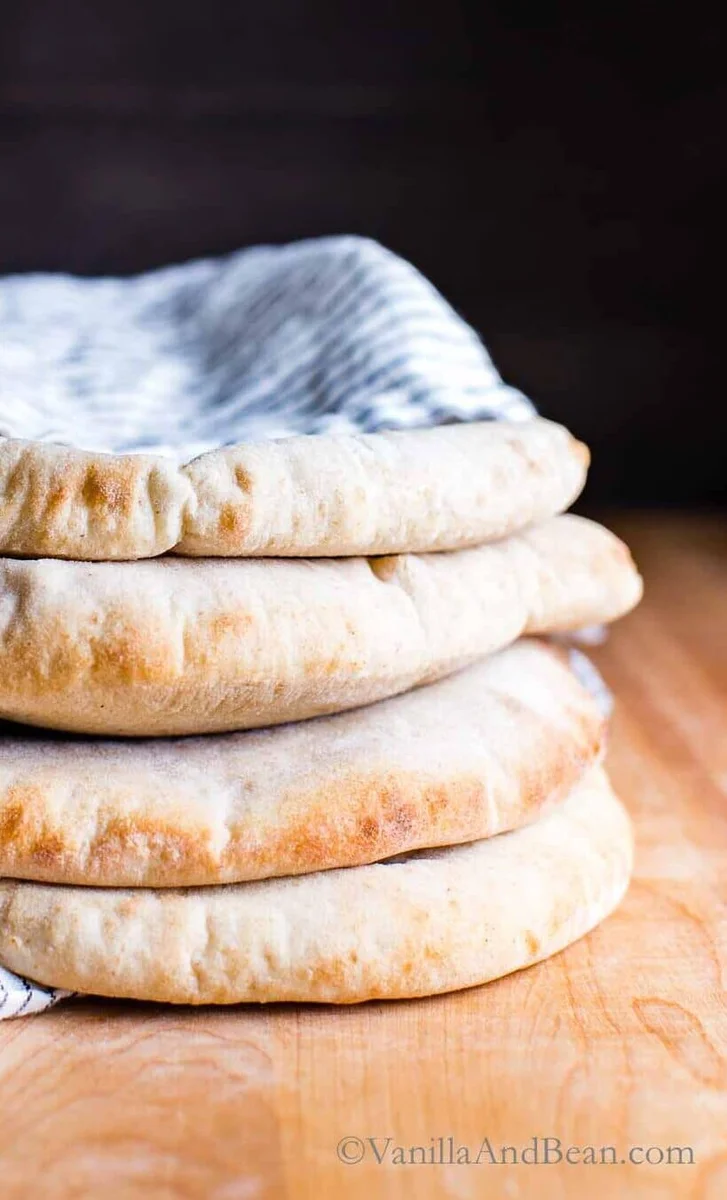
These soft sourdough pita breads use an active starter, bread flour and whole wheat flour, then bake quickly at high heat until they puff. Make the dough ahead for an overnight rise, then serve the pitas stuffed or cut into wedges for dipping.
Ingredients
- 200 gactive sourdough starter (100% hydration, doubled in size)
- 200 gwarm water (27°C)
- 30 ml (2 tablespoons)maple syrup or honey
- 30 ml (2 tablespoons)extra-virgin olive oil
- 300 gunbleached bread flour
- 85 gstone-ground wholemeal flour
- 6 gfine sea salt
Instructions
- 1
Mix the dough
In a large bowl, whisk the starter, water, maple syrup and olive oil until no lumps of starter remain. Add both flours and the salt. Mix first with a fork, then by hand, folding and pressing for 3–4 minutes until all the flour is incorporated and no dry patches remain. The dough may feel dry at first but will become more hydrated as you work it; it will stick to your fingers. Scrape off as much dough as possible with the fork, cover the bowl with a damp tea towel and leave for 30 minutes. This is a convenient time to refresh your starter.
- 2
Fold the dough
With the dough still in the bowl, stretch up a portion and fold it over the centre, pressing your fingertips into the dough. Repeat around the bowl to complete a fold. The dough should feel more workable. You can begin the bulk rise after one fold, but if time allows, repeat the fold at least once more, ideally twice, leaving 30–45 minutes between folds.
- 3
Let dough rise
After the final fold, cover the bowl with two damp towels and leave the dough to rise overnight at room temperature. At 21°C this usually takes 10–12 hours; in a cooler kitchen it may take 12–16 hours. It is ready when it has roughly doubled, looks less dense and jiggles when you shake the bowl.
- 4
Shape the dough
In the morning, use damp fingertips to ease the dough onto a floured work surface. Divide it into 4 pieces of about 210 g each. Working quickly, pull the edges of each piece into the centre and pinch to make a rough ball. Place each ball seam-side down and leave for 5 minutes. Sweep flour off the work surface and lightly mist it with water if needed to add friction. Cup your hand behind each ball and pull it towards you until the surface is taut.
- 5
Proof and preheat
Set the dough balls on a lightly floured surface, cover with a damp tea towel and leave at room temperature for 15 minutes, until slightly puffy. Meanwhile, heat the oven to 260°C, positioning racks in the upper and lower thirds. Put an upside-down baking tray and/or pizza stone on each rack to preheat.
- 6
Roll the pitas
On a lightly floured surface, roll each ball into an even disc 0.3–0.6 cm thick and 17–19 cm across. Turn the dough as you roll to help keep it round, and dust with flour as needed to prevent sticking. If a piece becomes difficult to roll, let it rest for about 5 minutes while you work on another. Move each disc onto a small piece of baking parchment and cover with a damp tea towel unless it is going straight into the oven. Roll the remaining dough balls.
- 7
Bake the pitas
Bake two pitas at a time on one tray if possible, or one at a time on a stone. Once the oven is hot, transfer the pitas on their parchment to a peel or upside-down baking tray. Open the oven and use the parchment as a handle to slide them onto the preheated tray or stone. Bake for 5 minutes 20 seconds, until puffed and lightly golden underneath around the edges. The tops will not brown, and there is no need to turn them.
- 8
Cool and serve
Remove the pitas and loosely wrap them in tea towels. Do not press or deflate them while hot, as escaping steam can burn you. Leave for 10 minutes, then gently deflate once cool. Cut in half for stuffing or into wedges for dipping.
- 9
Store the pitas
For the best texture, eat the pitas on the day they are baked. They keep in a sealed plastic bag at room temperature for 2–3 days. To freeze, cool completely and place in a freezer bag for up to 2 weeks. Thaw at room temperature, then rewarm wrapped in foil in a 175°C oven for about 10 minutes.
What is sourdough pita bread?
Pita is a round flatbread associated with Middle Eastern cooking, often served as a pocket for fillings or torn into pieces for dips. This version uses a naturally leavened sourdough starter alongside bread and wholemeal flours.
A very hot oven helps the thin discs puff quickly, creating a pocket inside. The overnight fermentation gives the dough time to rise before it is shaped and baked.
Nutrition and macros by portion
The nutrition label shows one serving as written: 211 calories, 6g protein, 37g carbs, 4g fat.
| Portion | Adjustment | kcal | Protein | Carbs | Fat |
|---|---|---|---|---|---|
| Lighter | Smaller pita portion | 148 kcal | 4g | 26g | 3g |
| This serving | As written | 211 kcal | 6g | 37g | 4g |
| Hungry | Add another pita | 317 kcal | 9g | 56g | 6g |
The flour supplies most of the carbohydrates, while the starter contributes additional flour and a little protein. Olive oil provides most of the fat, and the flour and starter contribute the remaining protein. Pair a pita with a generous serving of vegetables and a protein-rich filling or dip for a more rounded plate.
The starter and flour
Active starter: Use starter that has doubled in size after feeding. Because it is at 100% hydration, it contributes both flour and water to the dough.
Bread flour: Its gluten helps the dough stretch and hold its shape as it puffs. Wholemeal flour adds a nuttier flavour and makes up part of the flour blend.
Folding and fermentation
Folds: Stretching and folding the dough builds structure without kneading it on the worktop. The dough becomes easier to handle as it rests between folds.
Bulk rise: The overnight timing is a guide, not a fixed deadline. Look for dough that has roughly doubled and jiggles when the bowl is shaken; a cooler room can mean a longer rise.
Shaping without tearing
Taut balls: Pulling the dough towards you on a lightly dampened work surface creates surface tension. If the dough slides rather than grips, clear away excess flour and lightly mist the surface.
Resting: Give the balls their 5-minute rest before tightening them, then let them proof for 15 minutes. If a disc resists rolling, a further short rest makes it easier to shape.
Rolling and puffing
Even discs: Roll each pita to a consistent thickness of 0.3–0.6 cm and a width of 17–19 cm. Uneven thickness can make the bread puff inconsistently.
Hot baking surface: Preheat the tray or stone in the 260°C oven so the dough starts baking as soon as it lands. The pitas are done when puffed and just lightly golden underneath; pale tops are expected.
Serving ideas
For sandwiches: Cut the cooled pitas in half and fill the pockets with salad, vegetables or your preferred sandwich fillings. Let the bread cool before slicing so hot steam does not escape against your hand.
For dipping: Cut the pitas into wedges and serve with hummus or other dips and spreads. They also work alongside a meal as a scoopable bread.
Recipe notes & tips
- Weigh the flour and starter for more consistent dough.
- Keep a damp towel over dough that is resting so the surface does not dry out.
- Use the dough’s rise and jiggle as cues, since fermentation time varies with room temperature and starter activity.
- Preheat the baking trays or stone thoroughly before baking.
- Bake two pitas at a time on one tray if possible to avoid cooling the oven too much.
- Wait until the pitas have cooled before gently deflating them.
Variations
- Use honey: Swap the maple syrup for the same amount of honey.
- Add herbs: Work dried herbs into the flour before mixing for a savoury note.
- Make smaller pitas: Divide the dough into more pieces and roll each one thinner or narrower, checking them as they bake.
- Serve as wedges: Cut the cooled pitas into pieces for scooping up hummus or other dips.
- Make sandwich pockets: Slice each cooled pita in half and fill the pockets with your chosen sandwich ingredients.
Common mistakes to avoid
- Inactive starter: Use starter that is active and doubled in size, or the dough may not rise as expected.
- Rushing the bulk rise: Wait for the dough to roughly double and jiggle rather than relying only on the clock.
- Too much flour on the bench: Brush excess flour away before tightening the balls so they can grip the surface.
- Rolling unevenly: Aim for a uniform 0.3–0.6 cm thickness to encourage an even puff.
- Cool baking surface: Preheat the tray or stone in the oven before adding the dough.
- Deflating while hot: Let the pitas rest for 10 minutes before gently pressing out the steam.
How to store
Pitas are best eaten on the day they are baked, but can be kept in a sealed plastic bag at room temperature for 2–3 days. For longer storage, cool them completely and freeze in a freezer bag for up to 2 weeks. Thaw at room temperature and rewarm wrapped in foil in a 175°C oven for about 10 minutes.
Frequently asked questions
How long does the dough need to rise?
The bulk rise takes about 10–12 hours at 21°C, or around 12–16 hours in a cooler kitchen. Use the signs of readiness—the dough has roughly doubled, looks less dense and jiggles—rather than time alone.
Can I make the dough with honey instead of maple syrup?
Yes. The recipe allows either maple syrup or honey in the same quantity.
Why is my dough sticky?
The dough is expected to stick to your fingers while you mix it. Keep working it for 3–4 minutes until the flour is incorporated, and use the fork to scrape dough from your fingers.
Why did my pitas not puff?
Check that the oven and baking surface were fully preheated to 260°C, and that the discs were rolled evenly. Also allow the dough enough time to complete its bulk rise.
Can I bake the pitas on a tray instead of a pizza stone?
Yes. The method uses a preheated, upside-down baking tray and/or pizza stone. Baking two at a time on one tray is suggested as easier to manage.
Can sourdough pitas be frozen?
Yes. Cool them completely, place them in a freezer bag and freeze for up to 2 weeks. Thaw at room temperature and rewarm wrapped in foil for about 10 minutes at 175°C.
Cook it from the original
This recipe comes from vanillaandbean.com. Their page has the author’s own photos, notes and tips — the best place to cook it from.
Open the recipe on vanillaandbean.com