
Crispy chicken pops
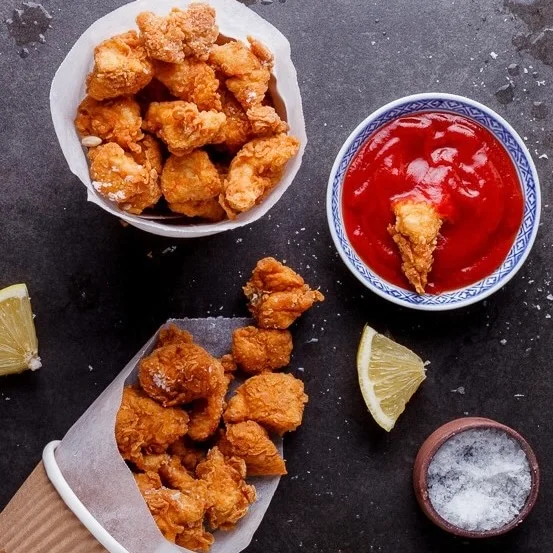
Crispy chicken pops are bite-sized pieces of chicken breast coated in seasoned flour and fried until golden. They make a quick snack or appetiser, with ketchup or another dipping sauce alongside.
Ingredients
- 500 g (1lb)chicken breasts
- 250 g (2 cups)plain flour
- 2 teaspoonssmoked paprika
- 2 teaspoonsdried oregano
- 2 teaspoonssalt
- 1 teaspooncracked pepper
- 3eggs
- for fryingoil
Instructions
- 1
Heat the oil
Heat the oil in a large, deep pot.
- 2
Cut the chicken
Cut the chicken breasts into bite-sized chunks.
- 3
Mix the flour
Put the flour in a bowl, add the spices and whisk to combine.
- 4
Whisk the eggs
Crack the eggs into a separate bowl and whisk them well.
- 5
Coat the chicken
Coat each piece first in the flour mixture, shaking off excess, then in the egg and once more in the flour. Repeat the coating if you would like a thicker crust.
- 6
Fry until golden
Carefully lower the coated chicken into the hot oil. Fry for 3–4 minutes, until crisp and golden brown and cooked through.
- 7
Drain the chicken
Lift the chicken from the oil and drain it on kitchen paper.
- 8
Serve with dips
Serve with fresh lemon and ketchup or your favourite dipping sauce.
What are crispy chicken pops?
Chicken pops are small, breaded pieces of chicken fried until crisp. This American-style snack uses a simple seasoned flour coating and egg to help it adhere.
The smoked paprika and oregano bring savoury flavour, while cutting the chicken into small pieces keeps the cooking time short.
Nutrition and macros by portion
The nutrition label shows one serving as written: 423 calories, 37g protein, 49g carbs, 7g fat.
| Portion | Adjustment | kcal | Protein | Carbs | Fat |
|---|---|---|---|---|---|
| Lighter | Serve with salad | 296 kcal | 26g | 34g | 5g |
| This serving | As written | 423 kcal | 37g | 49g | 7g |
| Hungry | Add a larger portion | 635 kcal | 56g | 74g | 11g |
Chicken breast supplies most of the protein, while the flour coating provides most of the carbohydrates. The flour and frying oil contribute fat, though the amount absorbed can vary. Serve with vegetables or salad alongside for a more balanced plate.
The seasoned coating
Spice mix: whisk the paprika, oregano, salt and pepper thoroughly through the flour so the seasoning is spread across the coating.
Two coats: dipping the chicken in flour, then egg, then flour again creates the crisp outer layer. Shake off excess flour at each stage to keep the coating from becoming heavy.
Getting the chicken ready
Even pieces: cut the breast into similarly sized chunks so they cook at roughly the same rate. Bite-sized pieces are easier to coat and serve.
Keep the wet and dry mixtures in separate bowls, and use one hand for the flour and the other for the egg if you want to reduce sticky fingers.
Frying for a crisp finish
Hot oil: the recipe relies on oil that is hot before the chicken goes in, so the coating starts crisping rather than sitting in the pot.
Small batches: leave room around the pieces while frying. Crowding the pot can cool the oil and make it harder for the coating to turn crisp and golden.
Checking doneness
Colour and timing: fry for 3–4 minutes, until the coating is crisp and golden brown and the chicken is cooked through. The exact time can vary with the size of the chunks and the heat of the oil.
Drain the pieces on kitchen paper as soon as they come out of the pot, then serve while the coating is crisp.
Serving ideas
Dips: serve with ketchup, fresh lemon and another favourite dipping sauce if desired. Offer the sauces separately so the crust stays crisp until each piece is dipped.
For a more rounded plate, pair the chicken with a fresh salad or vegetables alongside.
Recipe notes & tips
- Cut the chicken into pieces of similar size for more even frying.
- Whisk the seasonings well into the flour before coating the chicken.
- Shake off excess flour before dipping each piece into the egg.
- Fry in batches if needed so the pot is not crowded.
- Drain the cooked chicken on kitchen paper before serving.
- Serve the dipping sauces on the side to help keep the coating crisp.
Variations
- Add cayenne: mix a little into the seasoned flour for extra heat.
- Try garlic: add garlic powder to the flour for a savoury note.
- Use fresh herbs: serve with chopped parsley or another soft herb.
- Change the dip: serve with barbecue sauce or a favourite dipping sauce.
- Make a thicker crust: repeat the flour-and-egg coating before frying.
Common mistakes to avoid
- Uneven pieces: cut the chicken into similar-sized chunks so they cook at a similar rate.
- Clumpy coating: shake off excess flour before moving each piece to the egg.
- Crowded pot: fry in batches to leave space around the chicken.
- Oil not hot enough: heat it before adding the coated pieces, as directed.
- Overcooking: check the pieces after 3–4 minutes and remove them when crisp, golden and cooked through.
How to store
Refrigerate leftovers promptly in a covered container and eat within 2 days. Reheat in an oven or air fryer until piping hot; the coating may soften in the microwave.
Frequently asked questions
How big should I cut the chicken pieces?
Cut them into bite-sized chunks of roughly similar size. This helps them cook more evenly.
Can I make the coating thicker?
Yes. The recipe suggests repeating the flour-and-egg coating step to build a thicker crust.
How long do the chicken pops take to fry?
Fry them for 3–4 minutes, until crisp and golden brown and cooked through. Smaller or larger pieces may need a different amount of time.
How can I tell when the chicken is cooked?
The recipe calls for the pieces to be cooked through as well as crisp and golden. Check a piece from the batch before serving if you are unsure.
What can I serve with chicken pops?
Serve them with fresh lemon, ketchup or another dipping sauce. Salad or vegetables make a good side.
Can I prepare them ahead?
They are best served straight after frying, while the coating is crisp. You can cut the chicken and mix the seasoned flour ahead, then coat and fry just before serving.
Cook it from the original
This recipe comes from simply-delicious-food.com. Their page has the author’s own photos, notes and tips — the best place to cook it from.
Open the recipe on simply-delicious-food.com