
Pineapple Fridge Tart
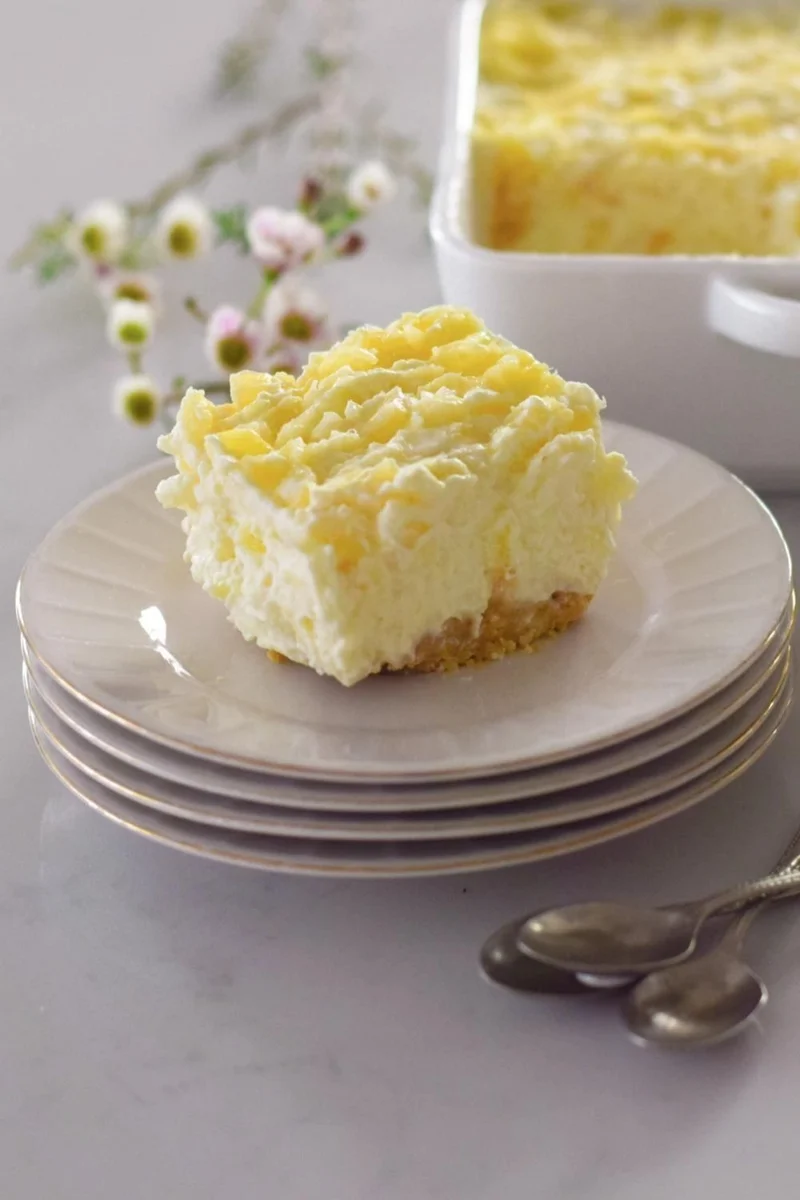
Pineapple Fridge Tart is a chilled dessert with a buttery biscuit base and a creamy pineapple filling. It is simple to assemble and needs no baking, though it does need time to set in the fridge.
Ingredients
- 200 gtennis biscuits, crumbled
- 75 gbutter, melted
- 440 gcanned pineapple pieces
- 250 gcream cheese
- 250 ml (1 cup)whipping cream
- 60 ml (¼ cup)caster sugar
- 60 ml (¼ cup)lemon juice
- 60 ml (¼ cup), optionaltoasted coconut
- To taste, optionalextra whipped cream
Instructions
- 1
Make the base
Put the biscuits in a zip-lock bag and crush them with a rolling pin, or pulse them in a food processor until crumbed. Stir in the melted butter. Press the mixture into the base of an 18 × 18 cm dish, smoothing it firmly with the back of a measuring cup.
- 2
Mix the filling
Whip the cream and set it aside. Beat the cream cheese and sugar until combined, then mix in all or some of the lemon juice, to suit your taste.
- 3
Add pineapple
Drain the pineapple and set aside ¼ cup. Stir the rest into the cream cheese mixture.
- 4
Fold in cream
Gently fold the whipped cream into the filling.
- 5
Chill the tart
Spread the filling over the biscuit base. Top with the reserved pineapple and, if using, the toasted coconut. Cover with cling film and refrigerate for 2 hours before serving. Serve with extra whipped cream if desired.
What is a pineapple fridge tart?
A fridge tart is a chilled dessert that sets without baking, typically combining a crumb base with a creamy filling. This version pairs sweet canned pineapple with tangy cream cheese and lemon.
The recipe draws on the familiar no-bake tart tradition rather than a specific pastry style. Its appeal is the contrast between the buttery biscuit base and the soft, fruity filling.
Nutrition and macros by portion
The nutrition label shows one serving as written: 440 calories, 6g protein, 44g carbs, 28g fat.
| Portion | Adjustment | kcal | Protein | Carbs | Fat |
|---|---|---|---|---|---|
| Lighter | Smaller slice, skip cream | 308 kcal | 4g | 31g | 20g |
| This serving | As written | 440 kcal | 6g | 44g | 28g |
| Hungry | Larger slice | 660 kcal | 9g | 66g | 42g |
The biscuit base and sugar provide most of the carbohydrates, while butter, cream cheese and whipping cream contribute much of the fat. Cream cheese and cream also supply some protein, though this is mainly a rich dessert rather than a protein-focused dish. Serve a slice with fresh fruit to add freshness and balance the plate.
The biscuit base
Crumbs: Crush the tennis biscuits finely so they pack together rather than leaving large, loose pieces. Mix them thoroughly with the melted butter before pressing them into the dish.
Pressing: Use the bottom of a measuring cup to compact and level the base. A firm, even layer is easier to cut once the tart has chilled.
Balancing the filling
Pineapple: Drain the pieces well so excess juice does not loosen the filling. Keeping a little aside gives the top a fresh fruit finish.
Lemon: The recipe allows you to use all the lemon juice or less. Add it to taste, bearing in mind that it balances the sweetness of the sugar and pineapple.
Folding for a light texture
Whipped cream: Whip the cream before mixing the other filling ingredients, then set it aside. Fold it in gently at the end to keep the filling airy rather than beating it until flat.
Chilling and serving
Set time: The tart needs 2 hours in the fridge before serving, even though the hands-on preparation is quick. Keep it covered while it chills.
To serve: Cut it into portions once the filling is cold and set. Extra whipped cream is optional, and toasted coconut adds a crisp finish.
What to serve alongside
Fresh fruit: A few berries or slices of kiwi make a bright accompaniment without competing with the pineapple.
After a meal: The tart is rich and creamy, so modest slices work well after a simple main course. A cup of tea or coffee is an easy pairing.
Recipe notes & tips
- Drain the pineapple thoroughly before mixing it into the filling.
- Crush the biscuits finely for a base that holds together more evenly.
- Press the base firmly into the dish, especially around the edges.
- Taste the filling after adding some lemon juice before deciding whether to add the rest.
- Fold the whipped cream in gently to keep the filling light.
- Allow the full 2 hours of chilling time before serving.
Variations
- Coconut topping: Sprinkle toasted coconut over the tart just before chilling or serving.
- Extra citrus: Add a little more lemon juice if you prefer a sharper filling.
- Fruit garnish: Arrange a few extra drained pineapple pieces over the top before chilling.
- Biscuit swap: Use another plain sweet biscuit for the base, keeping the same crumb-and-butter method.
- Creamy finish: Add a spoonful of whipped cream to each slice when serving.
Common mistakes to avoid
- Wet pineapple: Excess juice can soften the filling; drain the fruit well before adding it.
- Loose base: Crumbs that are not pressed down can break apart; compact them firmly in the dish.
- Overbeating the cream: Beating it into the filling can reduce its lightness; fold it in gently.
- Uneven crumbs: Large biscuit pieces make the base patchy; crush them until mostly fine.
- Serving too soon: The filling may not hold its shape; chill the tart for the full 2 hours.
How to store
Cover and keep the tart refrigerated, where it is best eaten within 2–3 days. Serve it cold; reheating is not suitable for this chilled dessert.
Frequently asked questions
How long does the tart need to chill?
Chill it for 2 hours before serving, as directed. Keep it covered in the fridge during that time.
Can I make it ahead?
Yes. Prepare it in advance and keep it covered and refrigerated until serving.
Should I drain the pineapple?
Yes, drain it well before adding it to the filling. Set aside ¼ cup of the drained fruit for the topping.
Can I use less lemon juice?
Yes. The method allows for all or less of the lemon juice, depending on how tangy you like the filling.
Is the toasted coconut essential?
No, it is optional. The tart can be served without it, or with extra whipped cream if you like.
Cook it from the original
This recipe comes from tamarindnthyme.com. Their page has the author’s own photos, notes and tips — the best place to cook it from.
Open the recipe on tamarindnthyme.com