
Rodic's Tapa (Vegan Filipino Recipe)
Nutrition per Serving
345
Calories
21g
Protein
23g
Carbs
19g
Fat
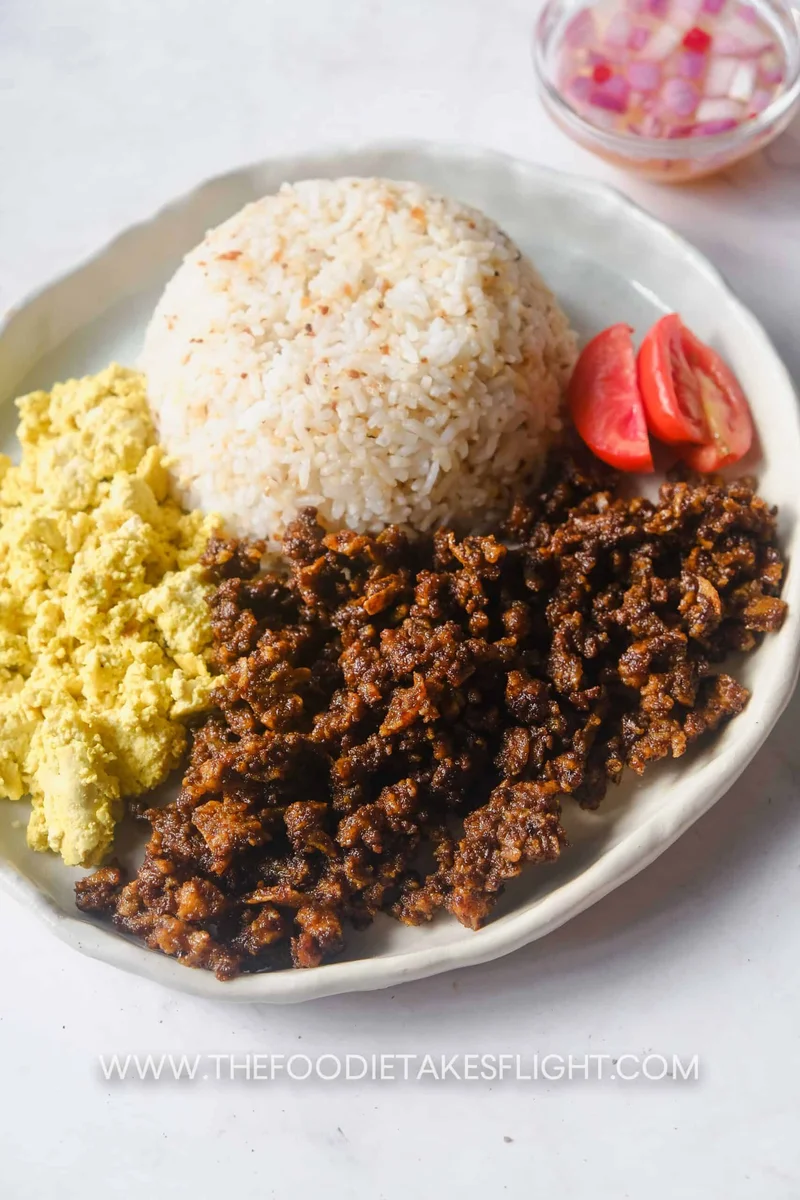
This is a vegan Filipino Rodic's-Style Tapa made using extra firm tofu - yes extra firm tofu, that's air fried until crisp before being marinated and cooked in a sweet-savoury sauce and served with garlic rice, tofu scramble, and of course some vinegar. This is a very hearty Filipino meal you can have for breakfast or any time of the day.
📝 Ingredients
- 17.5 oz extra firm tofu (or tokwa)
- 2.5 tbsp sugar (, adjust to taste)
- 1.5 - 2 tbsp soy sauce (, adjust to taste)
- 1/4 tsp pepper
- 1 tsp minced garlic ((optional for colour but highly recommended - see notes))
- 4 tsp dark soy sauce
- 1/3 cup vegetable broth ((see notes))
- 1/4 cup distilled white vinegar
- 1/2 small red onion (diced)
- 1-2 tsp sugar (adjust to taste)
- 1 red chili (sliced (optional))
- 1 tbsp neutral oil
- 9 oz extra firm tofu (tokwa pressed and drained)
- 1 1/2 tsp nutritional yeast optional
- 1/2 tsp black salt or sub for regular (adjust to taste)
- 1/2 tsp turmeric powder
- Ground black pepper
- Sprinkle of liquid aminos ( or soy sauce, to taste)
- 2-3 tbsp neutral oil (see notes)
- Fried Garlic Rice (Sinangag)
- Tofu Scramble ( or fried egg (if vegetarian))
- Vinegar for dipping
👨🍳 Instructions
- 1--- SHREDDED TOFU FOR TAPA ---
- 2For the Tapa, Remove the 500g/17.50z block of tofu from the water or packaging and drain from any excess water. Pat dry with a towel.
- 3Using a cheese grater, carefully grate the tofu into shreds.
- 4Meanwhile, preheat your air-fryer or oven to 350F/180C.
- 5On a lined baking tray or air fryer basket (I used parchment paper to line mine), place the shredded tofu and try to spread it out as thin as possible.
- 6For air-frying, air-fry for 12-15 minutes or until lightly golden brown - do not overcook since it can easily harden and become too dry.
- 7You can flip the tofu halfway through cooking. It’s also okay not to get even browning and even have the tofu still white, since this can add to the different textures of the overall tofu dish.
- 8If baking, you may need to bake the tofu for 25-30 minutes or longer.
- 9--- MARINADE FOR TAPA ---
- 10While the tofu is cooking, prepare the marinade by mixing everything together. Feel free to adjust to your taste.
- 11Marinate the tofu in the marinated after baking/air-frying. Set aside for 10-15 minutes. You can also leave this overnight in the refrigerator.
- 12--- VINEGAR FOR DIPPING ---
- 13For the vinegar, mix the onions and vinegar together. Mix in some sugar to counter the acidity. Add red chili, if using. Allow to soak for 10-15 minutes. The vinegar will turn pink from the onions.
- 14This is best prepared in advance and can be stored for days.
- 15--- TOFU SCRAMBLE & GARLIC RICE ---
- 16You can cook the garlic rice and tofu scramble the same pan as the tapa. I like to cook the garlic rice, then the tofu scramble, before the tapa.
- 17Heat a large wok or pan over medium. Once hot, add in the 9oz/250g tofu and crumble using a fork. Mix in the spices and coat the tofu. Season with some liquid aminos or soy sauce. Sauté for 3-5 minutes until cooked. Set aside so you can use the same pan for the tapa.
- 18--- COOKING TAPA ---
- 19To cook the tapa: Heat the wok or pan over medium high heat, add in the oil. Once hot, add in the marinated tofu shreds for the tapa.Sauté over medium heat for 2-3 minutes and allow the marinade to reduce until the sugars start to caramelise and coat the tofu shreds.
- 20Once cooked through and the sauce has reduced, turn off the heat.
- 21Serve the tapa with the garlic rice, tofu scramble, vinegar, and sliced tomatoes. Enjoy while hot.
- 22I like to enjoy this by scooping some of the vinegar with onions over the tapa, getting a scoop of the vinegar-ed tapa and and having it with the garlic rice and tofu scramble.
About the Chef & Original Recipe
This recipe was published by thefoodietakesflight.com. Visit the original source for step-by-step photos, chef notes and additional details.
Source: thefoodietakesflight.com