
Salt and pepper pork belly with perfect crispy crackling
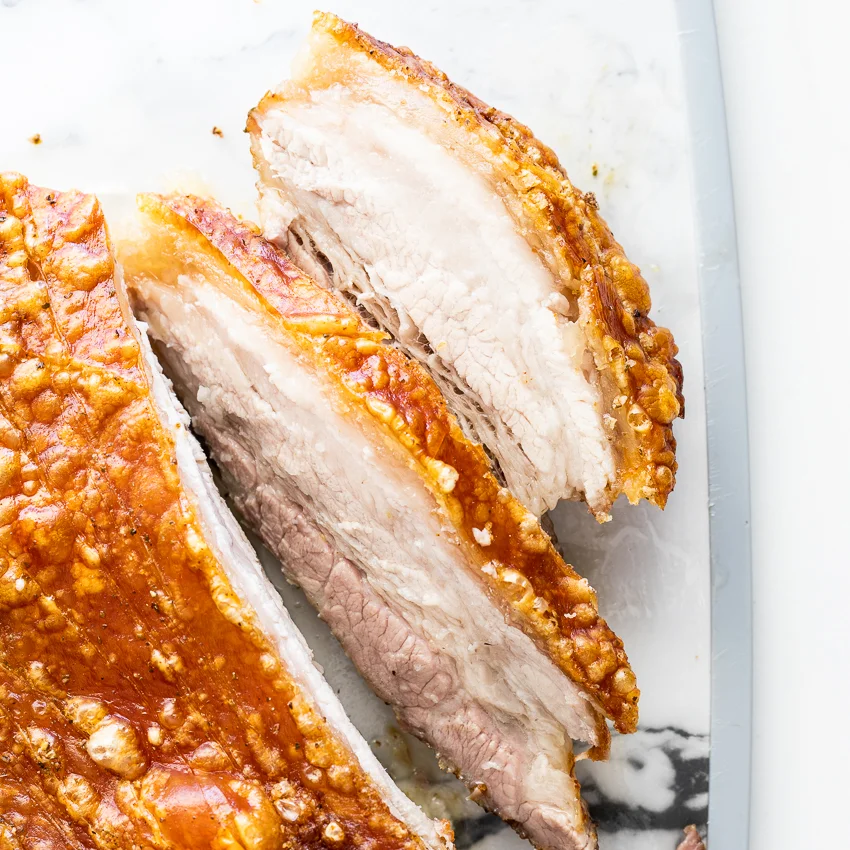
This British-style roast pork belly is seasoned simply with salt and freshly cracked black pepper, then roasted until the skin turns crisp and the meat is tender. It makes a centrepiece for a special meal, but the straightforward seasoning also suits a weeknight roast.
Ingredients
- 1.5 kg (3 lb)deboned pork belly
- 1 tbspsalt (smoked salt, if using)
- 2 tspfreshly cracked black pepper
Instructions
- 1
Heat the oven
Preheat the oven to 220°C (430°F) and set a wire rack inside a roasting tray.
- 2
Score the skin
Using a very sharp knife, score the pork belly skin, taking care not to cut down into the meat.
- 3
Season the pork
Rub salt and pepper generously over both the skin and the meat.
- 4
Set on the rack
Place the pork belly on the wire rack and put the tray in the oven.
- 5
Roast the belly
Roast for 30 minutes at 220°C (430°F), then reduce the oven to 160°C (320°F). Continue roasting for 25 minutes per 500 g (1 lb), until a meat thermometer reads 62°C (145°F).
- 6
Rest the meat
Take the cooked pork belly out of the oven, cover it with foil and rest for at least 10 minutes, or for up to one hour.
- 7
Carve and serve
Once the pork has rested, carve it and serve.
What is salt and pepper pork belly?
Pork belly is a rich cut with layers of meat and fat beneath the skin. In British roast cooking, it is often prized for the contrast between tender meat and crisp crackling.
This version keeps the seasoning simple: salt helps the skin dry and pepper adds a warm savoury note. Roasting on a rack lets heat circulate around the joint.
Nutrition and macros by portion
The nutrition label shows one serving as written: 518 calories, 9g protein, 0g carbs, 53g fat.
| Portion | Adjustment | kcal | Protein | Carbs | Fat |
|---|---|---|---|---|---|
| Lighter | Smaller pork portion | 363 kcal | 6g | 0g | 37g |
| This serving | As written | 518 kcal | 9g | 0g | 53g |
| Hungry | Larger pork portion | 777 kcal | 14g | 0g | 80g |
Most of the calories and fat come from the pork belly, while the meat supplies the protein; the seasoning contributes very little carbohydrate. Balance a serving with vegetables and a modest portion of potatoes.
The seasoning and the skin
Salt: the recipe uses a tablespoon, with smoked salt as an optional choice. Rub it over the skin and meat so the seasoning is not confined to the surface.
Scoring: cut shallow lines through the skin without reaching the meat. Even scoring makes the skin easier to carve after roasting.
Getting crisp crackling
A very sharp knife helps make controlled cuts in the skin. Take care not to cut into the meat, as the method calls for scoring the skin only.
Rack position: place the pork on a wire rack inside the roasting tray rather than directly on the tray. This allows air to move around the joint as it cooks.
Roasting time and doneness
High heat: start at 220°C (430°F) for 30 minutes, then lower the oven to 160°C (320°F). The initial hotter stage is intended to help the skin crisp.
Thermometer: the recipe gives a target reading of 62°C (145°F) and then calls for a resting period. It also specifies 25 minutes per 500 g (1 lb) after the initial 30 minutes, so use the thermometer reading as the stated doneness cue.
Resting and carving
Resting: cover the cooked pork loosely with foil for at least 10 minutes, or up to one hour. This gives you time to finish preparing the rest of the meal.
Carving: once rested, cut the belly into portions and include some crackling with each serving where possible.
What to serve with it
The rich pork works well with crisp or fresh accompaniments, such as roasted vegetables, greens or a sharp apple-based side. These bring contrast to the fatty meat.
For a fuller roast dinner, serve with potatoes and vegetables. Keep any gravy or additional sides separate so diners can choose how much to add.
Recipe notes & tips
- Use a very sharp knife to score the skin with control.
- Keep the cuts shallow so they do not reach the meat.
- Set the pork on a wire rack in the roasting tray as directed.
- Use a meat thermometer to check for the recipe's stated 62°C (145°F) target.
- Allow at least 10 minutes of resting time before carving.
Variations
- Smoked salt: use smoked salt for the seasoning, as suggested in the ingredient list.
- Coarser pepper: crack the black pepper freshly for a more pronounced texture.
- Roast dinner: serve with potatoes and cooked vegetables for a traditional-style plate.
- Fresh contrast: add an apple-based side to offset the richness of the pork.
- Simple sides: pair with greens for a less elaborate meal.
Common mistakes to avoid
- Cutting too deeply: avoid slicing through the skin into the meat when scoring.
- Blunt knife: use a very sharp knife so you can score the skin cleanly.
- Skipping the rack: place the pork on the wire rack rather than directly in the tray.
- Guessing doneness: check the centre with a meat thermometer for the stated 62°C (145°F) reading.
- Carving straight away: rest the pork for at least 10 minutes before cutting.
How to store
Refrigerate leftover pork in a covered container once cooled, and use within 3 days. Reheat until piping hot; the skin may soften, so reheat it uncovered in a hot oven if you want to crisp it again.
Frequently asked questions
Can I use smoked salt?
Yes. The recipe notes smoked salt as an option; use the same stated amount.
How deep should I score the skin?
Score through the skin but stop before cutting into the meat. A very sharp knife helps you control the depth.
How long does this pork belly take to roast?
The method specifies 30 minutes at 220°C (430°F), followed by 25 minutes per 500 g (1 lb) at 160°C (320°F), with a thermometer check for 62°C (145°F).
How long should the pork rest?
Rest it under foil for at least 10 minutes. The recipe allows resting for up to one hour.
Can I prepare it ahead?
You can season and score the pork in advance, then keep it covered in the fridge until ready to roast. Allow time for it to come out of the fridge before cooking.
Cook it from the original
This recipe comes from simply-delicious-food.com. Their page has the author’s own photos, notes and tips — the best place to cook it from.
Open the recipe on simply-delicious-food.com