
Rice Krispie Treat Cake
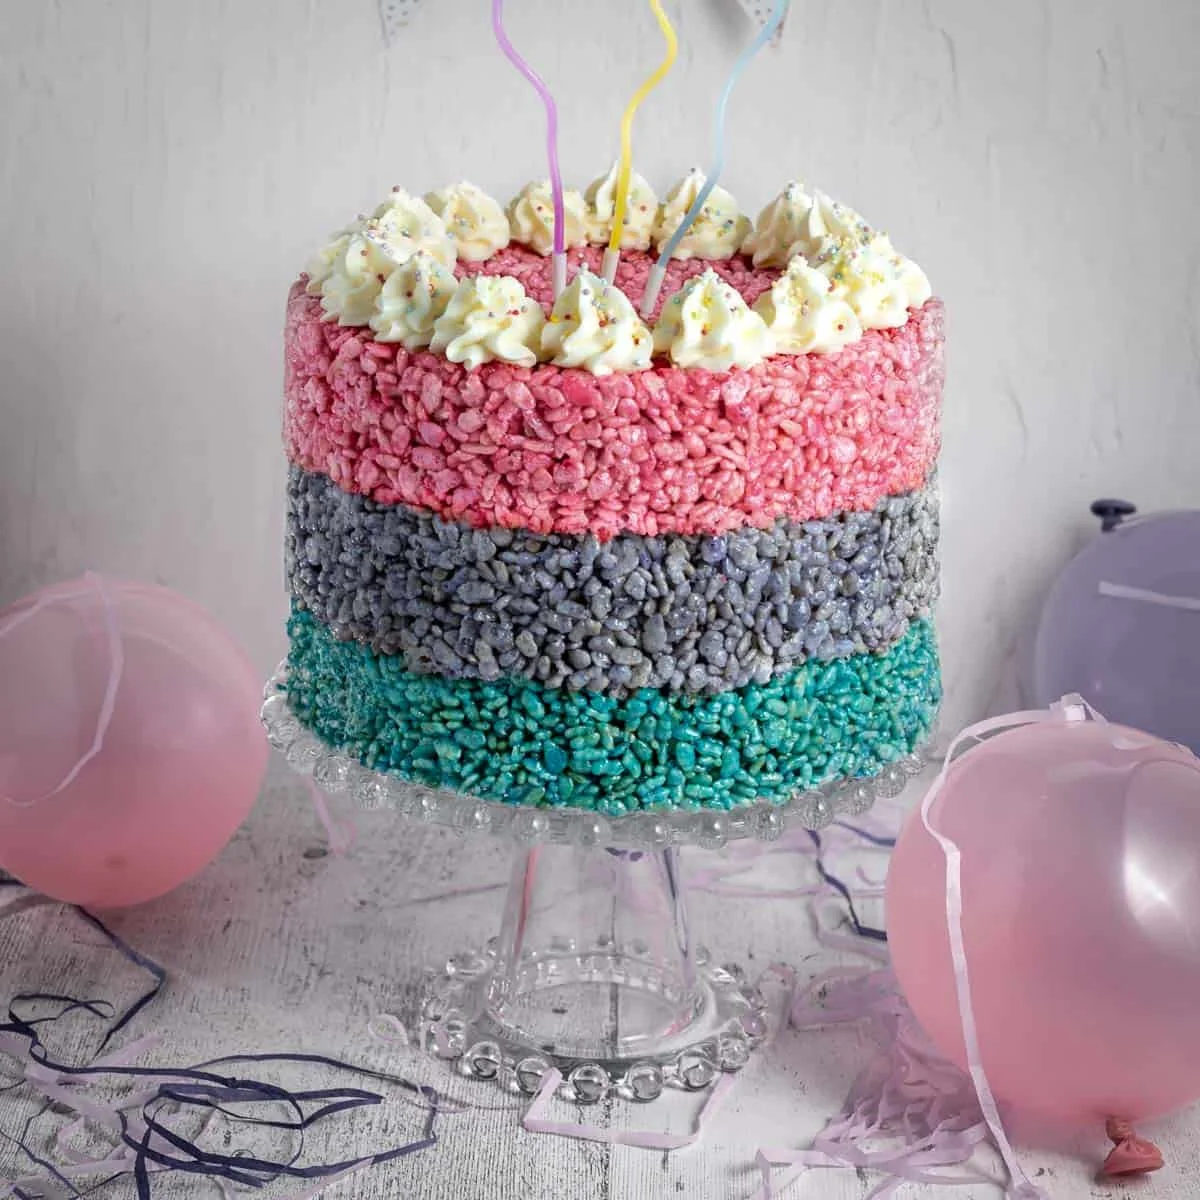
This no-bake cake stacks three colourful layers of marshmallow-coated crispy rice cereal. It is a playful alternative to a baked birthday cake and easy to make for parties or bake sales.
Ingredients
- 90 g (3.2 oz), divided into 3 × 30 g portionsunsalted butter
- 450 g (15.9 oz)white marshmallows
- 600 g (21.2 oz), divided into 3 × 200 g portionsRice Krispies
- 3 portionsgel food colouring of choice
Instructions
- 1
Prepare the tins
Grease and line three 20 cm (8-inch) round cake tins with baking paper. If you have only one tin, make the layers one at a time and reuse it.
- 2
Divide the ingredients
Split the butter, marshmallows and Rice Krispies into three equal portions.
- 3
Melt the butter
For the first layer, melt one portion of butter in a large saucepan over a low heat.
- 4
Melt the marshmallows
Add one portion of marshmallows and stir until they have melted completely and the mixture is smooth.
- 5
Colour the mixture
Stir in a little gel food colouring until evenly mixed. Make the colour a little brighter than you want the finished layer, as the cereal will make it paler.
- 6
Add the cereal
Take the pan off the heat and stir in one portion of Rice Krispies until the cereal is evenly coated.
- 7
Shape the layer
Spoon the mixture into the prepared tin and press it into an even layer with a lightly greased spatula, spoon or the bottom of a glass. Press firmly enough to level it, but avoid compressing it so much that it becomes dense.
- 8
Make two more
Repeat with the remaining butter, marshmallows, Rice Krispies and colours to make the other two layers.
- 9
Chill if needed
If the layers feel very soft, chill them for 10 minutes before stacking.
- 10
Stack the layers
Arrange the layers on a cake stand or serving plate, pressing each one down gently so the cake sits neatly.
- 11
Decorate the cake
Finish with buttercream, marshmallow fluff, melted chocolate, sprinkles, candles or sweets.
- 12
Slice and serve
Cut the cake into small wedges or pieces to serve.
What is a Rice Krispie treat cake?
A Rice Krispie treat cake takes the familiar marshmallow-and-crispy-rice confection and shapes it into a celebration cake. The treat has become popular as a simple, no-bake party sweet, and this version turns it into three colourful round layers.
Marshmallows bind the cereal together as they melt, while separate batches make it easy to give each layer its own colour. The result is a cheerful cake that can be decorated like a conventional birthday cake.
Nutrition and macros by portion
The nutrition label shows one serving as written: 182 calories, 2g protein, 37g carbs, 3g fat.
| Portion | Adjustment | kcal | Protein | Carbs | Fat |
|---|---|---|---|---|---|
| Lighter | Smaller cake slice | 127 kcal | 1g | 26g | 2g |
| This serving | As written | 182 kcal | 2g | 37g | 3g |
| Hungry | Larger cake slice | 273 kcal | 3g | 56g | 5g |
The carbohydrate content comes mainly from the crispy rice cereal and marshmallows. Butter contributes most of the fat, while the marshmallows and cereal provide a small amount of protein. Serve a small piece alongside fruit or another less-sweet option to balance the plate.
Why the three batches matter
Even portions: dividing the butter, marshmallows and cereal into three equal amounts helps the layers match in size and texture.
One colour at a time: colouring each marshmallow mixture before adding the cereal gives you more control over the shade and makes it easier to keep the layers distinct.
Keep the heat low
Marshmallow mixture: melt the butter over a low heat, then stir in the marshmallows until smooth. Gentle heat helps you keep the mixture workable while you stir in the cereal.
Work promptly: once the cereal is coated, transfer it to the tin before the mixture firms up. If you are using one tin for all three layers, prepare each batch in turn.
Press for a tender texture
Even layers: use a lightly greased spatula, spoon or glass base to spread the mixture across the tin. The aim is a level surface, not a tightly packed layer.
Gentle pressure: pressing too hard can make the cereal cake dense and difficult to bite through. Use only enough pressure to bring the mixture together.
When to chill the layers
Check the texture: if a layer still feels very soft when you are ready to stack, chill it for 10 minutes first. Firmer layers are easier to handle and less likely to squash under the weight above.
Stack carefully: set each layer on the one below and press gently to help the cake sit neatly. Avoid pushing down hard, which can compress the cereal.
Decorating and serving
Choose a finish: buttercream, marshmallow fluff, melted chocolate, sprinkles, candles or sweets all work as decorations for this cake.
Small portions: cut it into small wedges or pieces, as the marshmallow-bound cereal is sweet and filling. It is easy to serve at a party or bake sale.
Recipe notes & tips
- Use three equal portions of each main ingredient to keep the layers consistent.
- Add the food colouring before stirring in the cereal so it is easier to distribute evenly.
- Start with a little gel colouring and add more gradually to reach your preferred shade.
- Lightly grease the utensil you use to press the mixture into the tin.
- Let the cake stand on its serving plate before slicing so the layers can settle together.
Variations
- Rainbow layers: use a different gel colour for each batch to create a bright stack.
- Chocolate finish: drizzle melted chocolate over the assembled cake before serving.
- Buttercream topping: spread buttercream over the top for a more traditional birthday-cake finish.
- Marshmallow finish: top the cake with marshmallow fluff for an extra marshmallow note.
- Party decorations: add sprinkles, candles or sweets to suit the occasion.
Common mistakes to avoid
- Overheating the mixture: keep the butter and marshmallows over a low heat and stir until smooth.
- Uneven portions: divide the ingredients into three equal batches so the layers are similar in size.
- Dull colours: make each marshmallow mixture slightly brighter than the shade you want, as the cereal lightens it.
- Packing too firmly: press only enough to make an even layer, or the finished cake can become dense.
- Stacking soft layers: chill them for 10 minutes first if they feel very soft.
How to store
Store the cake in an airtight container at room temperature and aim to eat it within 2–3 days, while the cereal is still crisp. Avoid refrigerating it unless the decoration requires chilling, as refrigeration can make the layers firmer.
Frequently asked questions
Can I make the layers in one tin?
Yes. The method allows you to make one layer at a time and reuse the tin. Prepare each mixture in turn and let a layer firm up before stacking.
Why should I make the colours brighter?
The cereal lightens the colour once it is stirred into the marshmallow mixture. Starting with a slightly stronger shade helps the finished layers look more vibrant.
How firmly should I press the mixture?
Press just enough to level and even out each layer. Compacting it too much can make the cake dense.
Do I need to chill the layers?
Only if they feel very soft when you are ready to stack them. Chill them for 10 minutes, then assemble the cake.
What can I use to decorate the cake?
The recipe suggests buttercream, marshmallow fluff, melted chocolate, sprinkles, candles or sweets.
How should I cut and serve it?
Cut it into small wedges or pieces. The stacked cereal layers make a colourful, easy-to-share party dessert.
Cook it from the original
This recipe comes from thecinnamonjar.com. Their page has the author’s own photos, notes and tips — the best place to cook it from.
Open the recipe on thecinnamonjar.com