
Mango Mousse Cake
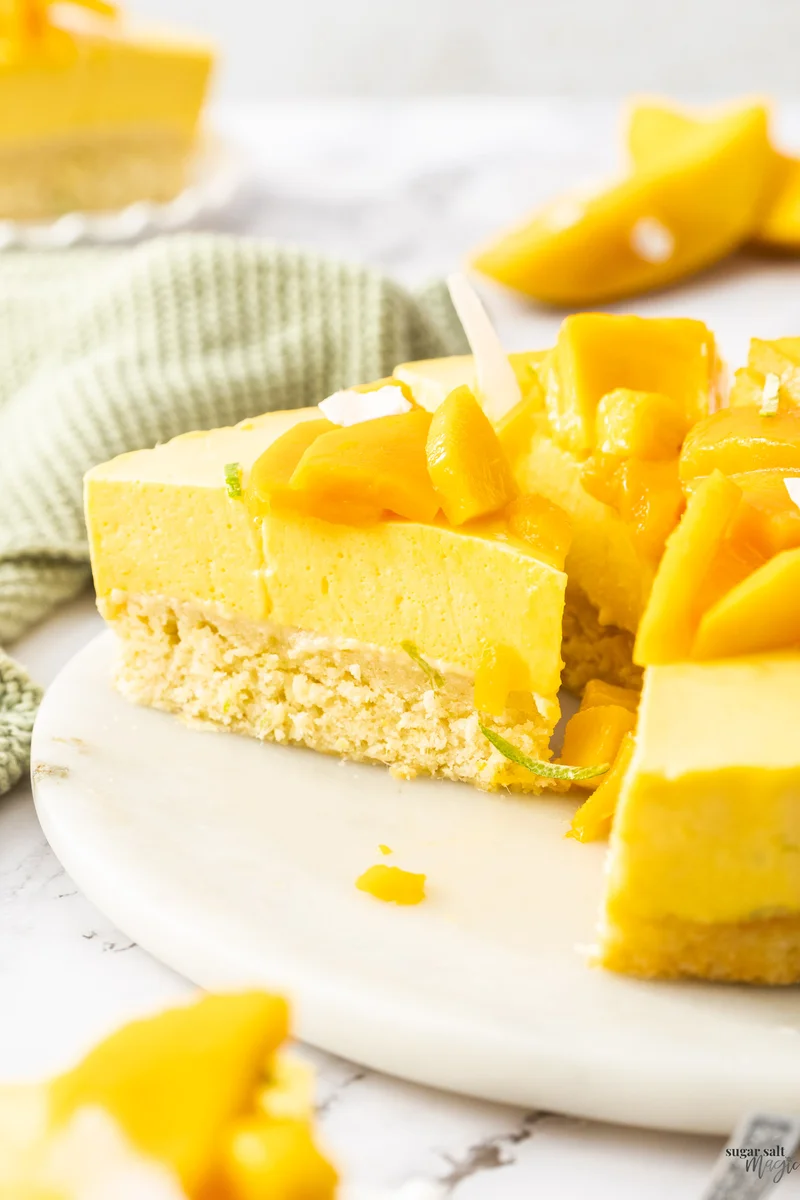
This mango mousse cake starts with a moist and rich coconut cake, topped with a creamy melt-in-the-mouth mango mousse. It’s easy to make, elegant and so delicious.Plan ahead for a minimum of 6 hours chilling time.
Ingredients
- 3/4 cup white granulated sugar ((150g / 5.3oz))
- 2 large eggs, room temperature
- 1/3 cup neutral flavoured vegetable oil
- 1 tablespoon milk ((notes 1))
- 165 g plain flour (all purpose flour) ((1 1/4 cups / 5.8oz))
- 1/3 cup desiccated coconut ((30g/1oz))
- 1 teaspoon baking powder
- 1/4 teaspoon salt
- Zest of one large lime
- 1 cup thickened cream (or whipping cream or heavy cream), cold ((250ml))
- 2 large ripe mangoes (you'll need 2 1/4 cups puree)
- 1/4 cup icing sugar (powdered sugar) ((33g / 1.2oz))
- 1 teaspoon lime zest
- 1/4 cup cold water ((60ml) (notes 1))
- 2 teaspoons powdered gelatine
- mango slices and shaved coconut for topping
Instructions
- 1
FOR THE LIME COCONUT CAKE BASE: Preheat the oven to 160C (140Cfan) / 325F. Line the base of an 8 inch springform pan, then grease the sides and line those with baking paper too.
- 2
In a large bowl, combine the eggs and sugar and whisk until combined. Add the oil and milk and whisk to combine.
- 3
Add the flour, coconut, baking powder and salt to the bowl. Use the whisk to mix until just combined. Add the lime zest and use a spatula to gently stir it in.
- 4
Pour the thick batter into the prepared pan and bake for 30-35 minutes or until a toothpick comes out with a crumb or two attached.
- 5
As soon as you take it out of the oven, gently press down the top of the cake with a glass to flatten it out slightly. It seems strange but the cake does dome a little and a flat surface looks nicest for the mousse to sit on.
- 6
Carefully release the spring clip but don’t take the outer ring off the pan. Leave it in place while the cake cools to at least room temperature before proceeding (you can speed it up in the fridge but let it cool for 5-10 minutes first, then place it on a plate and cool in the fridge).
- 7
FOR THE MANGO MOUSSE: Pour the cold cream into a large mixing bowl and use an electric beater to beat to stiff peaks. Careful not to overwhip it or it will become grainy. Chill until required.
- 8
Cut the flesh from the mangoes and add to a blender or food processor. Blend to a smooth puree. Measure out 2 ¼ cups of mango puree into a separate bowl and set aside.
- 9
In a very small saucepan or milk pan, pour the water, then sprinkle the gelatin powder over the top evenly. Let it sit for 3-4 minutes to soften.
- 10
Turn the heat on low under the pan and stir until the gelatine has dissolved, stirring and pressing it against the bottom of the pan as needed to dissolve it. Make sure not to bring it to a boil and remove it from the heat if you see any bubble. Take the time to make sure the gelatine is completely dissolved so you don’t end up with lumps in your mousse.
- 11
Add the sugar, lime zest and gelatine mixture to the mango puree and whisk to combine.
- 12
Pour quarter of the mango mixture into the whipped cream and use a spatula to very gently fold it together - don’t stir it. When there are just a few streaks remaining add the next portion of mango. Repeat until it’s fully folded together. Make sure to scrape right from the bottom of the bowl so all the cream and mango are incorporated.
- 13
If using acetate strips, remove the baking paper from around the inside sides of the spring form pan and lock it back up again. Slide the acetate strips down the sides of the cake all the way round.
- 14
Tip the mousse mixture onto the cooled cake and give it a shake to level it out. Chill for at least 4 hours or overnight until set.
- 15
To serve, if using baking paper, run an offset spatula around the cake between the paper and the tin. Carefully unlock the spring clip and lift it off. Now carefully peel off your baking paper or acetate strips.Decorate with sliced mango and shaved coconut then slice and serve.
- 16
Please take a moment to leave a comment & rating. It's appreciated and so helpful.
Cook it from the original
This recipe comes from sugarsaltmagic.com. Their page has the author’s own photos, notes and tips — the best place to cook it from.
Open the recipe on sugarsaltmagic.com