
Mini Pork Pies
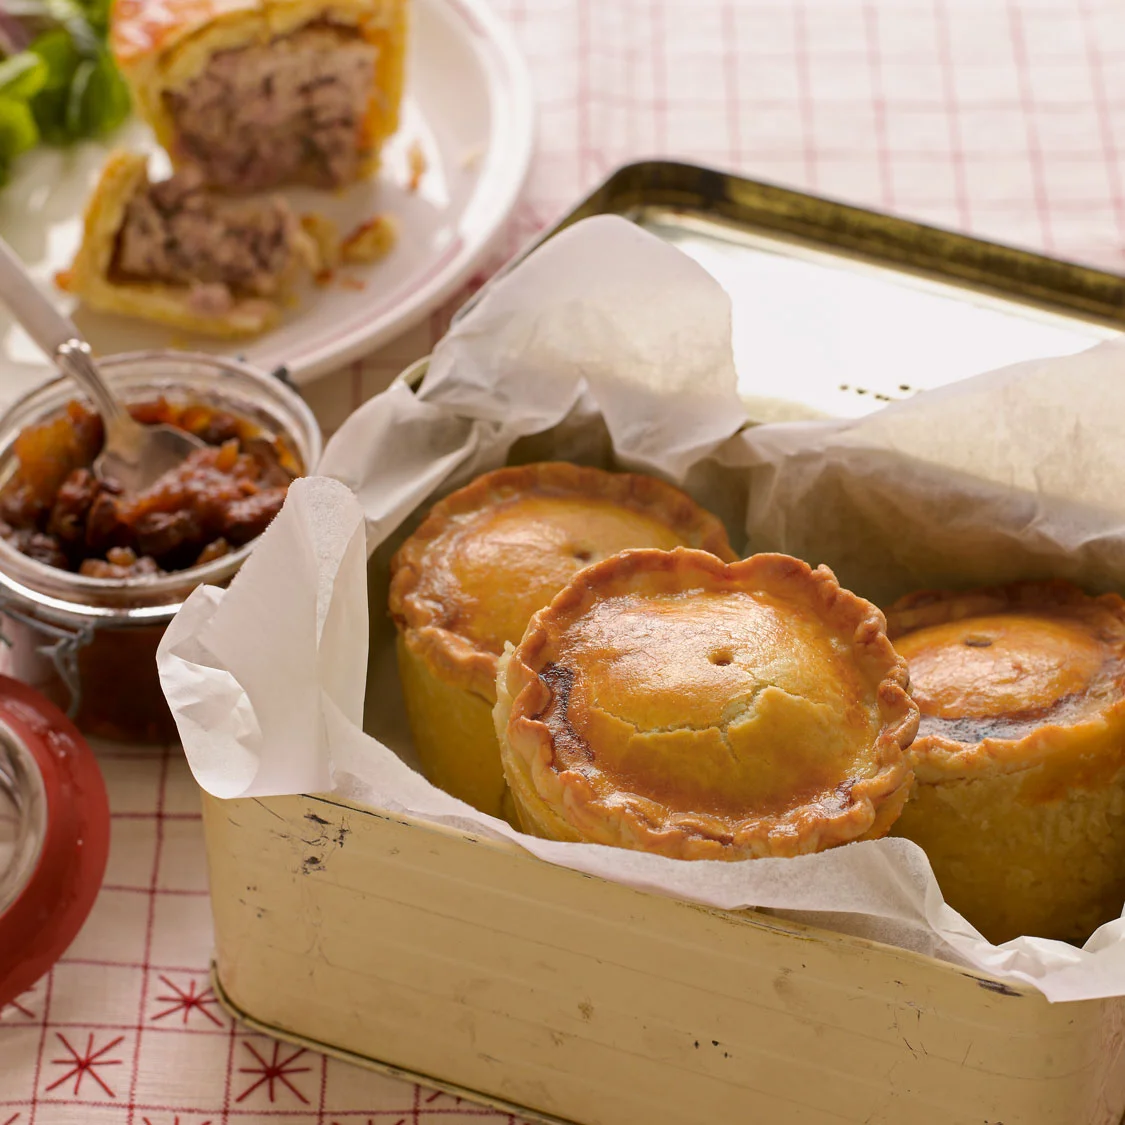
Mini pork pies have a savoury pork and bacon filling wrapped in hot water crust pastry. They’re a hands-on way to learn this pliable pastry, and make individual pies that are easy to serve.
Ingredients
- 475 gpork tenderloin
- 125 gunsmoked streaky bacon
- 1 smallonion, finely chopped
- 2 tspsage, finely chopped
- 1 tbspflat-leaf parsley, finely chopped
- 1/4 tspground nutmeg
- 1/4 tspground black pepper
- to tastesalt
- 375 gplain flour
- 1/2 tspsalt
- 100 glard, cut into small pieces
- 40 gbutter, cut into small pieces
- to glazebeaten egg
Instructions
- 1
Prepare the filling
Roughly chop the pork and pulse it briefly in a food processor until it resembles coarse mince, taking care not to make it too smooth. Alternatively, chop it very finely with a sharp knife. Transfer to a bowl. Finely chop the bacon, keeping its fat, and add it to the pork with the onion, sage, parsley, nutmeg, pepper and a little salt. Cover and chill until needed.
- 2
Make the pastry
Put the flour and 1/2 tsp salt in a large heatproof bowl. Add the lard and butter to a small pan with 150 ml water. Heat over medium heat until the fats melt, then increase the heat. As soon as the mixture boils, pour it into the flour; do not let it simmer first. Stir with a wooden spoon to make a soft dough, then leave it for a minute or two to cool slightly.
- 3
Chill the dough
Turn the dough onto a lightly floured surface and knead briefly until smooth. Wrap it in cling film and chill for 30–40 minutes. Avoid chilling it much longer, as the pastry can harden and become harder to roll.
- 4
Prepare the moulds
Lightly butter 6 small pudding moulds and preheat the oven to 200°C (180°C fan/400°F/Gas 6). Divide the filling into six equal portions. Halve the dough and keep one half wrapped. Shape the other half into a disc and roll it out on a well-floured surface to about 3 mm thick. Use an upturned bowl or saucer as a guide to cut three 14 cm circles for the bases and three 8 cm circles for the lids, re-rolling the scraps if needed.
- 5
Line the moulds
Fit the three larger pastry circles into three moulds, pressing the pastry against and up the sides with your fingers. Smooth out any thick folds and bring the pastry just above the rim.
- 6
Fill the cases
Spoon one portion of filling into each pastry case and press it down firmly. Keep the filling slightly below the top of each mould.
- 7
Seal the pies
Brush the pastry edges with beaten egg. Lay a pastry lid over each pie and press it onto the filling, then press the edges together firmly to seal and flute them. Brush the tops with beaten egg and pierce a small vent in the centre of each lid with a skewer. Repeat with the remaining pastry and filling to make six pies.
- 8
Bake and cool
Set the pies on a baking sheet and bake for 40–45 minutes, until the pastry is a rich golden brown. Remove them from the oven and leave for about 30 minutes. While they are still warm, loosen the pastry around the inside edges of the moulds in case any juices have stuck. Leave the pies in their moulds for a couple more hours, until completely cold and the juices have settled back into the meat, then turn them out.
What are mini pork pies?
Pork pies are a British savoury pastry tradition, typically made with a seasoned pork filling enclosed in hot water crust pastry. This version makes six individual pies in small pudding moulds.
The hot water dough is mixed while warm, so it is pliable enough to shape around the moulds. Coarsely chopped pork and streaky bacon give the filling a mix of textures and a savoury richness.
Nutrition and macros by portion
The nutrition label shows one serving as written: 612 calories, 30g protein, 48g carbs, 34g fat.
| Portion | Adjustment | kcal | Protein | Carbs | Fat |
|---|---|---|---|---|---|
| Lighter | Smaller pie, more salad | 428 kcal | 21g | 34g | 24g |
| This serving | As written | 612 kcal | 30g | 48g | 34g |
| Hungry | Add a second pie | 918 kcal | 45g | 72g | 51g |
The flour provides most of the carbohydrates, while lard, butter and streaky bacon contribute much of the fat; pork and bacon supply the protein. Pair a pie with salad or green vegetables for a plate with more freshness and variety.
A textured pork filling
Pork: Pulse it only briefly, stopping when it looks like coarse mince. Leaving some texture helps the filling feel substantial rather than pasty.
Bacon: Keep the fat attached as you chop it. Along with the pork, onion, herbs and spices, it seasons the filling and helps keep it moist.
Working with hot water crust
Melt the lard and butter in the measured water, then bring the mixture to the boil and pour it into the flour promptly. The recipe cautions against letting it simmer, as some of the water may evaporate.
Knead the dough only briefly, then chill it for 30–40 minutes. This short rest cools it enough to handle while avoiding the longer chill that can make it difficult to roll.
Shaping the pastry cases
Bases: Roll the pastry to about 3 mm thick and use 14 cm rounds for the moulds. Press it evenly up the sides, smoothing any thicker folds so the cases are not uneven.
Lids: Cut 8 cm rounds and keep the pastry covered while you work. Seal each lid firmly to the base and add a small central vent so the pies are not closed up without an opening.
Filling and doneness cues
Press the filling into the cases so it is packed in, but leave it slightly below the mould rims. This makes space for the lids and helps you bring the pastry edges together.
Bake for 40–45 minutes, using the rich golden-brown pastry as the visual cue given in the method. Leave the pies to cool in their moulds until completely cold before turning them out.
Why the cooling time matters
After about 30 minutes out of the oven, loosen the pastry around the mould edges while the pies are still warm. This helps prevent any baked-on juices from making them hard to release later.
The further cooling period lets the juices settle back into the meat. Allow a couple more hours in the moulds before unmoulding, so include that rest when planning when to serve them.
Serving the pies
Serve a pie with a crisp green salad, pickles or chutney to contrast with the rich pastry and savoury filling. For a fuller meal, add vegetables such as peas or green beans.
The pies are also convenient for a picnic or packed lunch once completely cool. They can be served at room temperature or gently reheated.
Recipe notes & tips
- Have the filling chilled and ready before you start shaping the pastry.
- Keep the unused half of the dough wrapped while you work on the first three pies.
- Use a well-floured surface when rolling the dough to help prevent sticking.
- Press the filling down firmly and leave it slightly below the top of the mould.
- Make the vent after glazing so each lid has a clear opening.
- Loosen the pastry edges while the pies are still warm, then let them cool fully in their moulds.
Variations
- Herb change: Swap the sage or parsley for another finely chopped herb that suits pork.
- Peppery filling: Add a little more ground black pepper to the pork mixture.
- Spice adjustment: Vary the nutmeg slightly to suit your taste.
- Different moulds: Use other small oven-safe pudding moulds of a similar size, adjusting the pastry fit as needed.
Common mistakes to avoid
- Over-processing the pork: Stop while it is still coarse so the filling keeps some texture.
- Simmering the pastry liquid: Bring it just to the boil and pour it straight into the flour to avoid losing water.
- Chilling the dough too long: Stick to 30–40 minutes so the pastry remains manageable.
- Leaving thick folds: Smooth the pastry against the mould sides for a more even case.
- Under-sealing the lids: Press the edges together firmly before fluting to close the pies.
- Turning the pies out too soon: Cool them completely in the moulds so the juices can settle.
How to store
Once completely cool, store the pies in a covered container in the fridge and eat within 3 days. Reheat gently in the oven until heated through, or serve them cold. They can also be frozen, well wrapped, for up to 2 months; defrost in the fridge before reheating.
Frequently asked questions
Can I make the filling ahead?
Yes. The method instructs you to cover and chill the prepared filling until you are ready to use it.
Can I make the pastry ahead?
It is best to follow the suggested short chill of 30–40 minutes. The method warns that a longer chill can make hot water crust pastry harder to handle.
Why is the pork chopped rather than finely minced?
The filling is meant to retain a coarse texture. Pulse briefly in a food processor, or chop it finely by hand, and stop before it becomes smooth.
How do I know when the pies are baked?
The stated visual cue is pastry that has turned a rich golden brown after 40–45 minutes in the oven.
Why do the pies need to cool in their moulds?
The method allows a couple of hours for the pies to cool completely and for the juices to settle back into the meat. Cooling them in the moulds also makes them easier to release.
Can I use a different type of mould?
The recipe specifies six small pudding moulds. If you use other moulds, choose small oven-safe ones that can accommodate the pastry cases and filling.
Cook it from the original
This recipe comes from thegreatbritishbakeoff.co.uk. Their page has the author’s own photos, notes and tips — the best place to cook it from.
Open the recipe on thegreatbritishbakeoff.co.uk