
Sourdough Starter Recipe
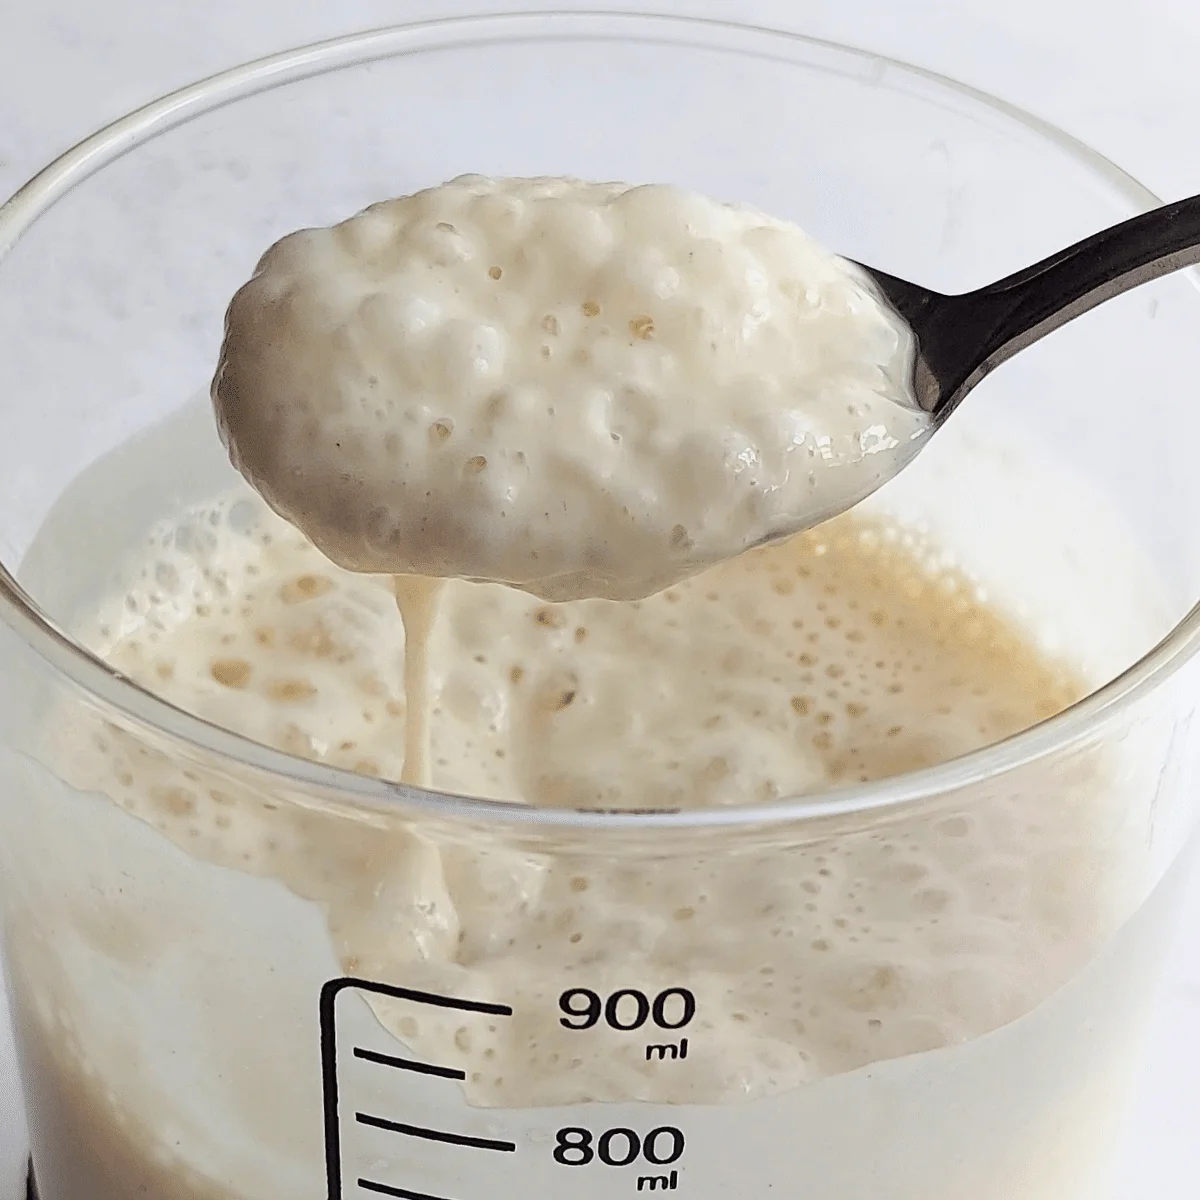
Making sourdough starter is super easy and you'll be baking with it before you know it.
Ingredients
- 3/4 cup (100g) white bread flour (per feeding) (Total: ~800g (6 cups) over 8 days ((see note 1))
- 1/2 cup (100g water (per feeding) ((see note 2))
Instructions
- 1
--- Day One ---
- 2
In a clean jar, combine ¾ cup (100g) white bread flour and ½ cup (100g) water. Stir until fully mixed.
- 3
Mark the mixture’s level on the jar using a rubber band, tape, or marker. This will help you track the rise over time.
- 4
Cover the jar loosely with a lid or cloth and leave it at room temperature (around 75-80°F or 24-27°C) for 24 hours.
- 5
--- Day Two ---
- 6
What to Expect: After 24 hours, the mixture should have risen 1 ½ to 2 times its original size.
- 7
Small bubbles may form, and it will have a faint sour smell, signaling fermentation.
- 8
What to Do: Stir the mixture well and discard about half (roughly 100g) of the starter.
- 9
Add ¾ cup (100g) white bread flour and ½ cup (100g) water to the remaining mixture. Stir until fully combined.
- 10
Mark the new level of the mixture.
- 11
Cover the jar loosely again and leave it at room temperature (75-80°F or 24-27°C) for another 24 hours.
- 12
--- Day Three ---
- 13
What to Expect: The starter should rise and fall, leaving marks on the jar.
- 14
Small bubbles and a slightly sour smell are normal.
- 15
A thin layer of brownish liquid (hooch) may form on top, which indicates hunger.
- 16
What to Do: Stir the mixture well and discard about half (roughly 100g) of the starter.
- 17
Add ¾ cup (100g) white bread flour and ½ cup (100g) water to the remaining mixture. Stir until fully combined.
- 18
Mark the new level of the mixture.
- 19
Cover the jar loosely again and leave it at room temperature for another 24 hours.
- 20
--- Day Four - Six ---
- 21
What to Expect: The starter may appear watery and flat but don’t lose hope!
- 22
The aroma may change to a cheesy or yogurt-like scent.
- 23
Hooch may form on the surface—pour it off to prevent excess moisture.
- 24
What to Do (each day): Discard about half (100g) of the starter.
- 25
Add ¾ cup (100g) white bread flour and ½ cup (100g) water. Stir until fully mixed and mark the new level.
- 26
Cover the jar loosely and leave it at room temperature.
- 27
--- Day Seven ---
- 28
What to Expect: Stronger activity—after feeding, the starter should rise significantly within a few hours and then fall back down.
- 29
The texture should feel airy and light with visible bubbles.
- 30
What to Do: Discard about half (100g) of the starter.
- 31
Add ¾ cup (100g) white bread flour and ½ cup (100g) water.
- 32
Stir until fully mixed and mark the new level.
- 33
Cover the jar loosely and leave it at room temperature.
- 34
--- Day Eight onwards ---
- 35
What to Expect: A mature starter will double or triple in size within 6-8 hours of feeding.
- 36
The texture will be light, airy, and spongy with visible bubbles. It will have a tangy aroma.
- 37
What to Do:
- 38
Check the Rise:. When your starter is ready, it should rise and get puffy, roughly doubling in size within 4-6 hours. After about 12 hours, it should start to fall back down. It should smell sour but pleasant. This is a good sign that it’s ready to bake.
- 39
Float Test (Optional): To test the readiness of your starter, you can do the float test. Simply drop a spoonful of the starter into a glass of water.Your starter should float for at least a few seconds, ideally 10-15 seconds.If it sinks quickly, it might need more time or another feeding. If it floats steadily, it's ready to use for baking.
- 40
All Set for Baking? If your starter passes the float test and has a nice rise, it's ready to bake! Give it a go with my super easy Sourdough Sandwich Bread recipe.
- 41
If your starter isn’t ready by day 8, keep feeding it as you have been. It might take a little longer depending on things like the flour you use and the temperature in your kitchen.
Cook it from the original
This recipe comes from thegardeningfoodie.com. Their page has the author’s own photos, notes and tips — the best place to cook it from.
Open the recipe on thegardeningfoodie.com