
The Best Classic Cream Scones
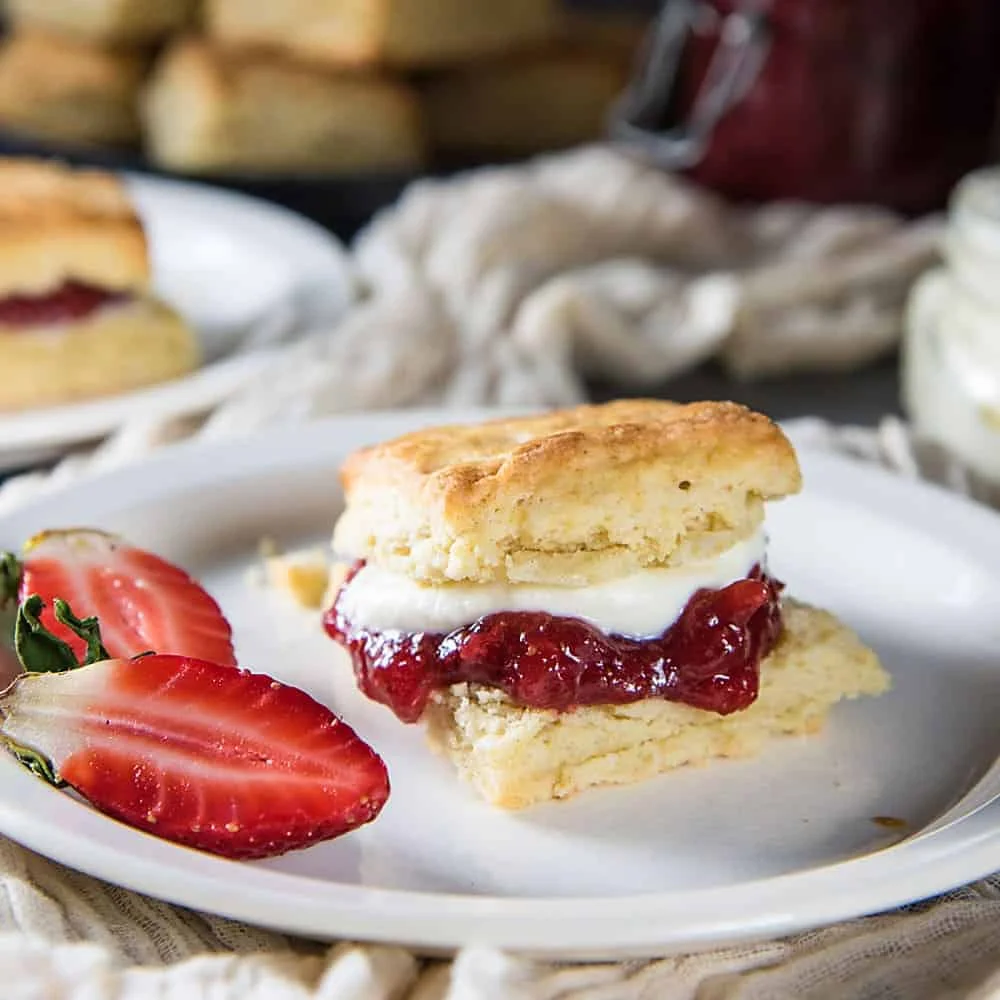
These classic cream scones are tender, buttery and layered, with a golden top and a texture you can tailor by spacing them closer together or further apart. Serve them warm with butter, jam and cream for an easy afternoon treat.
Ingredients
- 400 gplain flour, chilled
- 4 tspbaking powder
- ¼ tspbicarbonate of soda
- 1 tspsalt
- 3 tbspsugar
- 170 gunsalted butter, chilled and cut into cubes
- 300 mldouble cream, chilled
- 1 tspvanilla
- As neededextra cream or milk, for brushing
- Optional, as neededextra coarse sugar, for sprinkling
Instructions
- 1
Mix dry ingredients
Put the flour, baking powder, bicarbonate of soda, salt and sugar in a bowl and combine.
- 2
Rub in butter
Cut the butter into the flour mixture with a pastry cutter, or rub it in with your fingertips. Stop when the mixture looks coarse and contains butter pieces about the size of peas.
- 3
Add the cream
Stir the vanilla into the cream, then add it gradually to the flour mixture. Use a fork to mix until the cream is incorporated and the dough looks shaggy and lumpy.
- 4
Bring dough together
Turn the dough onto lightly floured baking parchment. Lightly flour its surface and gently bring the dough together. Pat it into a circle or square about 15–20 cm across.
- 5
Layer the dough
Cut the dough in half and stack one half on the other. Cover with another sheet of parchment and roll or pat it back into a circle or square about 15–20 cm across. Repeat the cutting and stacking once or twice more.
- 6
Shape the dough
Roll the dough into a rough square about 1.3–1.9 cm thick. Use a clean knife to trim away only the rough edges.
- 7
Cut the scones
Cut the dough into 16 pieces in a 4-by-4 grid, cleaning the knife after each cut. Press the sharp knife straight down for clean edges. If using a biscuit cutter, lightly flour it and press straight down through the dough.
- 8
Chill the pieces
Put the cut scones in the freezer for about 10–15 minutes while the oven heats.
- 9
Heat the oven
Preheat the oven to 218°C.
- 10
Arrange the scones
Transfer the scones on their parchment to a baking tray. Separate them to suit the sides you want; use a spatula if needed to release them from the parchment.
- 11
Choose the spacing
For soft sides, arrange the scones so they touch. For sides that are soft and crisp, leave about 1–1.5 cm between them. For crisp sides, space them about 5 cm apart.
- 12
Brush and sprinkle
Brush only the tops with milk or cream. Sprinkle over coarse sugar if using.
- 13
Bake until golden
Put the scones in the oven and lower the temperature to 204°C. Bake for about 20 minutes, until beautifully golden brown.
- 14
Cool briefly
Take the scones out of the oven and leave them to cool a little.
- 15
Serve warm
Enjoy warm, or microwave cooled scones for about 20–30 seconds to warm them. Serve with butter, jam and cream.
What are cream scones?
Scones are a familiar part of afternoon tea in Britain and across Australasia, where they are often served with jam and cream. This version uses cream in the dough for richness, while cold butter and repeated folding help create a layered crumb.
The method is approachable, but it rewards a light touch: keep the dough rough rather than kneading it smooth, and the baked scones stay tender.
Nutrition and macros by portion
The nutrition label shows one serving as written: 242 calories, 3g protein, 23g carbs, 16g fat.
| Portion | Adjustment | kcal | Protein | Carbs | Fat |
|---|---|---|---|---|---|
| Lighter | Smaller scone, lighter toppings | 169 kcal | 2g | 16g | 11g |
| This serving | As written | 242 kcal | 3g | 23g | 16g |
| Hungry | Two scones per portion | 363 kcal | 5g | 35g | 24g |
The flour and sugar provide most of the carbohydrates, while the butter and cream contribute most of the fat. The cream and flour also provide some protein; serve a scone with fruit or alongside a protein-rich savoury food to make the plate more varied.
Keep the ingredients cold
Cold butter: leave it in small cubes and work it into the flour only until pea-sized pieces remain. Those pieces help give the scones their flaky texture.
Chilled cream: mix in the vanilla first, then pour it gradually into the dry ingredients. Add only enough mixing to bring the shaggy dough together.
Build the layers gently
Cut and stack: folding the dough over itself once or twice creates layers without requiring extensive kneading. Handle it gently and use a little flour on the parchment if it sticks.
Keep the final square roughly 1.3–1.9 cm thick. Trimming the ragged edges gives the pieces neater sides, while straight downward cuts help them rise evenly.
Choose your scone sides
Touching: arrange the pieces so they meet for soft sides. This keeps the edges from browning as much.
Spaced apart: leave 1–1.5 cm for a mix of soft and crisp sides, or about 5 cm for more crispness around each scone. Transfer them carefully if they have stuck to the parchment.
Watch for the right finish
Golden tops: bake at 204°C after lowering the oven temperature from 218°C. Start checking around the 20-minute mark and look for a golden-brown surface.
Tender crumb: take care not to overwork the dough when bringing it together. The mixture can remain lumpy before baking; it does not need to become smooth.
Serve them simply
Warm scones are especially good with butter, jam and cream, as suggested in the recipe. For a balanced plate, pair one with fruit or serve it as part of a meal that includes a savoury option.
If serving a batch at once, offer the toppings separately so everyone can add the amount they like.
Recipe notes & tips
- Chill the flour, butter and cream before you begin so the dough stays cool as you work.
- Use your fingertips or a pastry cutter to rub in the butter, stopping when pea-sized pieces remain.
- Mix the cream in gradually and avoid kneading the dough smooth.
- Clean the knife between cuts for neater edges.
- Brush only the tops with cream or milk so the cut sides remain clear.
- Choose the spacing on the tray according to whether you prefer soft or crisp sides.
Variations
- Use a cutter: press a lightly floured biscuit cutter straight down for round scones.
- Skip the topping sugar: leave off the coarse sugar for a less sweet top.
- Change the sides: bake the scones touching for softer sides, or spaced apart for crisper ones.
- Serve with jam: add your preferred jam alongside the butter and cream.
- Warm from cold: heat cooled scones in the microwave for 20–30 seconds before serving.
Common mistakes to avoid
- Overworking the dough: it can become less tender, so mix only until it comes together.
- Warm butter: it blends too fully into the flour, so keep it chilled and stop at pea-sized pieces.
- Rough cutting: dragging the knife can compress the edges, so cut straight down with a sharp, clean knife.
- Brushing the sides: cream on the cut edges can affect their rise, so brush only the tops.
- Crowding without a plan: the sides may turn softer than intended, so set the spacing before baking.
- Skipping the chill: the dough may be less firm to handle, so freeze the cut scones for 10–15 minutes while the oven preheats.
How to store
Once cool, store the scones in an airtight container at room temperature and eat within 1–2 days for the best texture. Warm them in the microwave for 20–30 seconds before serving; freeze extras in a sealed container and thaw before reheating.
Frequently asked questions
Can I make the dough ahead?
The cut scones can be chilled in the freezer for the recipe’s 10–15-minute rest while the oven heats. For a longer make-ahead option, freeze the cut pieces and bake them from frozen, allowing extra time and checking for a golden finish.
Why are the butter pieces meant to stay visible?
Small, cold pieces of butter help create a flaky texture as the scones bake. Work the butter in only until it is about the size of peas.
How do I get soft sides?
Arrange the scones so that they touch before baking. For crisper sides, leave space between them instead.
Can I use a biscuit cutter?
Yes. Lightly flour the cutter and press it straight down through the dough to make clean edges.
How can I tell when the scones are done?
They should be beautifully golden brown after about 20 minutes at 204°C. If they need longer, continue baking and check their colour.
How should I warm a cold scone?
Microwave it for about 20–30 seconds, as directed in the recipe, and serve warm.
Cook it from the original
This recipe comes from theflavorbender.com. Their page has the author’s own photos, notes and tips — the best place to cook it from.
Open the recipe on theflavorbender.com