
Honey Garlic Chicken Breast
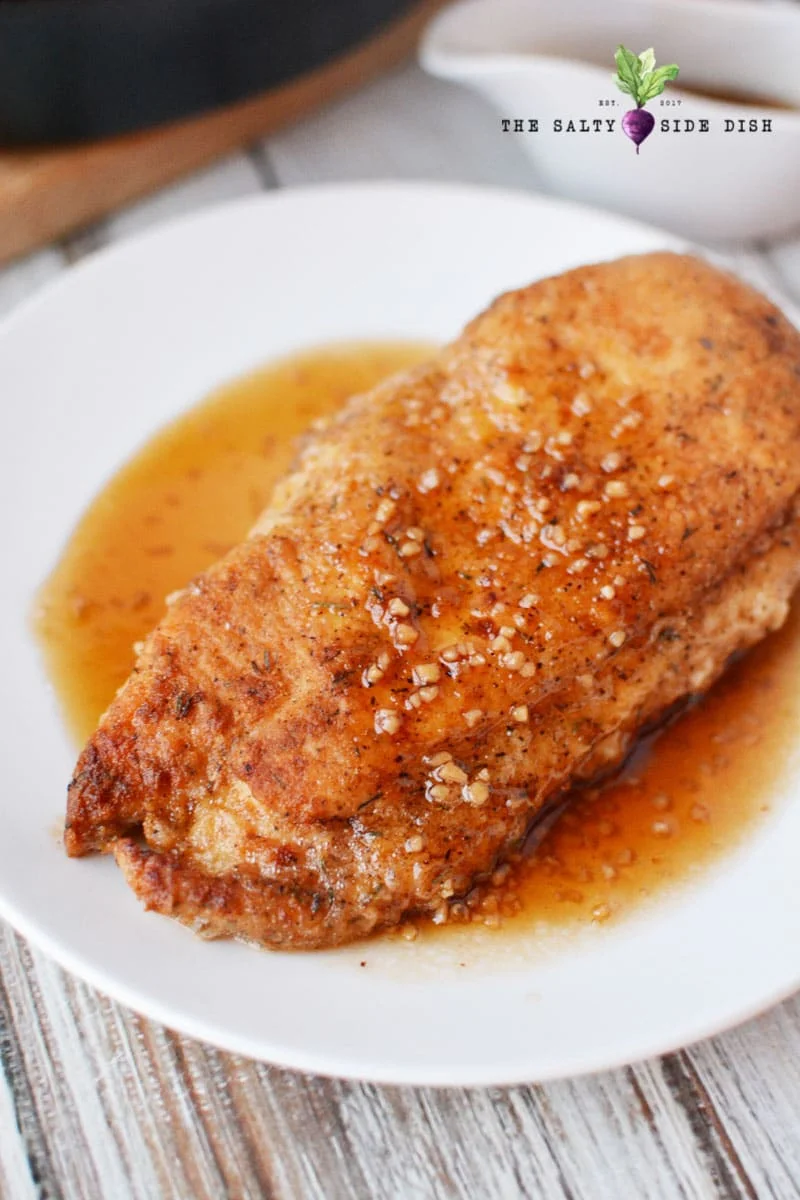
Honey garlic chicken breast is a quick skillet dinner with a spiced flour coating and a warm, sweet-savoury sauce. It brings together familiar pantry ingredients for a flavourful meal in about 20 minutes.
Ingredients
- 2chicken breasts
- 63 g (½ cup)flour
- 1 tablespoonginger
- 2 teaspoonspaprika
- 1 teaspoonsalt
- 1 teaspoonnutmeg
- ½ teaspoonpepper
- ½ teaspoonthyme
- 1egg
- 30 ml (2 tablespoons)water
- 170 g (½ cup)honey
- 30 ml (2 tablespoons)soy sauce
- 1 tablespoonminced garlic
Instructions
- 1
Mix the coating
Combine the flour, ginger, paprika, salt, nutmeg, pepper and thyme in a shallow dish, mixing well. Set it aside.
- 2
Beat the egg
In a separate shallow dish, beat the egg with the water until combined.
- 3
Heat the pan
Heat oil in a frying pan.
- 4
Coat the chicken
Dip each chicken breast in the egg mixture, then coat both sides in the flour mixture. Place the chicken in the pan.
- 5
Keep flour separate
Do not return flour that has touched raw chicken to the original bag.
- 6
Cook the chicken
Cook over medium heat until browned and cooked through, about 5 minutes per side.
- 7
Warm the sauce
While the chicken cooks, put the honey, soy sauce and garlic in a small saucepan. Heat over medium-low, stirring frequently, until warmed through.
- 8
Simmer and serve
Lower the sauce heat to a simmer to keep it warm, then serve it over the chicken.
What is honey garlic chicken breast?
This is a skillet-cooked chicken dish coated in seasoned flour and finished with a honey, soy and garlic sauce. It fits the familiar American-style weeknight dinner repertoire, pairing a crisp-edged chicken coating with a sweet and savoury glaze.
Spiced coating: paprika, ginger, nutmeg, pepper and thyme give the flour a warming, aromatic flavour. The quick stovetop method keeps the preparation straightforward without a long oven bake.
Nutrition and macros by portion
The nutrition label shows one serving as written: 696 calories, 57g protein, 100g carbs, 9g fat.
| Portion | Adjustment | kcal | Protein | Carbs | Fat |
|---|---|---|---|---|---|
| Lighter | Less honey sauce | 487 kcal | 40g | 70g | 6g |
| This serving | As written | 696 kcal | 57g | 100g | 9g |
| Hungry | Add rice or potatoes | 1044 kcal | 86g | 150g | 14g |
The chicken and egg provide most of the protein, while the flour and honey contribute much of the carbohydrates. Honey is also the main source of the dish's sweetness; the listed nutrition figures report 9 g of fat per serving. Add a generous serving of vegetables to balance the plate with freshness and fibre.
The coating and egg wash
Flour mixture: Stir the spices through the flour evenly so each piece gets a balanced coating. A shallow dish makes it easier to cover both sides of the chicken.
Egg wash: Beating the egg with water helps the flour mixture cling to the chicken. Let excess egg drip off before dredging to avoid a thick, patchy layer.
Getting the chicken cooked through
Even thickness: If the breasts are noticeably uneven, gently flatten the thicker ends so they cook at a similar pace. Take care not to tear the surface before coating.
Doneness: The recipe allows about 5 minutes per side over medium heat, but the exact time depends on the thickness of the chicken. Check the centre of the thickest part; it should reach 74°C and the meat should no longer be pink.
Making the honey garlic sauce
Gentle heat: Warm the honey, soy sauce and garlic over medium-low heat, stirring frequently. This is enough to bring the ingredients together without needing a hard boil.
Keep it warm: Once heated through, turn the sauce down to a simmer while the chicken finishes. Stir it occasionally so the garlic is distributed through the sauce.
Timing a 20-minute dinner
Start the sauce while the chicken is cooking, as the recipe directs, so both components are ready around the same time. Prepare the flour and egg dishes first to make the coating stage easier.
Use a roomy frying pan so the breasts sit in a single layer. If they do not fit without crowding, cook them in batches and keep the first batch warm while the rest cooks.
What to serve with it
Rice or potatoes work well alongside the honey-soy sauce and make a simple, filling plate. Spoon any extra sauce over the side rather than letting it go to waste.
For freshness and colour, add a green vegetable such as broccoli, green beans or a crisp salad. Keep the side simply seasoned so it complements the sweet, garlicky chicken.
Recipe notes & tips
- Set up the egg and flour dishes before handling the raw chicken.
- Coat both sides evenly, then shake off loose flour before placing the chicken in the pan.
- Avoid crowding the pan so the chicken can brown rather than steam.
- Stir the sauce often as it warms to keep the garlic evenly distributed.
- Use a clean plate and utensils for the cooked chicken, not those used for raw chicken.
Variations
- Add chilli: Stir a pinch of chilli flakes into the sauce for gentle heat.
- Use fresh ginger: Finely grate fresh ginger into the flour mixture for a brighter aroma.
- Add citrus: Finish the sauce with a small squeeze of lemon for a sharper contrast.
- Make it gluten-free: Use a gluten-free flour blend and gluten-free soy sauce.
- Add sesame: Sprinkle toasted sesame seeds over the finished chicken for extra crunch.
Common mistakes to avoid
- Returning used flour to the bag: Discard flour that has touched raw chicken to avoid contaminating the supply.
- Crowding the pan: The chicken may steam instead of brown; cook in batches if needed.
- Using uneven breasts: Thick sections can remain undercooked while thinner ends dry out; flatten the thicker parts gently.
- Turning the heat too high: The coating can brown before the centre cooks; keep the pan at medium heat.
- Boiling the sauce hard: Excessive heat can make it reduce too quickly; warm it gently and stir often.
How to store
Refrigerate leftover chicken and sauce in a covered container within 2 hours, and use within 3 days. Reheat until piping hot throughout, either gently in a pan or in the microwave; add a small splash of water if the sauce has thickened.
Frequently asked questions
How can I tell when the chicken is cooked through?
Check the thickest part with a food thermometer; it should reach 74°C. The recipe's guide is about 5 minutes per side, though thicker breasts may take longer.
Can I use chicken thighs instead?
Yes, boneless thighs can be coated and pan-cooked in the same style. Their cooking time may differ, so check that they are cooked through before serving.
Can I make the sauce ahead?
You can mix the honey, soy sauce and garlic ahead and refrigerate it. Warm it gently in a small saucepan before serving.
What can I use instead of soy sauce?
Tamari is a suitable alternative, including a gluten-free version if needed. The flavour and saltiness may vary slightly between brands.
Can I prepare the chicken in advance?
The flour and egg mixtures can be set out ahead, but coat the chicken just before cooking for the best result. Keep raw chicken refrigerated until you are ready to use it.
Cook it from the original
This recipe comes from saltysidedish.com. Their page has the author’s own photos, notes and tips — the best place to cook it from.
Open the recipe on saltysidedish.com