
Lemon White Chocolate Cheesecake
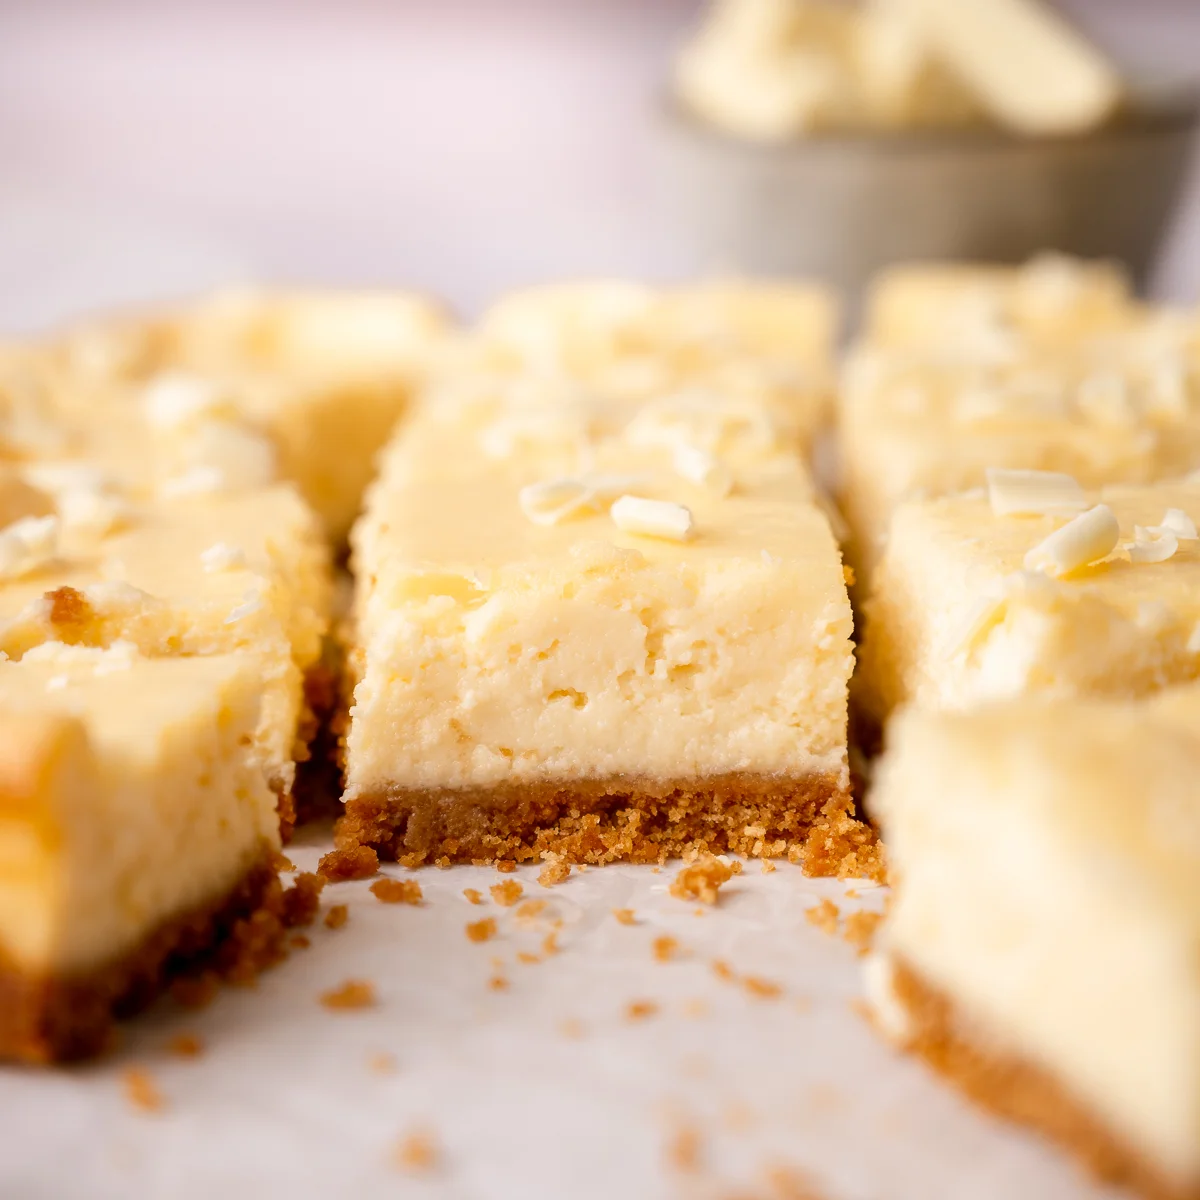
A rich, creamy cheesecake with a vanilla wafer crust, melted white chocolate and fresh lemon. It takes a little patience to chill, but the result is a smooth, tangy-sweet dessert that cuts into neat squares.
Ingredients
- 100 g (1 cup)vanilla wafer crumbs, finely ground
- 40 g (3 tablespoons)unsalted butter, melted
- 120 g (⅔ cup)white chocolate chips or chunks
- 60 ml (¼ cup)double cream
- 450 g (2½ cups)full-fat cream cheese, at room temperature
- 100 g (½ cup)granulated sugar
- 2 largeeggs
- 1 teaspoonpure vanilla extract
- 2 teaspoonslemon zest
- 2 tablespoonsfreshly squeezed lemon juice
- To taste (optional)white chocolate chips, for sprinkling
Instructions
- 1
Preheat and line
Heat the oven to 180°C (350°F). Line an 8 × 8-inch baking tin with baking parchment, leaving enough overhang on the sides to lift out the cheesecake later.
- 2
Bake the crust
Mix the wafer crumbs with the melted butter in a medium bowl. Press the mixture gently into an even layer in the lined tin, then bake for 8 minutes. Leave it to cool while you make the filling.
- 3
Lower the temperature
Reduce the oven temperature to 150°C (300°F).
- 4
Melt the chocolate
Combine the white chocolate and double cream in a medium heatproof bowl. Microwave in 20-second intervals, stirring between each, until melted; alternatively, set the bowl over a pan of simmering water and stir occasionally. Set aside.
- 5
Beat the cheese
Using a mixer fitted with a paddle attachment, beat the cream cheese on medium speed until smooth, about 1 minute. Add the sugar and beat for a further 2 minutes, scraping down the sides and bottom of the bowl as needed.
- 6
Finish the filling
Add the eggs one at a time, mixing until each is incorporated. Add the vanilla, lemon zest and lemon juice, and beat until smooth. Stir in the melted white chocolate mixture until combined.
- 7
Fill and bake
Pour the filling over the cooled crust and spread it evenly. Sprinkle with white chocolate chips if you like, then bake for about 45 minutes. The centre should still wobble slightly when you take the cheesecake out of the oven.
- 8
Chill and cut
Leave the cheesecake at room temperature for 1 hour, then refrigerate for 4 hours, or preferably overnight, until completely set. Lift it out using the parchment overhang and cut into squares.
What is lemon white chocolate cheesecake?
Cheesecake has many traditions and styles, from baked versions with a firm, creamy filling to lighter chilled ones. This is a baked cheesecake, with cream cheese, eggs and sugar set over a biscuit crumb base.
White chocolate adds sweetness and richness, while lemon zest and juice bring a bright, fragrant contrast. The square tin makes it easy to cut into portions once the filling has fully chilled.
Nutrition and macros by portion
The nutrition label shows one serving as written: 3660 calories, 48g protein, 300g carbs, 280g fat.
| Portion | Adjustment | kcal | Protein | Carbs | Fat |
|---|---|---|---|---|---|
| Lighter | Smaller cheesecake square | 2562 kcal | 34g | 210g | 196g |
| This serving | As written | 3660 kcal | 48g | 300g | 280g |
| Hungry | Larger cheesecake square | 5490 kcal | 72g | 450g | 420g |
The wafer crumbs and sugar supply most of the carbohydrates, while the butter, cream cheese, cream and white chocolate contribute much of the fat. Cream cheese, eggs and a little from the other ingredients provide the protein. Balance a portion with fresh berries, and note that the supplied serving count of one treats the whole batch as one serving.
A crumb base that holds together
Crumb measure: grind the vanilla wafers finely before measuring so the butter can coat them evenly. The crumbs should look consistently fine, without large pieces.
Firm press: press the mixture into a level layer without packing it excessively hard. A flat-bottomed glass can help make the surface even.
Melt the white chocolate gently
Microwave method: use short 20-second bursts and stir between them, since white chocolate can scorch if heated for too long. Stop once it is melted and smooth.
Stovetop method: set the bowl over simmering water, making sure its base does not touch the water. Stir occasionally, then set the mixture aside while you prepare the cheese.
Mix for a smooth filling
Room-temperature cheese: softer cream cheese blends more readily with the sugar and is less likely to leave lumps. Scrape the bowl as you mix so no firm cheese remains stuck to the sides or base.
Gentle additions: mix in the eggs one at a time, then add the lemon and vanilla. Stir the chocolate mixture through until combined rather than beating the finished filling for longer than needed.
Use the wobble as a cue
At the end of baking, the edges should look more set than the middle, which should still wobble slightly. The filling continues to firm as it cools and chills, so baking until the centre is completely rigid can leave it overdone.
Timing: the bake takes about 45 minutes, followed by 1 hour at room temperature and at least 4 hours in the fridge. Overnight chilling gives the cheesecake plenty of time to set before cutting.
Serve chilled squares
Lift the cheesecake using the parchment overhang and cut it once fully cold for cleaner squares. A sharp knife, wiped between cuts, helps keep the edges tidy.
The lemon and white chocolate make this rich dessert quite complete on its own. For a contrast, serve a square with fresh berries or a spoonful of unsweetened fruit.
Recipe notes & tips
- Grind the wafers before measuring so the crumb quantity is consistent.
- Bring the cream cheese to room temperature for a smoother filling.
- Scrape down the mixer bowl to catch any cream cheese clinging to the sides.
- Stir the melted white chocolate until smooth before mixing it into the filling.
- Leave the cheesecake undisturbed while it cools and chills so it can set fully.
- Use the parchment overhang to lift the cold cheesecake from the tin.
Variations
- Berry topping: serve each square with fresh raspberries or sliced strawberries.
- Extra lemon: add a little more finely grated zest for a sharper citrus note.
- Biscuit swap: use finely ground plain biscuits in place of vanilla wafers.
- Chocolate finish: scatter the optional white chocolate chips over the top before baking.
- Gluten-free base: use gluten-free vanilla biscuits, checking that the other ingredients suit your needs.
Common mistakes to avoid
- Uneven crumbs: grind the wafers finely so the base presses into a consistent layer.
- Lumpy filling: let the cream cheese come to room temperature and scrape the bowl while mixing.
- Scorched chocolate: melt it in short intervals, stirring each time, or use a gentle water bath.
- Overbaking: take the cheesecake out while the centre still has a slight wobble.
- Cutting too soon: chill for at least 4 hours, or preferably overnight, before slicing.
- Crumbly crust: mix the crumbs and melted butter thoroughly, then press them into an even layer.
How to store
Keep the cheesecake covered in the refrigerator and eat within 3–4 days. Serve it chilled; avoid reheating, as warming can soften the filling and affect its set.
Frequently asked questions
Can I make this cheesecake the day before?
Yes. Chill it overnight after the 1-hour room-temperature rest; this also gives it time to set completely before slicing.
How do I know when it is baked?
The centre should still wobble slightly when you remove it from the oven. It will firm as it cools and chills.
Can I melt the chocolate on the hob?
Yes. Place the bowl over a pan of simmering water, making sure the bowl does not touch the water, and stir occasionally until melted.
Why does the cream cheese need to be at room temperature?
It blends more smoothly with the sugar and is less likely to form lumps in the filling.
Can I freeze the cheesecake?
Yes. Wrap portions well and freeze them; thaw in the refrigerator before serving. The texture may be a little softer after thawing.
When should I add the optional white chocolate chips?
Sprinkle them over the filled cheesecake just before baking, as directed in the method.
Cook it from the original
This recipe comes from prettysimplesweet.com. Their page has the author’s own photos, notes and tips — the best place to cook it from.
Open the recipe on prettysimplesweet.com