
No-Bake Cheesecake
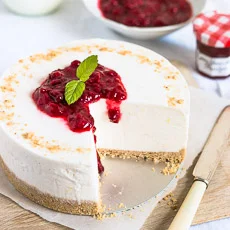
This is my favorite recipe for no-bake cheesecake. It’s simple and quick to make and holds its shape well.
Ingredients
- 2 cups (200g) graham cracker or digestive biscuit crumbs (to make crumbs, pulse in a food processor or blender until finely ground)
- 1/4 cup (50g) granulated sugar
- 7 tablespoons (100g) unsalted butter (, melted)
- 24 ounces (680g) cream cheese, softened to room temperature
- 1 1/2 cups (180g) powdered sugar
- 2 teaspoons pure vanilla extract
- zest from one small lemon, optional
- 2 tablespoons lemon juice
- 1 1/2 cups (360 ml) heavy cream
- berry sauce or topping of choice
Instructions
- 1
Make the crust: In a medium bowl, mix together crumbs and sugar, then add melted butter and mix until fully combined and crumbs are moistened. Press the mixture very tightly into the bottom of a 9-inch springform pan using either your fingers or the bottom of a cup to form a crust layer.
- 2
Make the filling: In a bowl of a stand mixer fitted with the paddle attachment (or with a handheld electric mixer), beat the cream cheese on medium speed until smooth and creamy, about 2 minutes. Add powdered sugar and beat until combined. Add vanilla and lemon zest and juice and beat until combined and smooth. Set aside.
- 3
In another bowl of a stand mixer fitted with the whisk attachment (or with a handheld electric mixer), whisk heavy cream until stiff peaks form. Using a spatula, gently fold half of the whipped cream into the cream cheese mixture, then fold in the other half.
- 4
Pour filling into the pan and smooth the top. Cover pan with plastic wrap and place in the fridge for at least 4 hours, or until completely set, before serving. Serve cold. Top with berry sauce, fresh fruit or any other topping you like (read above post for suggestions).
- 5
Cheesecake can be kept in the fridge for up to 5 days. It can also be frozen, wrapped tight, for 2 month. To thaw, place overnight in the fridge.
Cook it from the original
This recipe comes from prettysimplesweet.com. Their page has the author’s own photos, notes and tips — the best place to cook it from.
Open the recipe on prettysimplesweet.com