
Instant Pot Pork Shoulder
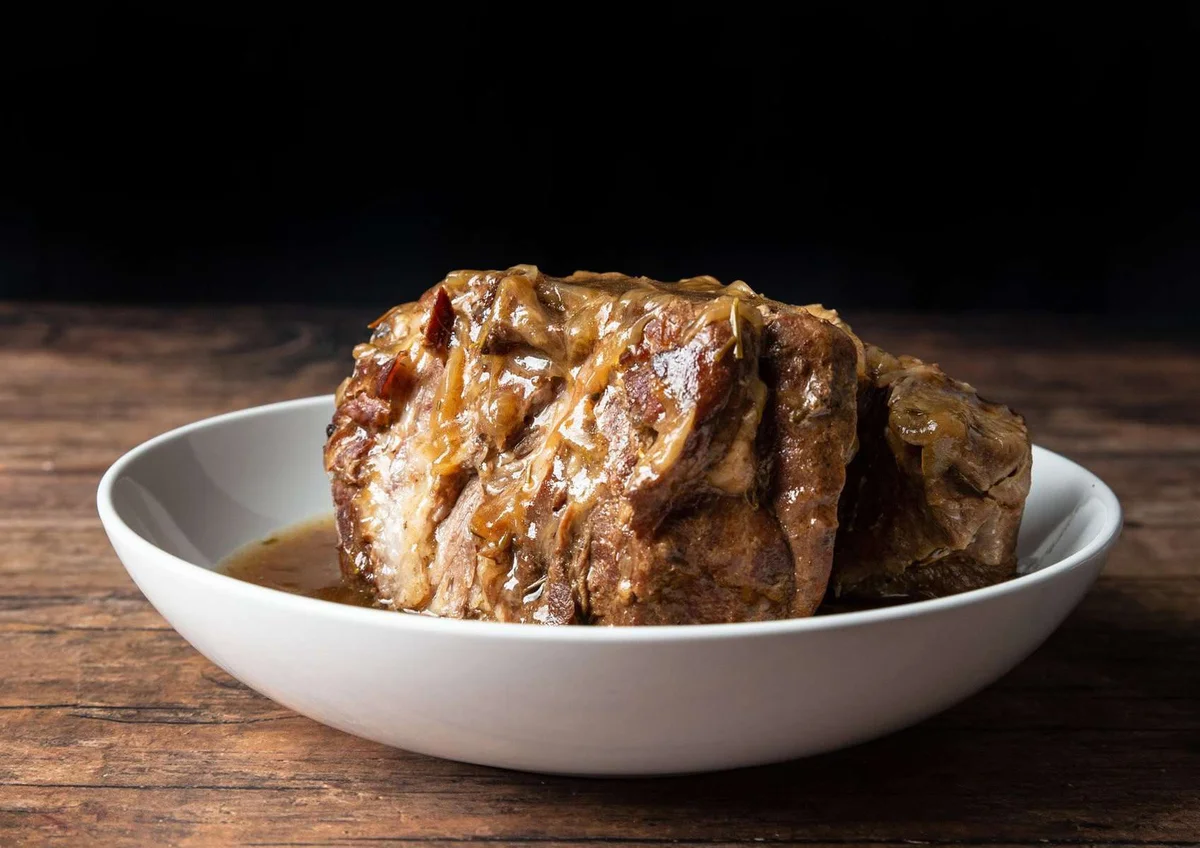
This Instant Pot pork shoulder is browned, pressure-cooked with onions, garlic and rosemary, then served with a thickened buttery sauce. It makes a hearty family meal without needing to tend a pot on the hob for hours.
Ingredients
- 1457 g (3–3.25 lb)pork shoulder, 4 inches thick
- 250 ml (1 cup)unsalted chicken stock
- 2.8 g (½ teaspoon)table salt
- 15 ml (1 tablespoon)regular soy sauce
- 28 g (2 tablespoons)unsalted butter or olive oil
- 550 g (2)onions, sliced
- 41 g (12)garlic cloves, crushed
- 2.2 g (2 teaspoons)dried rosemary
- 2 (0.3 g)bay leaves
- 30 g (2 tablespoons)cornflour
- 45 ml (3 tablespoons)cold water
Instructions
- 1
Brown the pork
Set the Instant Pot to Sauté More and wait until it reads HOT. Pat the pork shoulder dry and lightly season one side with coarse salt and black pepper. Add 28 g (2 tablespoons) butter or olive oil to the inner pot and coat the base. Place the seasoned side of the pork in the pot, then season the other side with salt and black pepper. Brown for 5 minutes, turn and brown the other side for another 5 minutes. Remove the pork and set it aside.
- 2
Cook onion mixture
Sauté the sliced onions in the Instant Pot for 3½ minutes. Add the crushed garlic and sauté for 1 minute, then add the dried rosemary and bay leaves and sauté for 30 seconds.
- 3
Deglaze the pot
Pour in 250 ml (1 cup) chicken stock. Use a wooden spoon to scrape the browned bits from the bottom of the pot, then give the mixture a quick stir.
- 4
Pressure-cook pork
Add the soy sauce and 2.8 g (½ teaspoon) table salt, and stir briefly. Return the pork and any juices to the cooking liquid. With the venting knob set to Venting, close the lid, then turn the knob to Sealing. Cook at High Pressure for 60 minutes, followed by a 15-minute natural release. Release any remaining pressure by turning the knob to Venting, then carefully remove the lid.
- 5
Thicken the sauce
Transfer the pork to a chopping board. Set the sauce to simmer using Sauté More. Mix the cornflour with the cold water, then stir the mixture into the onion sauce in three additions until it reaches your preferred thickness. Taste and adjust the seasoning, adding roughly 1–2 large pinches of salt if needed.
- 6
Slice and serve
Slice the pork thinly. Spoon the garlic butter onion sauce over it and serve immediately.
What is Instant Pot pork shoulder?
Pork shoulder is a well-marbled cut often used in American-style braises and barbecue. Here, pressure cooking gives it a quicker route to tenderness, while the cooking liquid becomes a savoury onion and garlic sauce.
The method borrows the flavours of a slow braise but uses the Instant Pot to cook the pork under pressure. Browning first and scraping the pot after sautéing build flavour into the sauce.
Nutrition and macros by portion
The nutrition label shows one serving as written: 311 calories, 30g protein, 14g carbs, 15g fat.
| Portion | Adjustment | kcal | Protein | Carbs | Fat |
|---|---|---|---|---|---|
| Lighter | Use less butter | 218 kcal | 21g | 10g | 11g |
| This serving | As written | 311 kcal | 30g | 14g | 15g |
| Hungry | Add potatoes or rice | 467 kcal | 45g | 21g | 23g |
The pork supplies most of the protein, while the onions contribute carbohydrates. Butter or olive oil carries much of the fat, with the stock and sauce adding flavour and some sodium. Balance the plate with a generous serving of green vegetables alongside the pork and a moderate portion of potatoes, rice or bread.
Choosing the pork and aromatics
Pork shoulder: the recipe specifies a thick, 4-inch piece. Pat it dry before browning so its surface has a chance to colour in the hot pot.
Onion and garlic: sliced onions soften into the sauce, while the crushed garlic seasons both the cooking liquid and the finished dish. Rosemary and bay add an aromatic, savoury note.
Why browning matters
Even browning: wait for the pot to read HOT, then leave each side in place for the full 5 minutes. Moving the pork too soon can prevent a good sear.
Deglazing: scrape the browned bits from the pot after adding the stock. This clears the base before pressure cooking and brings those savoury bits into the sauce.
Pressure cooking and release
Sealed cooking: check that the venting knob is set to Sealing before starting the 60-minute High Pressure cook. The 15-minute natural release is part of the method; release only the remaining pressure afterwards.
Careful opening: turn the knob to Venting to release the last pressure, and take care when removing the lid. Keep your hands and face clear of the steam.
Getting the sauce right
Cornflour slurry: mix the cornflour and cold water smoothly before adding it. Stir it into the simmering sauce a third at a time so you can stop once the texture suits you.
Seasoning: taste after thickening, then add salt gradually if needed. The soy sauce and stock already contribute savouriness, so the final adjustment is best made to taste.
Slicing and serving
Thin slices: transfer the cooked pork to a chopping board and slice it thinly before serving. Spoon plenty of onion sauce over the meat so each portion gets some of the aromatics.
On the plate: serve with potatoes, rice or bread to catch the sauce, and add a green vegetable such as broccoli or green beans for contrast.
Recipe notes & tips
- Pat the pork dry before seasoning and browning.
- Wait for the Instant Pot to read HOT before adding the pork.
- Scrape the whole base of the pot when deglazing to lift the browned bits.
- Mix the cornflour with cold water until smooth before adding it to the sauce.
- Add the thickening slurry gradually and stop when the sauce reaches your preferred consistency.
- Slice the pork just before serving and spoon the sauce over it while hot.
Variations
- Add black pepper: season the pork with freshly ground pepper as directed in the method.
- Use olive oil: swap it for the butter when browning the pork.
- Serve with mash: spoon the onion sauce over mashed potatoes.
- Add greens: serve with steamed broccoli or green beans for a fresh side.
- Make extra sauce: serve the pork with additional stock-based sauce, thickened to taste.
Common mistakes to avoid
- Crowding the sear: brown the two sides for the full 5 minutes each without turning early.
- Skipping the deglaze: scrape the base thoroughly with a wooden spoon after adding the stock.
- Wrong vent setting: turn the knob to Sealing before pressure cooking.
- Quick-releasing too soon: allow the full 15-minute natural release before venting the remaining pressure.
- Lumpy thickener: blend the cornflour and cold water smoothly before stirring it in.
- Adding all the slurry at once: incorporate it in thirds and stop when the sauce is thick enough.
How to store
Refrigerate leftover pork and sauce in an airtight container for up to 3 days. Reheat gently in a covered pan or microwave until hot throughout, adding a splash of stock or water if the sauce has thickened too much.
Frequently asked questions
Can I use olive oil instead of butter?
Yes. The method allows either 28 g (2 tablespoons) of unsalted butter or olive oil for browning.
How long does the pork cook under pressure?
Cook it at High Pressure for 60 minutes, then allow a 15-minute natural release before venting the remaining pressure.
How do I stop the sauce from becoming too thick?
Stir the cornflour slurry into the simmering sauce a third at a time, stopping when the sauce reaches the consistency you want.
Can I make the pork ahead?
Yes. Refrigerate the cooked pork and sauce in an airtight container, then reheat gently until hot throughout. Add a little stock or water if needed to loosen the sauce.
What should I serve with it?
Potatoes, rice or bread work well with the onion sauce. A green vegetable, such as broccoli or green beans, makes a good accompaniment.
Cook it from the original
This recipe comes from pressurecookrecipes.com. Their page has the author’s own photos, notes and tips — the best place to cook it from.
Open the recipe on pressurecookrecipes.com