
Instant Pot Risotto
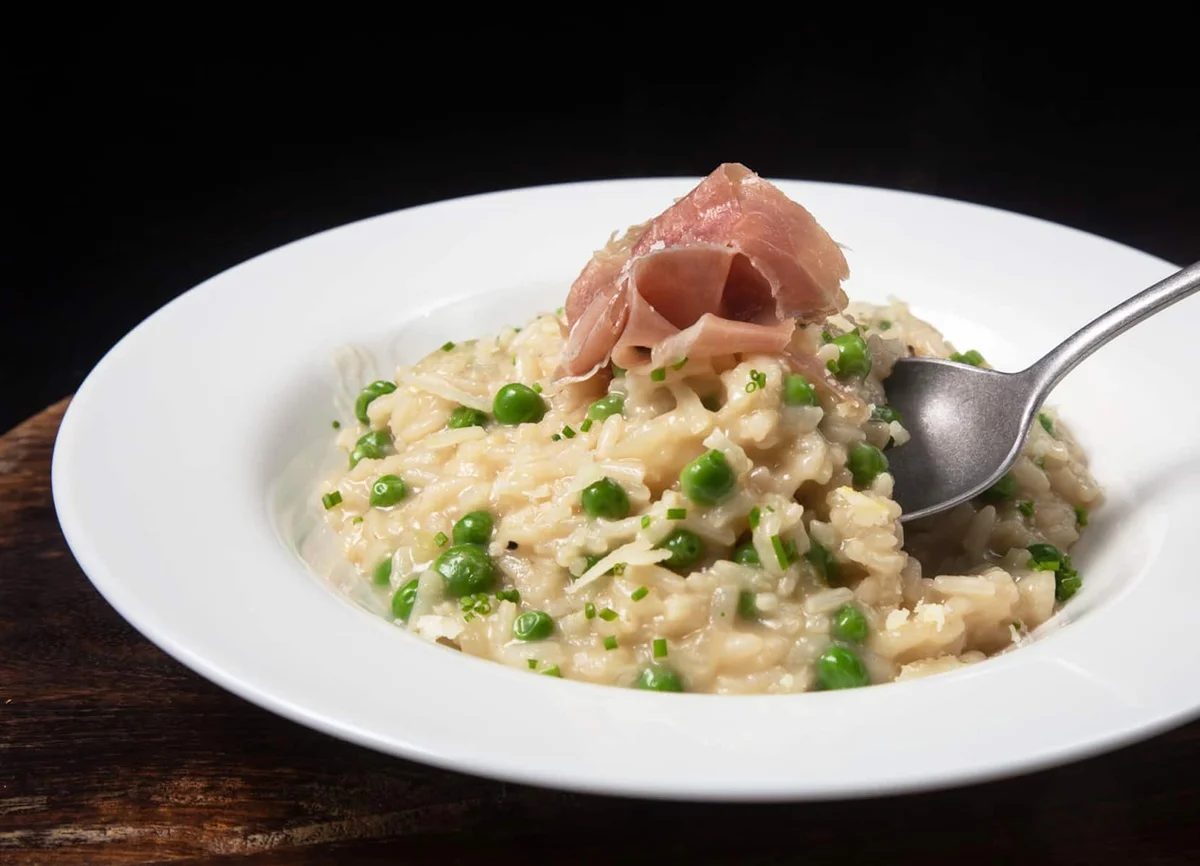
This Italian-style risotto uses the Instant Pot to cook Arborio rice under pressure, then gets its creamy finish from peas and freshly grated Parmesan. It is a practical choice when you want a rich, comforting meal without stirring a pan throughout the cooking.
Ingredients
- 400 gArborio rice
- 42 gunsalted butter (or 28 g unsalted butter and 15 ml olive oil)
- 1 (200 g)onion, diced
- 1 small (20 g), optionalshallot, diced
- 4 cloves (14 g)garlic, minced
- 125 mldry white wine, such as Pinot Grigio
- 1 litreunsalted chicken stock
- 30 mlregular soy sauce
- 85–170 ggreen peas
- 42 gParmesan, freshly grated
- to tasteshaved Parmesan
- to tastechives, finely chopped
- to tasteprosciutto, cut or torn into small pieces
- 2 pinchessalt
- to tasteblack pepper
Instructions
- 1
Sauté aromatics
Set the Instant Pot to “Sauté More” and wait for it to show “HOT”. Add 14 g butter or olive oil and coat the base of the pot. Cook the onion and shallot for 2 minutes, then add the garlic and sauté for another 30 seconds, until fragrant.
- 2
Toast the rice
Push the aromatics to one side of the pot. Add the remaining 28 g butter to the clear side, then add the 400 g rice and stir to coat it. Mix the rice with the aromatics and toast for 2–3 minutes, until the edges look translucent but the centres remain white; do not brown it.
- 3
Deglaze the pot
Pour in 125 ml white wine and scrape the bottom of the pot to loosen any browned bits. Let the wine simmer for about 1 minute so the alcohol can evaporate.
- 4
Pressure cook
Add 30 ml soy sauce and 1 litre chicken stock. Stir briefly and check that no rice is stuck to the sides. Close the lid with the venting knob set to Venting, then turn it to Sealing. Cook at High Pressure for 5 minutes, then Quick Release the pressure and carefully open the lid. If desired, warm the serving plates in an oven or toaster oven set to 95°C.
- 5
Finish the risotto
The risotto may look soupy at first. Stir in 85–170 g peas until the mixture becomes creamy and smooth. If it is too loose, stir and cook for a few more minutes using the Sauté function. Add 42 g freshly grated Parmesan and mix until melted, then season to taste with salt and black pepper; the recipe uses 2 pinches of salt.
- 6
Serve immediately
Spoon the risotto onto a warmed plate and garnish with prosciutto, shaved Parmesan and finely chopped chives. Serve straight away.
What is risotto?
Risotto is an Italian rice dish traditionally cooked gradually with stock until the grains release starch and the mixture turns creamy. This version uses the Instant Pot to cook the rice under pressure, then finishes it with peas and Parmesan.
Arborio rice is a short-grain variety suited to risotto because it softens while keeping some shape. Butter, wine and cheese bring richness, while the peas add a sweet, fresh contrast.
Nutrition and macros by portion
The nutrition label shows one serving as written: 408 calories, 13g protein, 65g carbs, 9g fat.
| Portion | Adjustment | kcal | Protein | Carbs | Fat |
|---|---|---|---|---|---|
| Lighter | Use less butter | 286 kcal | 9g | 46g | 6g |
| This serving | As written | 408 kcal | 13g | 65g | 9g |
| Hungry | Serve a larger portion | 612 kcal | 20g | 98g | 14g |
Most of the carbohydrates come from the Arborio rice, while butter and Parmesan contribute much of the fat. The rice, chicken stock and Parmesan contribute protein, with the prosciutto adding more if used. Pair a serving with a generous salad or vegetables to add freshness to the plate.
Choosing the rice and stock
Arborio rice: use the specified rice for its starchy, creamy finish. Rinsing it would remove surface starch that helps give the dish its characteristic texture.
Stock: unsalted chicken stock leaves room to season at the end. The soy sauce adds savoury depth, so taste before adding more salt.
Build flavour before pressure cooking
Aromatics: sauté the onion and shallot until softened, then add the garlic briefly so it becomes fragrant without burning. Scrape the base thoroughly when you add the wine to release browned flavour and help avoid stuck-on residue.
Toasting: coat the grains in butter and give them 2–3 minutes in the pot. Their edges should turn translucent while their centres stay white; browning is not the goal.
How to judge the texture
Straight after pressure cooking, the risotto can look looser than expected. Stirring in the peas and grated Parmesan helps bring it together into a creamy consistency.
If it still seems too runny, use the Sauté function for a few more minutes, stirring as it cooks. Stop when the rice is creamy and the mixture holds together but is not dry.
Finish with care
Stir in freshly grated Parmesan at the end so it melts into the hot rice. Season only after adding the cheese and soy sauce, since both contribute savoury flavour.
The recipe’s optional warm plates help the risotto stay hot at the table. Add the prosciutto, extra Parmesan and chives just before serving.
What to serve alongside
Serve the risotto as a main course with a crisp green salad or simply dressed vegetables for freshness. The peas and prosciutto provide contrasting flavours and textures within the dish.
For a larger meal, pair it with roasted vegetables or a simple side of greens. Keep accompaniments lightly seasoned so they do not compete with the Parmesan and soy sauce.
Recipe notes & tips
- Wait for the Instant Pot to show “HOT” before adding the butter and aromatics.
- Keep the rice moving during toasting so it coats evenly without browning.
- Scrape the base well after adding the wine to lift any stuck browned bits.
- Use Quick Release after the 5-minute pressure cook, and open the lid carefully.
- Add the Parmesan only after stirring in the peas, then adjust the texture with the Sauté function if needed.
- Serve immediately, as the risotto thickens as it stands.
Variations
- Skip the shallot: leave it out if you do not have one; the onion and garlic still provide the aromatic base.
- Use olive oil: replace the first 14 g butter with olive oil as suggested in the recipe.
- Adjust the peas: use anywhere from 85 g to 170 g to suit your preference.
- Finish with herbs: add the finely chopped chives just before serving for a fresh, savoury garnish.
- Add prosciutto: scatter small pieces over the finished risotto for a salty garnish.
Common mistakes to avoid
- Browning the rice: toast it until the edges look translucent while the centres remain white.
- Leaving rice on the base: check and stir the rice away from the sides before sealing the pot.
- Skipping the deglaze: scrape the bottom after adding wine to loosen the browned bits.
- Expecting a thick mixture immediately: stir in the peas and Parmesan first, then cook briefly on Sauté if needed.
- Over-seasoning early: taste after the soy sauce and Parmesan are mixed in, then add salt and pepper.
- Letting it stand too long: serve as soon as it reaches the desired consistency, since it thickens while waiting.
How to store
Refrigerate leftovers in an airtight container for up to 3 days. Reheat gently in a saucepan or microwave with a splash of stock or water, stirring until hot; the texture may be thicker than when freshly made.
Frequently asked questions
Can I make this without the shallot?
Yes. The shallot is optional, so omit it and continue with the onion and garlic.
Why does the risotto look soupy when I open the pot?
It may look loose straight after pressure cooking. Stir in the peas and Parmesan, then cook for a few more minutes on Sauté if it still needs thickening.
Can I use frozen peas?
Yes. Stir them in at the same stage as the peas in the recipe and mix until the risotto is creamy.
Can I leave out the wine?
The recipe uses dry white wine to deglaze the pot and add flavour. If you omit it, use a little stock to loosen the browned bits from the base.
Can I use vegetable stock instead?
The stated recipe calls for unsalted chicken stock. Vegetable stock can be used as a substitute, though it will change the flavour.
How do I stop the risotto becoming too thick?
Serve it as soon as it reaches a creamy consistency. If it thickens while waiting or after chilling, stir in a splash of stock or water when reheating.
Cook it from the original
This recipe comes from pressurecookrecipes.com. Their page has the author’s own photos, notes and tips — the best place to cook it from.
Open the recipe on pressurecookrecipes.com