
Picadillo Chile Relleno
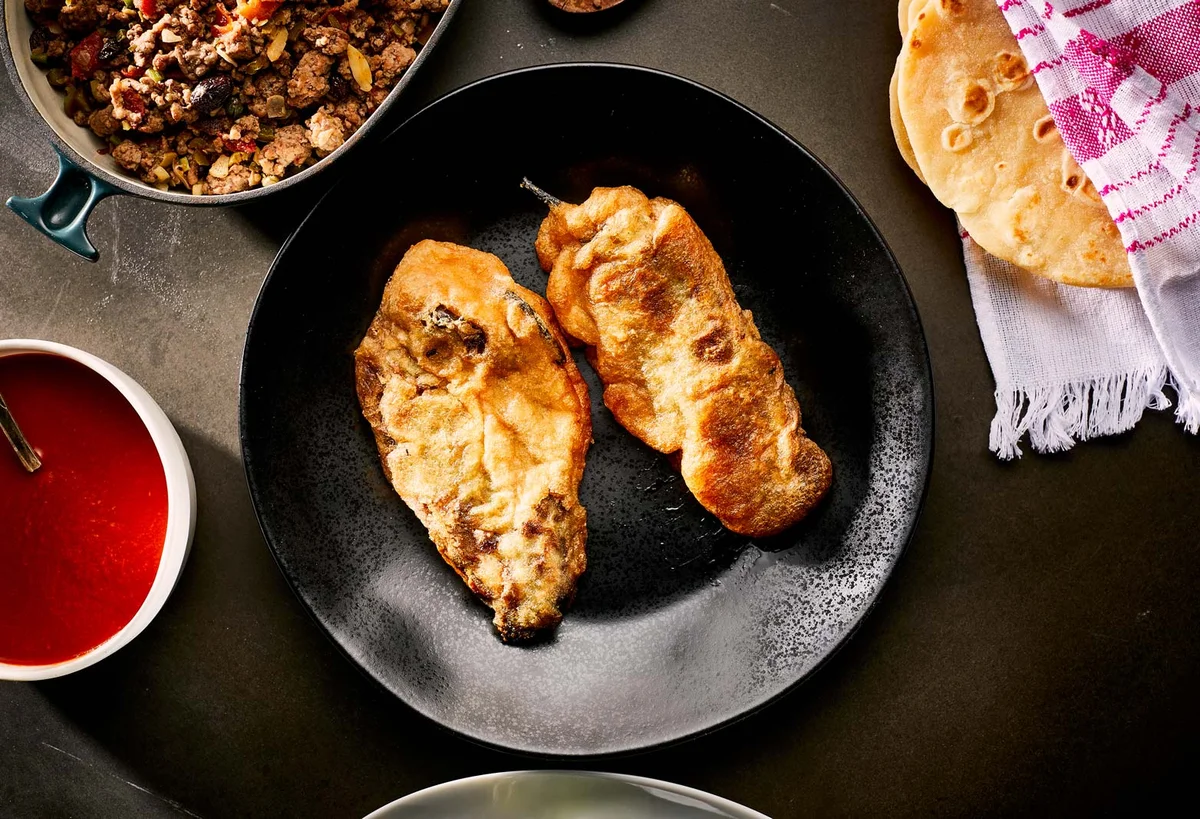
Roasted Anaheim chiles are filled with pork picadillo, coated in airy egg batter and fried until golden. Serve them in flour tortillas with cabbage, salsa, crema and cheese for a hearty Mexican-style meal.
Ingredients
- 8 to 10 (about 1.36 kg)fresh Anaheim chiles
- 3 to 4 cupspork picadillo
- ½ cup (about 60 g)plain flour
- 4, separatedeggs
- for fryingvegetable oil
- to servethick flour tortillas or shop-bought flour tortillas
- to serveshredded cabbage
- to serveColorado chile salsa
- to serveMexican crema
- to servecrumbled Cotija or queso fresco
Instructions
- 1
Roast the chiles
Char the Anaheim chiles under a grill, on a barbecue or over an open flame, turning every 2 to 3 minutes for 6 to 9 minutes in total. The skins should be blistered and the flesh cooked, but not burnt.
- 2
Peel and deseed
While the chiles are hot, put them in a sealed plastic bag and leave them to steam for at least 10 minutes. Remove the skins under a thin stream of cold water or in a bowl of water. Cut a slit down one side of each chile and remove the seed cluster and veins.
- 3
Fill the chiles
Put about ⅓ cup picadillo in each chile, or use as much as will fit while still allowing it to close. Secure the opening with a toothpick if needed.
- 4
Coat with flour
Spread the ½ cup flour on a plate and roll each stuffed chile in it. Leave them to sit so the flour can help the egg batter cling.
- 5
Whip the batter
Beat the egg whites in a mixer until they hold stiff peaks. With the mixer on low, gently fold in the yolks, mixing only for a few seconds, until incorporated.
- 6
Heat the oil
Pour oil into a large casserole to a depth of about 1.3 cm and heat over medium to medium-high. Test it with a small piece of tortilla or bread: the oil is ready when lively bubbles form all around it.
- 7
Batter and fry
Dip each floured chile in the egg batter, coating it completely. Gently lower it into the hot oil with the slit facing upwards, and spoon a little hot oil over the opening to help seal it. Fry in batches without crowding, for about 2 minutes per side, until golden brown; turn gently with a slotted spoon.
- 8
Drain and serve
Transfer the cooked chiles to a paper-lined rack or platter. If serving later, warm them in a baking dish at 150°C for 10 minutes. To make tacos, put the chiles in flour tortillas and add shredded cabbage, Colorado chile salsa, Mexican crema and crumbled Cotija or queso fresco.
What is a chile relleno?
Chile relleno means stuffed chile: a whole pepper is filled, coated in batter and fried. The dish is associated with Mexican cooking, with regional versions using different chiles, fillings and sauces.
This version uses roasted Anaheim chiles and pork picadillo, then serves them taco-style with cabbage, salsa, crema and cheese. The mild pepper and savoury filling are balanced by crisp toppings and a rich, airy coating.
Nutrition and macros by portion
The nutrition label shows one serving as written: 520 calories, 25g protein, 43g carbs, 27g fat.
| Portion | Adjustment | kcal | Protein | Carbs | Fat |
|---|---|---|---|---|---|
| Lighter | Use less crema and cheese | 364 kcal | 18g | 30g | 19g |
| This serving | As written | 520 kcal | 25g | 43g | 27g |
| Hungry | Add another tortilla | 780 kcal | 38g | 65g | 41g |
The picadillo and eggs provide much of the protein, while the flour tortillas and coating contribute carbohydrates. Pork, frying oil, crema and cheese account for much of the fat; the exact amounts depend on the picadillo, tortillas and oil absorbed during frying. Serve with extra cabbage or a simple salad to add freshness and balance the plate.
Choosing and roasting the chiles
Anaheim chiles: Choose peppers that are large enough to hold the filling and have intact skins. Similar-sized chiles are easier to roast and fry evenly.
Roasting: Turn them regularly so the skin blisters all over while the flesh softens. Steaming them in a sealed bag loosens the skin, making it easier to peel without tearing the pepper.
Preparing the filling
Picadillo: The recipe calls for prepared pork picadillo, so have it ready before stuffing the chiles. Use about ⅓ cup per pepper, adjusting to fit while leaving enough room to close the slit.
Flour coating: A light dusting gives the egg batter something to grip. Let the floured chiles rest briefly before dipping them.
Getting the batter right
Egg whites: Beat them until they hold stiff peaks for a light coating that can surround the chile. A clean mixing bowl helps the whites whip properly.
Yolks: Fold them in gently on low speed and stop as soon as they are incorporated. Overmixing can deflate the whites and make the batter less airy.
Frying and checking doneness
Oil temperature: Test the oil with a small piece of tortilla or bread; steady, active bubbles around it indicate that it is ready. If the oil is too cool, the coating can absorb more oil instead of setting promptly.
Turning: Keep the slit facing upwards as you lower each chile into the pan, then spoon hot oil over the opening to help seal it. Fry for about 2 minutes per side, until the coating is golden brown.
Serving as tacos
Tortillas: Place each chile in a thick flour tortilla or a shop-bought one. Add the toppings just before serving so the cabbage stays crisp.
Toppings: The salsa brings chile flavour, while crema and crumbled cheese add creamy, savoury notes. Add cabbage generously for a fresh contrast to the fried coating.
Recipe notes & tips
- Roast the chiles until blistered all over, but take them off the heat before the flesh burns.
- Peel the chiles gently under water to help remove the skin without splitting the flesh.
- Leave enough space around the picadillo filling for the chile to close.
- Dip the chiles just before frying so the batter stays fluffy.
- Fry in batches rather than crowding the casserole.
- Use a slotted spoon to turn the battered chiles gently.
Variations
- Change the filling: Use another prepared picadillo if you have one.
- Choose the cheese: Use Cotija for a saltier finish or queso fresco for a milder one.
- Adjust the salsa: Serve the Colorado chile salsa on the side so everyone can add as much as they like.
- Make smaller tacos: Use smaller flour tortillas and divide the toppings between them.
- Add more crunch: Increase the shredded cabbage when assembling the tacos.
Common mistakes to avoid
- Burnt chiles: Turn them every 2 to 3 minutes and remove them once blistered and cooked.
- Torn peppers: Peel carefully after steaming and make just one slit down each side.
- Overfilled chiles: Use about ⅓ cup picadillo, or less if needed to close the opening.
- Deflated batter: Fold in the yolks gently and stop as soon as they are incorporated.
- Cool frying oil: Test with a small piece of tortilla or bread before adding the chiles.
- Crowded pan: Fry in batches so the chiles have room to turn and brown.
How to store
Refrigerate leftover chiles in an airtight container for up to 3 days. Reheat them in a baking dish at 150°C for 10 minutes, as directed; add the tortillas and fresh toppings when serving.
Frequently asked questions
Can I roast the chiles on a barbecue?
Yes. The recipe allows a grill, barbecue or open flame; turn the chiles every 2 to 3 minutes and cook for 6 to 9 minutes in total.
Do I need to remove the chile skins?
Yes, peel away the charred skin after steaming the roasted chiles for at least 10 minutes in a sealed bag. This also helps keep the batter from sitting on loose skin.
How much picadillo goes in each chile?
Use about ⅓ cup per chile, or as much as fits while still allowing the chile to close.
How can I tell when the oil is ready?
Dip in a small piece of tortilla or bread. The oil is ready when active bubbles form all around it.
Can I make the chiles ahead?
The recipe gives instructions for warming cooked chiles later: place them in a baking dish at 150°C for 10 minutes. Add the tortillas and toppings when ready to serve.
What should I serve with chile relleno?
Serve it in a flour tortilla with shredded cabbage, Colorado chile salsa, Mexican crema and crumbled Cotija or queso fresco, as suggested here.
Cook it from the original
This recipe comes from patijinich.com. Their page has the author’s own photos, notes and tips — the best place to cook it from.
Open the recipe on patijinich.com