
Instant Pot Roast Beef
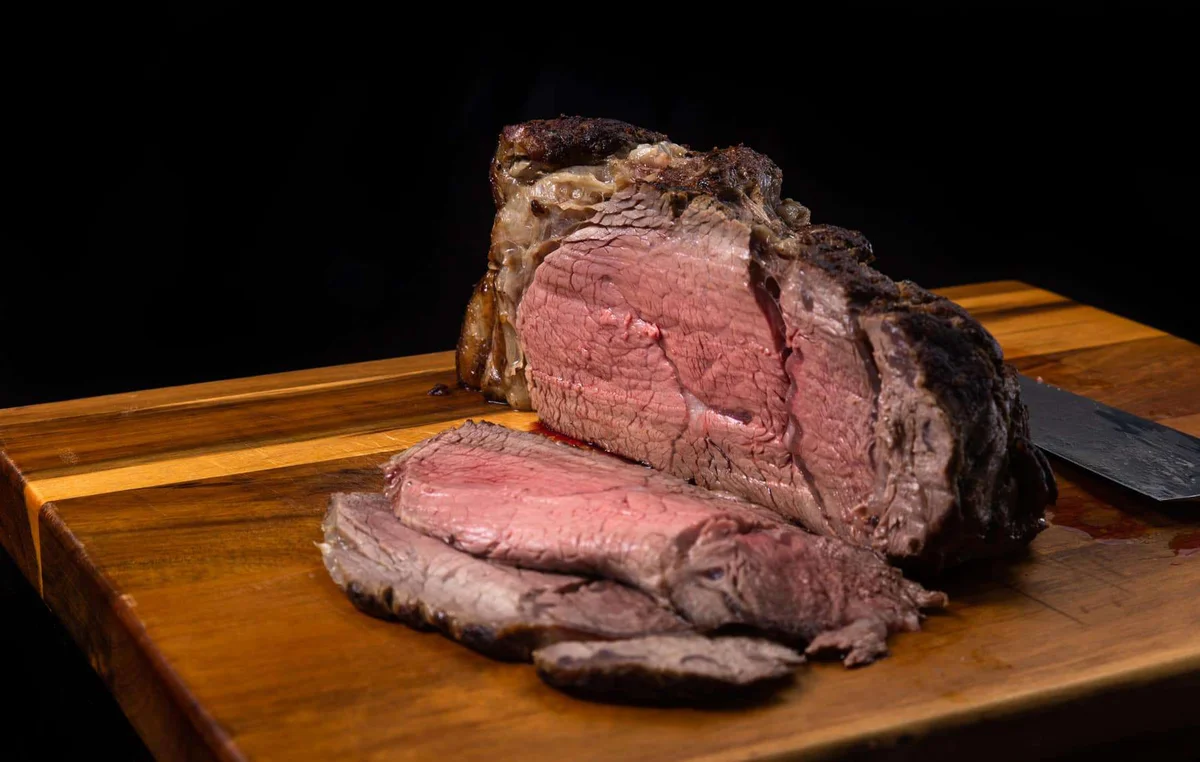
This Instant Pot roast beef is browned, gently pressure-cooked and served with a savoury gravy. A meat thermometer helps you aim for a rosy medium-rare centre, while thin slices also work well for sandwiches.
Ingredients
- 1.13–1.36 kg (2.5–3 lb), about 6.4 cm (2.5 in) thickbeef eye of round or top sirloin
- 6 cloves (26 g), mincedgarlic
- 1 (262 g), slicedonion
- 250 ml (1 cup)unsalted chicken stock or good-quality unsalted beef stock
- 15–30 ml (1–2 tbsp)regular soy sauce
- 30 ml (2 tbsp), dividedolive oil
- 2 (0.5 g)bay leaves
- ¼ tsp (0.3 g)dried rosemary
- To tastekosher salt
- To tasteblack pepper
- 12 g (1½ tbsp)plain flour
- 45 ml (3 tbsp)water
Instructions
- 1
Brown the beef
Set the Instant Pot to Sauté More and wait until it reads HOT, about 8 minutes. Add 15 ml (1 tbsp) olive oil and coat the bottom. Pat the beef dry. Season one side generously with salt and black pepper, place it seasoned-side down, and brown for 4 minutes. Season the other side, turn the beef and brown it for 3 minutes 30 seconds. Brown the two remaining sides for 2 minutes 30 seconds each, without adding more seasoning. Set the beef aside.
- 2
Cook the aromatics
Add the remaining 15 ml (1 tbsp) olive oil to the pot. Add the sliced onion and sauté for 3 minutes. Stir in the bay leaves, rosemary and minced garlic, then sauté for 30 seconds, until fragrant.
- 3
Deglaze the pot
Pour in 250 ml (1 cup) stock. Scrape the browned bits from the bottom of the pot with a wooden spoon, then briefly mix.
- 4
Pressure-cook the beef
Stir in 15 ml (1 tbsp) soy sauce. Put the steamer rack in the pot and set the browned beef on it. Close the lid and set the vent to Sealing. For beef about 6.4 cm (2.5 in) thick, cook at High Pressure for 3 minutes, then allow a 25-minute natural release; for beef about 8.3 cm (3.25 in) thick, cook at High Pressure for 3 minutes, then allow a 30-minute natural release. Keep the pot on Keep Warm during the natural release. Open the lid and check the temperature at the thickest part with a meat thermometer. For medium-rare, aim for 49°C (120°F). If it is below that, return the beef to the rack, close the lid and use Keep Warm to continue cooking, checking every 5–10 minutes. The temperature may rise about 4–6°C (7–10°F) per 5 minutes.
- 5
Make the gravy
When the beef reaches 49°C (120°F), transfer it to a chopping board and loosely cover it with foil. Rest for 8–10 minutes. Meanwhile, bring the liquid in the pot to a simmer using Sauté. Taste and decide whether to add up to another 15 ml (1 tbsp) soy sauce. Mix the flour with 45 ml (3 tbsp) water, then stir the mixture into the gravy a third at a time until it reaches your preferred thickness. Taste and adjust with salt and black pepper if needed.
- 6
Slice and serve
After resting, slice the beef against the grain. Cut eye of round as thinly as possible for deli-style slices; cut top sirloin into steak-sized slices. Serve with the gravy and your chosen side dishes.
What is Instant Pot roast beef?
Roast beef is a familiar American centrepiece, often served hot with gravy or sliced cold for sandwiches. This pressure-cooker version uses a small joint and a brief high-pressure cook followed by a natural release.
The beef is browned first for a savoury base, then cooked above the stock rather than submerged in it. Checking the centre temperature gives you a better guide to doneness than relying on time alone.
Nutrition and macros by portion
The nutrition label shows one serving as written: 362 calories, 52g protein, 6g carbs, 13g fat.
| Portion | Adjustment | kcal | Protein | Carbs | Fat |
|---|---|---|---|---|---|
| Lighter | Lean beef, extra vegetables | 253 kcal | 36g | 4g | 9g |
| This serving | As written | 362 kcal | 52g | 6g | 13g |
| Hungry | Larger beef portion | 543 kcal | 78g | 9g | 20g |
The beef provides most of the protein, while the stock, onion and flour contribute some carbohydrate; olive oil and the beef account for much of the fat. Pair a serving with vegetables and a suitable side such as potatoes to make a more complete plate.
Choosing the beef
Eye of round: This lean, compact cut suits very thin slicing, especially for deli-style portions. Cutting across the grain helps make each slice easier to chew.
Top sirloin: This cut can be served in thicker, steak-sized slices. Choose a small joint that fits comfortably in the cooker with the lid closed.
Build flavour before pressure cooking
Browning: Pat the joint dry and let the pot become properly hot before adding the beef. Work through the specified sides and times, then lift the meat out before cooking the aromatics.
Deglazing: Scrape the browned residue from the pot after adding stock. Clearing the base helps incorporate those savoury bits into the cooking liquid and gravy.
Use temperature as your cue
Thermometer: Check the thickest part of the joint after the natural release. The recipe targets 49°C (120°F) for medium-rare before resting.
Gradual finish: If the centre is below target, use Keep Warm and check again every 5–10 minutes. A thicker joint can take longer to reach the desired temperature.
Rest, then slice across the grain
Resting: Loosely cover the beef with foil and leave it for 8–10 minutes while you finish the gravy. This also gives you time to bring the cooking liquid to a simmer.
Slicing: Look for the direction of the muscle fibres and cut across them. Keep eye of round slices particularly thin; top sirloin can be cut more thickly.
Finish and serve the gravy
Thickening: Mix the flour with water before adding it, so it is easier to blend into the simmering liquid. Stir it in gradually, stopping when the gravy is as thick as you like.
Serving: Taste before adding the optional extra soy sauce, then adjust with salt and pepper if needed. Serve the beef and gravy with potatoes, vegetables or another favourite side.
Recipe notes & tips
- Pat the beef dry before browning so its surface makes good contact with the hot pot.
- Brown the joint in the specified stages rather than trying to turn it constantly.
- Use a meat thermometer in the thickest part, away from the steamer rack.
- Keep the natural release time matched to the joint thickness given in the method.
- Add the flour-and-water mixture in stages so you can control the gravy's thickness.
- Slice against the grain, especially when serving eye of round.
Variations
- Cold cuts: Chill leftover slices and cut them thinly for sandwiches.
- More gravy: Use the upper amount of soy sauce only after tasting the simmering liquid.
- Herb change: Swap the dried rosemary for another dried herb that suits beef.
- Vegetable sides: Serve with steamed or roasted vegetables alongside the beef and gravy.
- Thicker slices: Cut top sirloin into steak-sized pieces rather than deli-style slices.
Common mistakes to avoid
- Wet beef: It can brown less effectively; pat the joint dry before seasoning.
- Scorched pot residue: The gravy can taste burnt; scrape up the browned bits while deglazing with stock.
- Guessing doneness: Timing alone may not give the intended centre; check with a meat thermometer.
- Skipping the rest: The beef is harder to slice neatly; leave it loosely covered for 8–10 minutes.
- Adding flour directly: It can form lumps; first mix it with the measured water.
- Slicing with the grain: The meat can seem tougher; cut across the visible fibres.
How to store
Refrigerate leftover beef and gravy in covered containers and use within 3–4 days. Reheat gently with some gravy to help keep the slices moist, or freeze for longer storage.
Frequently asked questions
Can I use a roast thicker than the one specified?
The method gives a separate natural-release time for a 3.25-inch (about 8.3 cm) joint. For other sizes, check the thickest part with a thermometer and continue on Keep Warm if it has not reached the target.
How do I know when the beef is medium-rare?
The method aims for 49°C (120°F) in the thickest part before resting. Check with a meat thermometer rather than judging by the outside colour.
Can I make the gravy without soy sauce?
The recipe uses soy sauce for seasoning, but you can leave it out if needed. Taste the gravy and adjust with salt and black pepper.
Why is the beef cooked on a rack?
The rack holds the roast above the stock and aromatics while it pressure-cooks. The liquid below then forms the base for the gravy.
How should I slice the roast?
Cut across the grain. Slice eye of round very thinly for deli-style portions, or cut top sirloin into thicker, steak-sized slices.
Can I make this recipe with a large roast?
This method is intended for a small roast. A larger joint may not cook to the same timing, so use a method and timings suited to its size.
Cook it from the original
This recipe comes from pressurecookrecipes.com. Their page has the author’s own photos, notes and tips — the best place to cook it from.
Open the recipe on pressurecookrecipes.com