
Easy No-Knead Artisan Bread
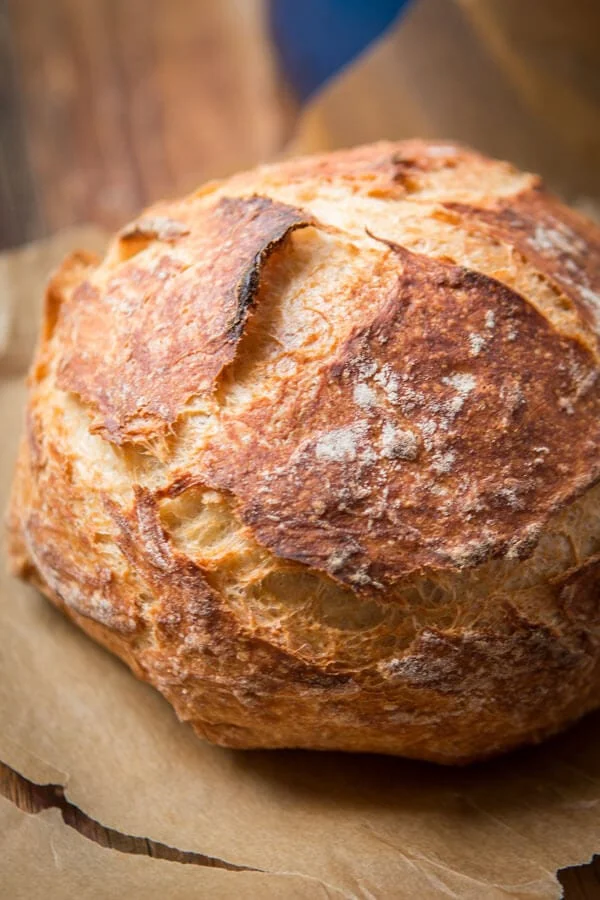
This American-style no-knead loaf uses a long overnight rise and a hot Dutch oven to develop a crisp crust and open, chewy crumb. It takes little hands-on work, making it a straightforward choice when you can plan a day ahead.
Ingredients
- 375 g (3 cups)plain flour
- 7.5 g (1½ teaspoons)salt
- 2 g (½ teaspoon)sugar
- 3 g (1 teaspoon)instant yeast
- 355 ml (1½ cups)warm water
Instructions
- 1
Mix dry ingredients
In a large bowl, whisk together the flour, salt, sugar and yeast. Pour in the warm water.
- 2
Combine the dough
Stir with a wooden spoon until all the ingredients are combined.
- 3
Expect rough dough
This is a no-knead dough, so it will not become smooth.
- 4
Leave overnight
Cover the bowl tightly with cling film and leave it on the worktop overnight.
- 5
Heat the oven
Once the dough has risen, preheat the oven to 230°C (450°F), with the Dutch oven inside and its lid off.
- 6
Shape the loaf
Turn the dough out onto a lightly floured surface and shape it into a round ball.
- 7
Rest the dough
Let the dough rest while the oven and pot heat. The pot needs 30 minutes to heat.
- 8
Load the pot
When the Dutch oven is hot, line its base with baking parchment. Place the dough ball in the centre and cover with the lid.
- 9
Bake covered
Bake at 230°C (450°F) for 30 minutes.
- 10
Finish uncovered
Remove the lid and bake for a further 10–15 minutes, until done and golden.
- 11
Cool before slicing
Take the bread out of the oven and let it cool before slicing, or tear into it if you want to eat it hot.
What is no-knead artisan bread?
No-knead bread is a simple loaf made by mixing the dough rather than working it by hand. This home-style American recipe relies on a long rise to develop its texture, then bakes in a covered Dutch oven.
The pot traps heat around the dough, helping it bake with a crisp crust. An overnight rest also makes this a practical loaf to prepare ahead.
Nutrition and macros by portion
The nutrition label shows one serving as written: 176 calories, 5g protein, 37g carbs, 1g fat.
| Portion | Adjustment | kcal | Protein | Carbs | Fat |
|---|---|---|---|---|---|
| Lighter | Serve a smaller slice | 123 kcal | 4g | 26g | 1g |
| This serving | As written | 176 kcal | 5g | 37g | 1g |
| Hungry | Serve a larger slice | 264 kcal | 8g | 56g | 2g |
Most of the carbohydrates come from the flour, while the flour also supplies some protein. The recipe contains no added oil or butter, so its fat is low; serve a slice with eggs, cheese or another protein-rich food and vegetables to make a more balanced plate.
Why the dough rests overnight
Long rise: after mixing, the dough sits covered on the worktop overnight. This gives the yeast time to work without requiring kneading.
Loose texture: expect the mixed dough to look rough rather than smooth. That is normal for this method, so avoid adding flour just to make it resemble kneaded dough.
Getting the Dutch oven ready
Heat the pot: preheat the oven to 230°C (450°F) with the Dutch oven inside and the lid off. Allow the pot to heat for 30 minutes as the dough rests.
Handle with care: the pot will be very hot when it is time to add the parchment and dough. Keep the parchment centred and lower the dough into the pot carefully.
Shaping and baking
Round shape: use a lightly floured surface to form the dough into a ball. The recipe does not call for kneading during shaping.
Covered bake: bake the loaf with the lid on for 30 minutes, then uncover it and bake for another 10–15 minutes. The crust should be golden when the loaf is done.
When to slice the loaf
For neat slices: let the bread cool before cutting so the crumb has time to settle. Use a serrated knife and a gentle sawing motion.
For hot bread: the recipe also suggests tearing into the loaf straight from the oven. The crumb may be softer and less tidy while still warm.
What to serve with it
At the table: serve slices alongside soup, salad or a main meal, or use them for toast and sandwiches.
For a snack: pair a slice with a protein-rich topping such as eggs or cheese, or add vegetables on the side for a more balanced plate.
Recipe notes & tips
- Measure the flour carefully so the dough does not become unnecessarily dry.
- Use warm rather than hot water when mixing the dough.
- Cover the bowl tightly for the overnight rise.
- Let the Dutch oven heat for the full 30 minutes before loading the dough.
- Use baking parchment to help place and remove the dough from the hot pot.
- Wait for the loaf to cool before slicing if you want cleaner cuts.
Variations
- Herb loaf: stir dried herbs into the flour mixture before adding the water.
- Seeded crust: scatter seeds over the shaped dough before placing it in the pot.
- Garlic loaf: add finely chopped garlic to the dry ingredients for a savoury variation.
- Wholemeal blend: replace some of the plain flour with wholemeal flour, keeping in mind that the dough texture may change.
- Cheese loaf: fold grated cheese into the dough after combining the ingredients.
Common mistakes to avoid
- Kneading the dough: kneading is not needed here; stir only until the ingredients are combined.
- Expecting a smooth dough: this mixture stays rough, so do not keep adding flour to smooth it out.
- Skipping the overnight rise: the dough needs this resting time before shaping and baking.
- Using a cold pot: heat the Dutch oven for 30 minutes so it is ready when the dough is.
- Removing the lid too soon: keep the pot covered for the first 30 minutes, then uncover it for the final bake.
- Slicing immediately: cooling helps the loaf hold its shape; tear it while hot only if you are happy with a softer crumb.
How to store
Once completely cool, store the loaf in a bread bag or wrapped at room temperature and use within about 2 days for the best texture. Refresh slices in a toaster, or warm the loaf briefly in the oven.
Frequently asked questions
Can I make this bread without a Dutch oven?
This recipe relies on a preheated Dutch oven with a lid to bake the loaf. Without one, the method would need to be adapted, so the crust and baking result may differ.
How long should the dough rise?
Cover it and leave it on the worktop overnight, as directed. The recipe does not specify an exact number of hours for that rise.
Should the dough look smooth before rising?
No. The recipe notes that the dough will not be smooth because it is not kneaded; stir until the ingredients are combined.
How do I know when the bread is done?
After 30 minutes covered, remove the lid and bake for another 10–15 minutes. The loaf should be golden in colour.
Can I slice the bread while it is hot?
Yes, the method says you can tear into it hot. For slices that hold together more neatly, let it cool first.
Cook it from the original
This recipe comes from ohsweetbasil.com. Their page has the author’s own photos, notes and tips — the best place to cook it from.
Open the recipe on ohsweetbasil.com